Creative Woodworks & crafts 2005-11, страница 59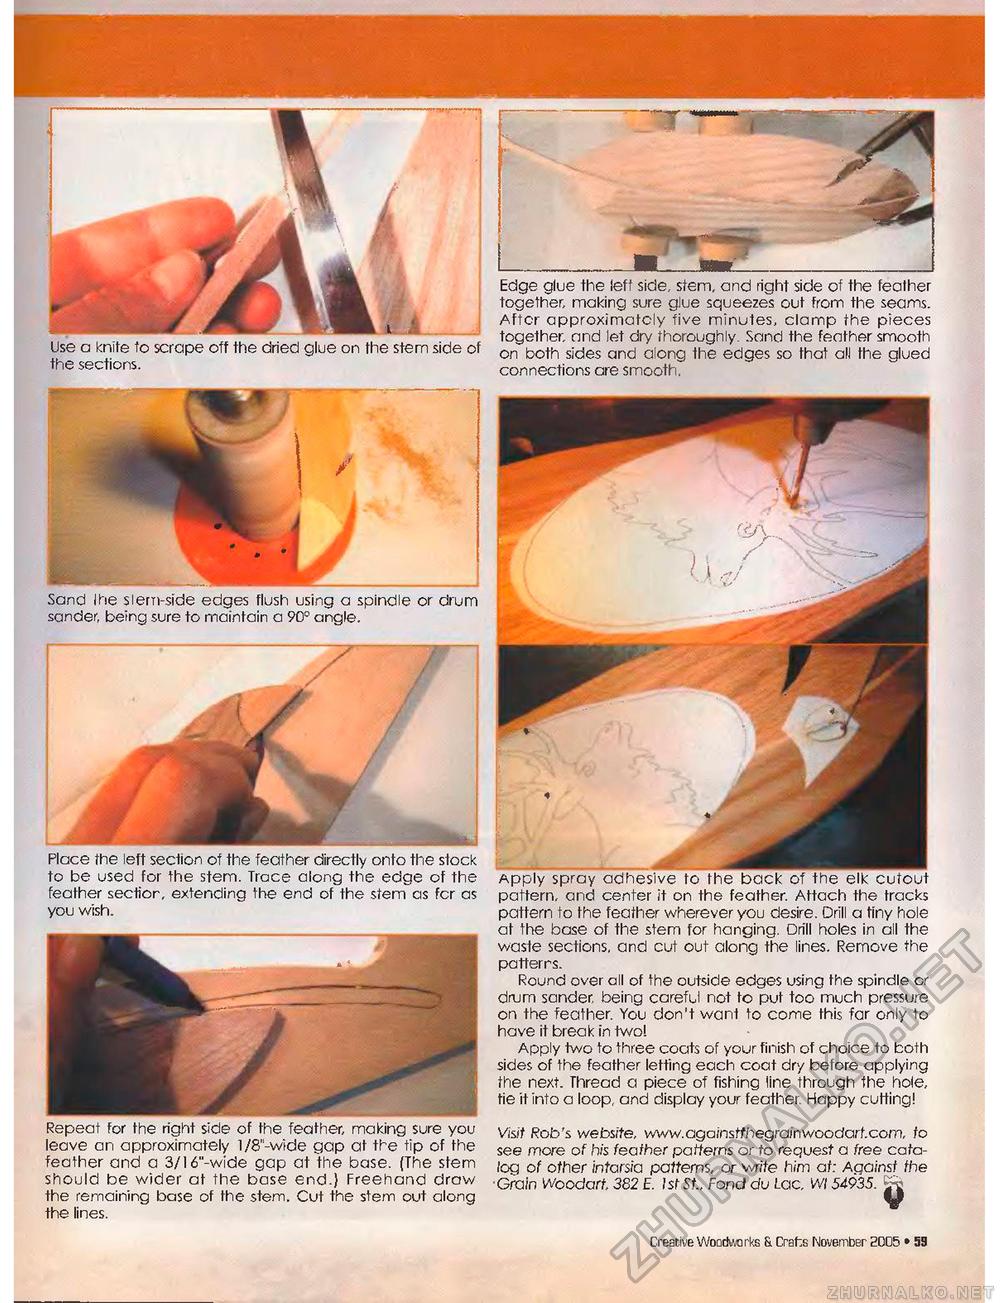
Edge glue the left side, stem, and right side of the feather together, making sure glue squeezes out from the seams. After approximately five minutes, clamp the pieces together, and let dry thoroughly Sand the feather smooth on both sides and along the edges so that all the glued connections are smooth. 1 side of Sand I he si em-side edges flush using a spindle or drum sander, being sure to maintain a 90° angle. Place the left section of the feather directly onto the stock to be used for the stem. Trace along the edge of the feather sectior, extending the end of the stem as fcr as you wish. Repeat for the right side of the feather, making sure you leave an approximately l/8"-wide gap at the tip of the feather and a 3/16"-wide gap at the base. (The stem should be wider at the base end.) Freehand draw the remaining base of the stem. Cut the stem out along the lines. Visit Rob's website, www.ogoinstthegroinwoodort.com, to see more of his feather patterns or to request a free catalog of ofher intarsia patterns, or write him at: A gainst the ■Grain Woodart, 382 E. 1st St., Fond du Lac, Wl 54935. r Apply spray adhesive to the back of the elk cutout pattern, and center it on the feather. Attach the tracks pattern to the feather wherever you desire. Drill a tiny hole at the base of the stem for hanging. Drill holes in all the waste sections, and cut out along the lines. Remove the patterns. Round over all of the outside edges using the spindle or drum sander, being careful not to put too much pressure on the feather. You don't want to come this far only to have it break in two! Apply two to three coats of your finish of choice to both sides of the feather letting each coat dry before applying the next. Thread a piece of fishing line through the hole, tie it into a loop, and display your feather. Happy cutting! Creative Woodworks & Crahs November 2005 » 59 |


