Creative Woodworks & crafts 2005-11, страница 62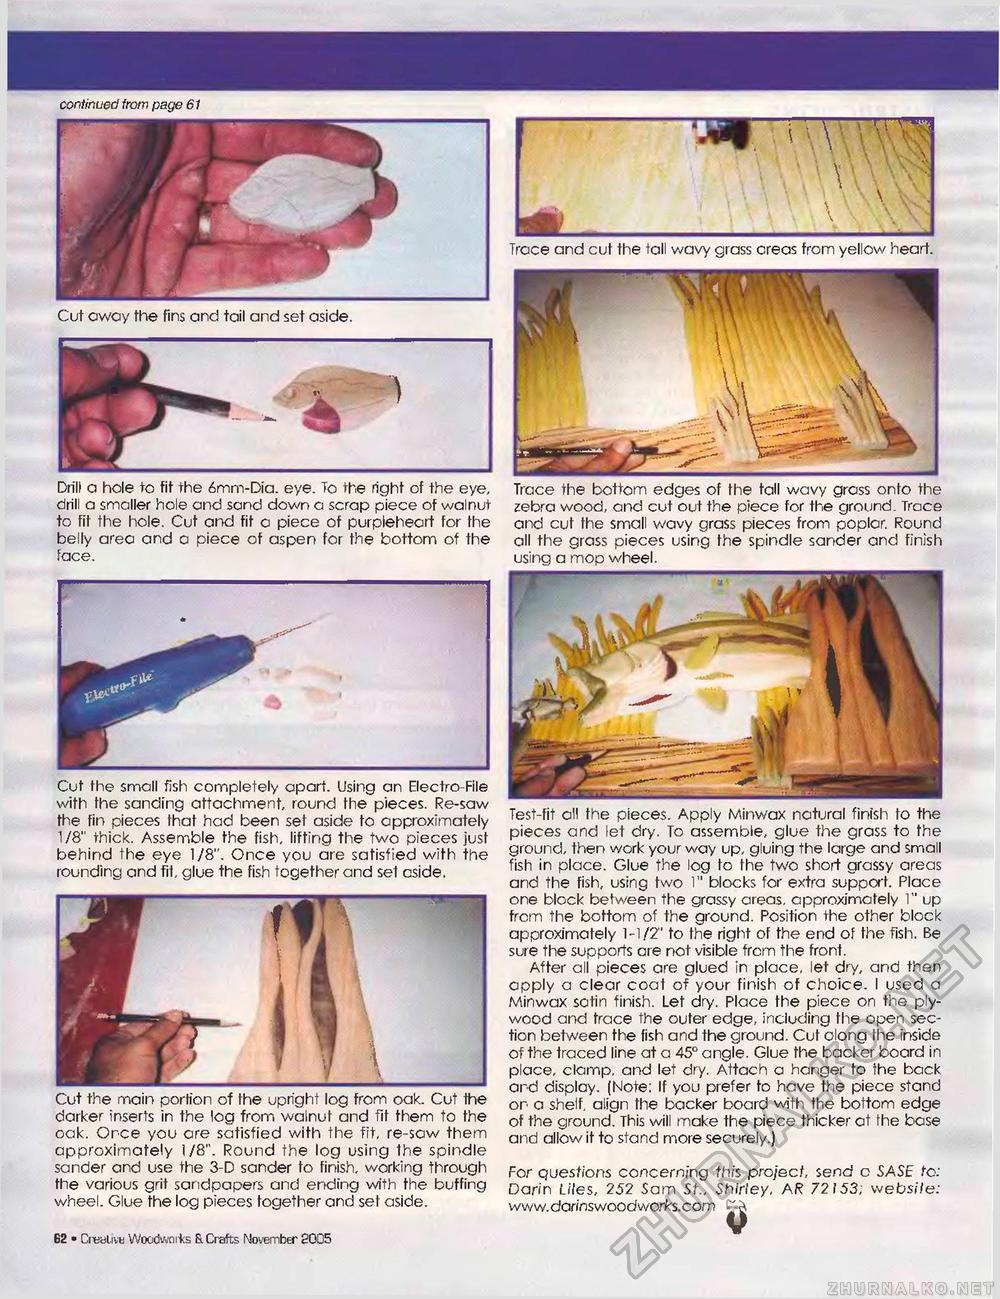
continued from page 61 Cut owoy the fins and tail and set aside. Cut the small fish completely apart. Using an Electro-File with the sanding attachment, round the pieces. Re-saw the fin pieces that had been set aside to approximately 1/8" thick. Assemble the fish, lifting the two pieces just behind the eye 1/8". Once you are satisfied with the rounding and fit, glue the fish together and set cside. ■5*1 Cut the main portion of the upright log from oak. Cut the darker inserts in the log from walnut and fit them to the oak. Once you are satisfied with the fit, re-saw them approximately 1/8". Round the log using the spindle sander and use the 3-D sander to finish, working through the various grit sandpapers and ending with the buffing wheel. Glue the log pieces together and set aside. 62 • Crealivn Woodworks El Crafts November 2005 \ \ \ \ \ v/\ \ \ \VN Trace and cut the tall wavy grass creas from yellow heart. Drill a hole to fit the 6mm-Dia. eye. To the right of the eye, drill a smaller hole and sand down a scrap piece of walnut to fit the hole. Cut and fit a piece of purpleheart for the belly area and a piece of aspen for the bottom of the face. Trace the bottom edges of the tall wavy gross onto the zebra wood, and cut out the piece for the ground. Trace and cut the small wavy grass pieces from poplar. Round all the grass pieces using the spindle sander and finish using a mop wheel. Test-fit all the pieces. Apply Minwax natural finish to the pieces and let dry. To assemble, glue the grass to the ground, then work your way up, gluing the large and small fish in place. Glue the log to the two short grassy areas and the fish, using two 1" blocks for extra support. Place one block between the grassy areas, approximately 1" up from the bottom of the ground. Position the other block approximately 1-1/2" to the right of the end of the fish. Be sure the supports are not visible from the front. After all pieces are glued in place, let dry, and then apply a clear coat of your finish of choice. I used a Minwax sotin finish. Let dry. Place the piece on the plywood and trace the outer edge, including the open section between the fish and the ground. Cut olong the inside of the traced line at a 45° angle. Glue the backer board in place, clamp, and let dry. Attach a hanger to the back ard display. (Note; If you prefer to have the piece stand or a shelf, align the backer board with the bottom edge of the ground. This will make the piece thicker at the base and allow it to stand more securely.) For questions concerning this project, send o SASf to: Darin Li/es, 252 Sam St., Shirley, AR 72153; website: www.darinswoodworks.com V |


