Creative Woodworks & crafts 2005-11, страница 65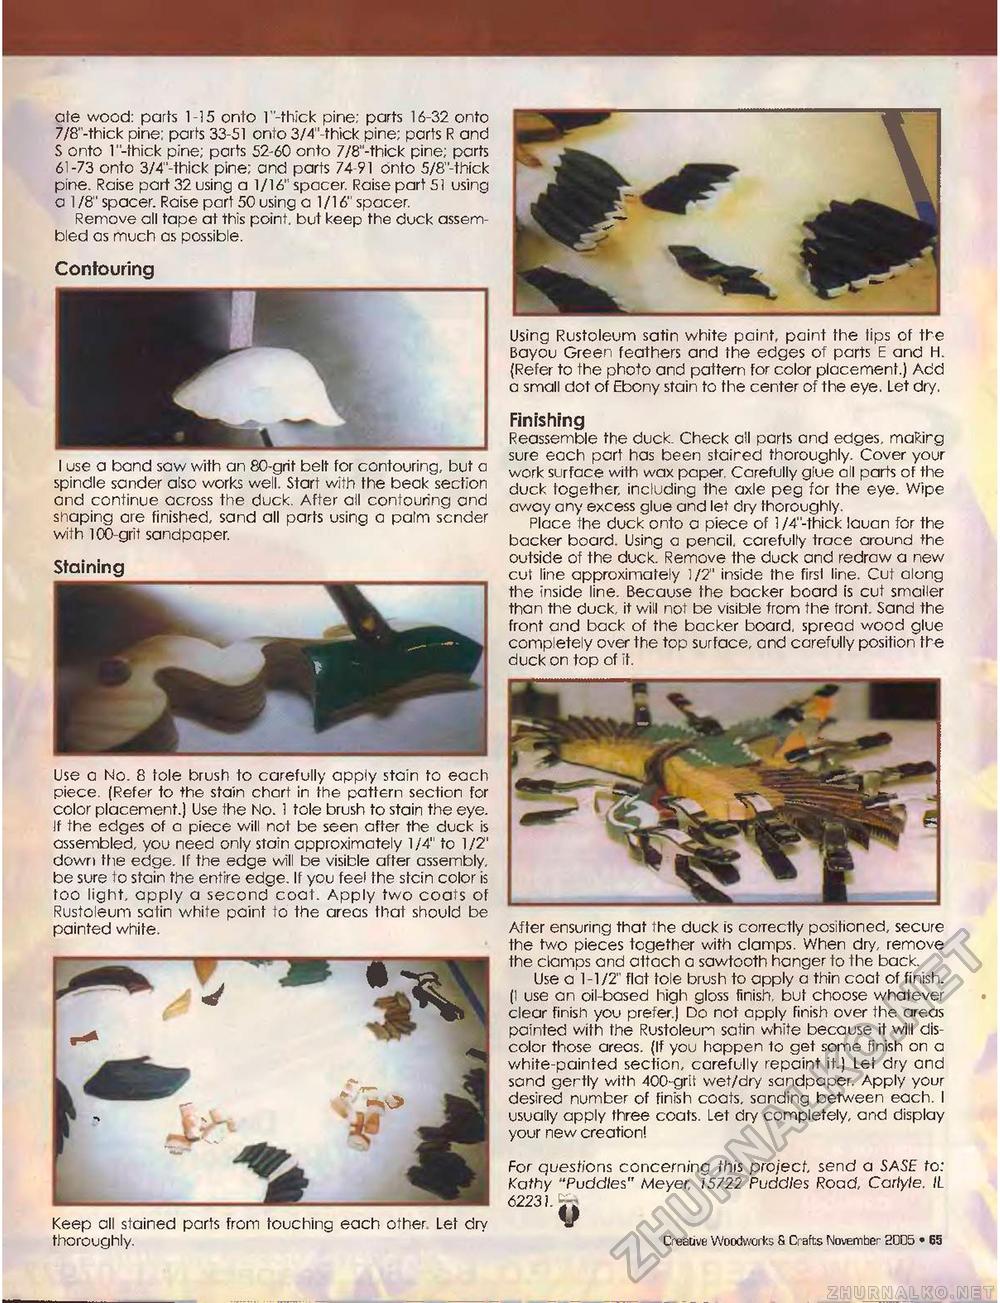
ate wood: parts 1-15 onto l"-thick pine; parts 16-32 onto 7/8"-thick pine: parts 33-51 onto 3/4"-thick pine; parts R and S onto 1 "-thick pine; ports 52-60 onto 7/8"-thick pine; parts 61-73 onto 3/4"-thick pine; and parts 74-91 onto 5/8"-thick pine. Raise part 32 using a 1/16" spacer. Raise part 51 using a 1 /8" spacer. Raise part 50 using a 1/16" spacer. Remove all tape at this point, but keep the duck assembled as much as possible. Contouring I use a band saw with an 80-grif belt for contouring, but o spindle sander also works well. Start with fhe beak section and continue across the duck. After ail contouring and shaping are finished, sand all parts using a palm sender with 100-grit sandpaper. Staining Use a No. 8 tole brush to carefully apply stain to each piece. (Refer to the stain chart in the pattern section for color placement.) Use the No. 1 tole brush to stain the eye. If the edges of o piece will not be seen after the duck is assembled, you need only stain approximately 1/4" to 1/2' down the edge. If the edge will be visible after assembly, be sure to stain the entire edge. If you feel the stein color is too light, apply a second coat. Apply two coats of Rustoleum satin white paint to the areas that should be painted white. Using Rustoleum satin white paint, paint the tips of the Bayou Green feathers and the edges of parts E and H. (Refer to the photo and pattern for color placement.) Add a small dot of Ebony stain to fhe center of the eye, Let dry. Finishing Reassemble the duck. Check all parts and edges, makirg sure each part has been staired thoroughly. Cover your work surface with wax paper. Carefully glue all parts of the duck together, including the axle peg for the eye. Wipe awoy any excess glue and let dry thoroughly. Place the duck onto a piece of 1 /4"-thick lauan for the backer board. Using a pencil, carefully trace around the outside of the duck. Remove the duck and redraw a new cut line approximately 1/2' inside the firsl line. Cut along the inside line. Because fhe backer board is cut smaller than the duck, it will not be visible from the front. Sand the front and back of the backer board, spread wood glue completely over the top surface, and carefully position the duck on top of if. Keep all stained parts from touching each other. Let dry thoroughly. After ensuring that the duck is correctly positioned, secure the two pieces together with clamps. When dry, remove the clamps and attach a sawtooth hanger to the back. Use a 1-1/2" flat tole brush to apply a thin coat of finish, (l use an oil-based high gloss finish, but choose whatever clear finish you prefer.) Do not apply finish over the areas painted with the Rustoleum satin white because it will discolor those areos. (If you happen to get some finish on a white-painted section, carefully repaint it.) Let dry and sand gertly with 400-grit wet/dry sandpaper. Apply your desired number of finish coats, sanding between each. I usually apply three coats. Let dry completely, and display your new creation! For questions concerning this project send a SASE to: Kathy "Puddles" Meyer, 15722 Puddles Road, Carlyle. IL 62231. V Creative Woodworks S Crafts November 2005 * 65 |


