Creative Woodworks & crafts 2005-11, страница 64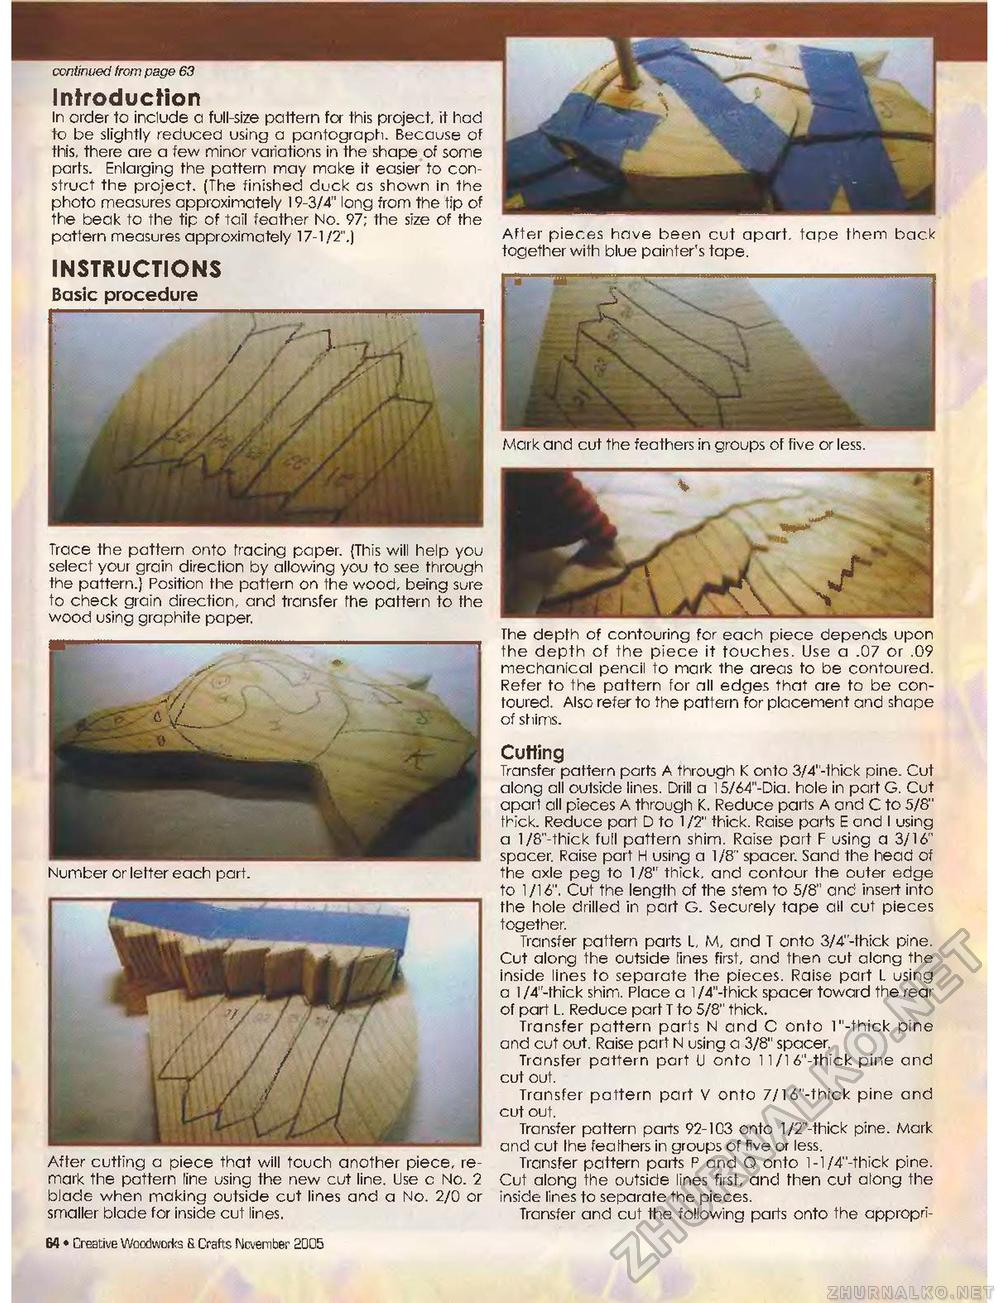
Trace the pattern onto tracing paper. (This will help you select your grain direction by allowing you to see through the pattern.) Position the pattern on the wood, being sure to check grain direction, and transfer the pattern to the wood using graphite paper, Number or letter each part. continued from page 29 Mark and cut the feathers in groups of five or less. Introduction In order to include a full-size pattern fa this project, it had to be slightly reduced using a pantograph. Because of this, there are a few minor variations in the shape of some parts. Enlarging the pattern may make it easier to construct the project. (The finished duck as shown in the photo measures approximately 19-3/4" long from the tip of the beak to the tip of tail feather No. 97; the size of the pattern measures approximately 17-1/2",) INSTRUCTIONS Basic procedure Culling Transfer pattern parts A through K onto 3/4"-thick pine. Cut along all outside lines. Drill a 15/64"-Dia. hole in part G. Cut apart all pieces A through K. Reduce parts A and C to 5/8" thick. Reduce part D to 1/2" thick. Raise parte E and I using a 1/8"-thick full pattern shim. Raise part F using a 3/16" spacer. Raise part H using a 1/8" spacer. Sand the head of the axle peg to 1 /8" thick, and contour the outer edge to 1/16". Cut the length of the stem to 5/8" and insert into the hole drilled in part G. Securely tape all cut pieces together. Transfer pattern parts L, M, and T onto 3/4"-thick pine. Cut along the outside lines first, and then cut along the inside lines to separate the pieces. Raise part L using a 1 /4"-thick shim. Place a 1 /4"-thick spacer toward the rear of pan L. Reduce part T to 5/8" thick. Transfer pattern parts N and C onto 1 "-thick pine and cut out. Raise part N using a 3/8" spacer. Transfer pattern part U onto 1 l/16"-thick pine and cut out. Transfer pattern part V onto 7/16"-thick pine and cut out. Transfer pattern parts 92-103 onto 1/2"-thick pine. Mark and cut the feathers in groups of five or less. Transfer pattern parts P and Q onto l-l/4"-thick pine. Cut along the outside lines first, and then cut along the inside lines to separate the pieces. Transfer and cut the following parts onto the appropri After pieces have been cut apart, tape them back together with blue painter's tape. The depth of contouring for each piece depends upon the depth of the piece it touches. Use a .07 or .09 mechanical pencil to mark the areas to be contoured. Refer to the pattern for all edges that are to be contoured. Also refer to the pattern for placement and shape of shims. After cutting a piece that will touch another piece, remark the pattern line using the new cut line. Use c No. 2 blade when making outside cut lines and a No. 2/0 or smaller blade for inside cut lines. 64 • Creative Woodworks & Crafts November 2005 |


