Creative Woodworks & crafts 2005-11, страница 58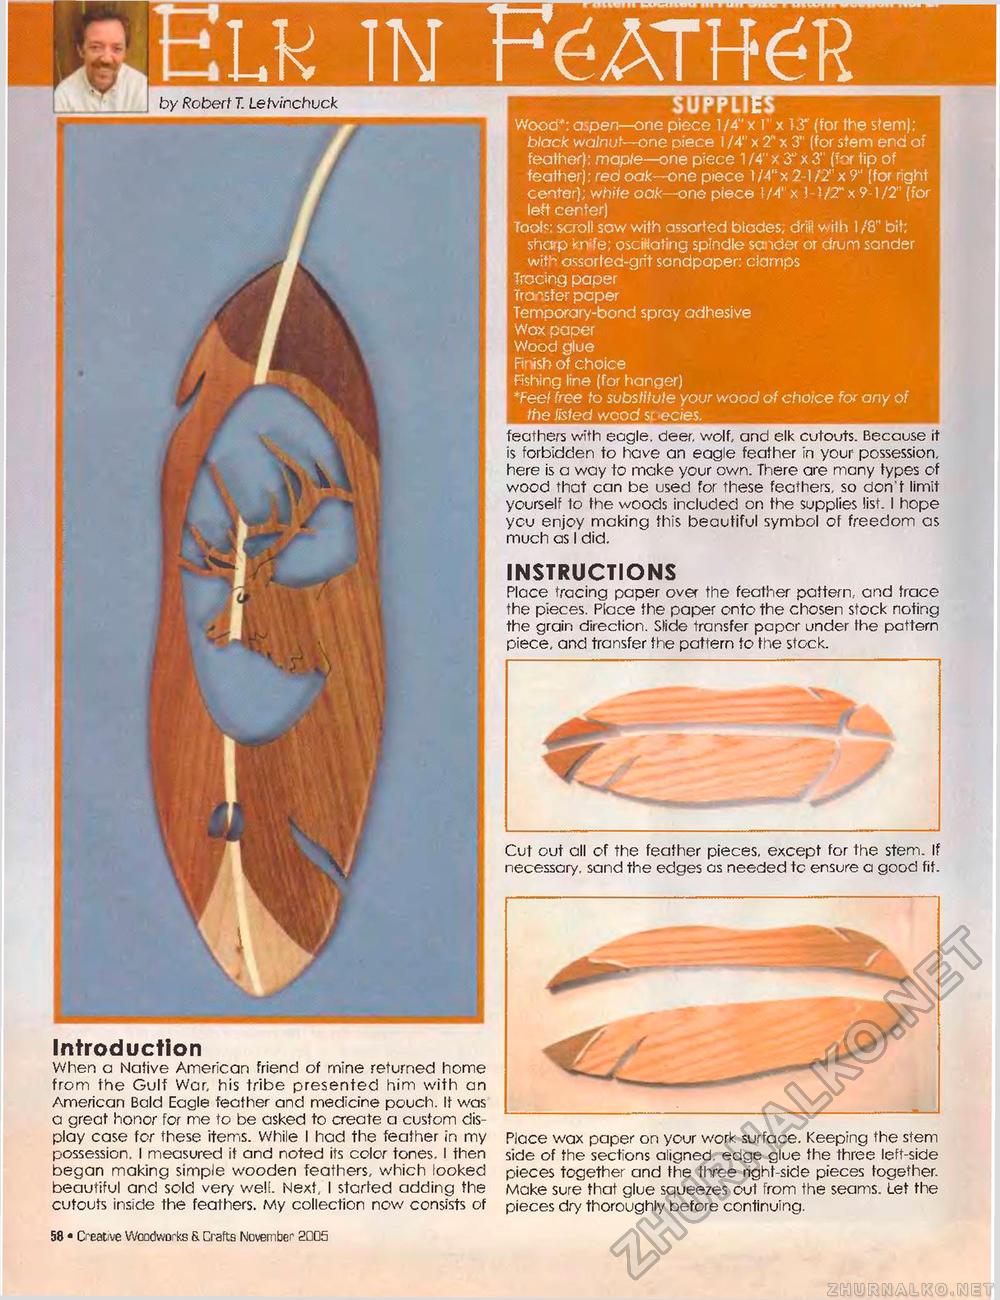
HUiHIlil Wood*: a:pen—one piece 1/4"x 1' x 13" (for the stem); black walnut—one piece I /4" x 2" x 3" (for stem end of feather}: maple—one piece 1 /4" x 3"x 3" (for tip of feather): red oak—one piece 11 A" x 2-1 /2" x 9" (for right center}; white oak—one piece 1/4" x 1-1/2" x 9-1 /2" (for left center) Toofc: scroll saw with assarted blades, drill with 1 /8" bit; sharp knfe; oscitiating spindle sander or drum sander with assorted-grit sandpaper: clamps Tracing paper Transfer poper Temporary-bond spray adhesive Wax paper Wood glue Finish of choice Fishing line (for hanger) *Feel free to substitute your wood of choice for any of the listed wood si ecies. feathers with eagle, deer, wolf, and elk cutouts. Because it is forbidden to have an eagle feather in your possession, here is a way to make your own. There are many types of wood that can be used for these feathers, so don't limit yourself to the woods included on the supplies list. I hope ycu enjoy making this beautiful symbol of freedom as much as I did. INSTRUCTIONS Place tracing paper over the feather pattern, and trace the pieces. Place the paper onto the chosen stock noting the grain direction. Slide transfer paper under the pattern piece, and transfer the pattern to the stock. Cut out all of the feather pieces, except for the stem, if necessary, sand the edges as needed tc ensure a good fit. Introduction When a Native American friend of mine returned home from the Gulf War, his tribe presented him with an American Bald Eagle feather and medicine pouch. It was a great honor for me to be asked to create a custom display case for these items. While I had the feather in my possession. I measured it and noted its color tones. I then began making simple wooden feathers, which looked beautiful and sold very well. Next, I started adding the cutouts inside the feathers. My collection now consists of Place wax paper on your work surface. Keeping the stem side of the sections aligned, edge glue the three left-side pieces together and the three right-side pieces together. Make sure that glue squeezes out from the seams. Let the pieces dry thoroughly before continuing. 58 • Creative Woodworks fi Crafts November £005 |


