Creative Woodworks & crafts 2009-04, страница 65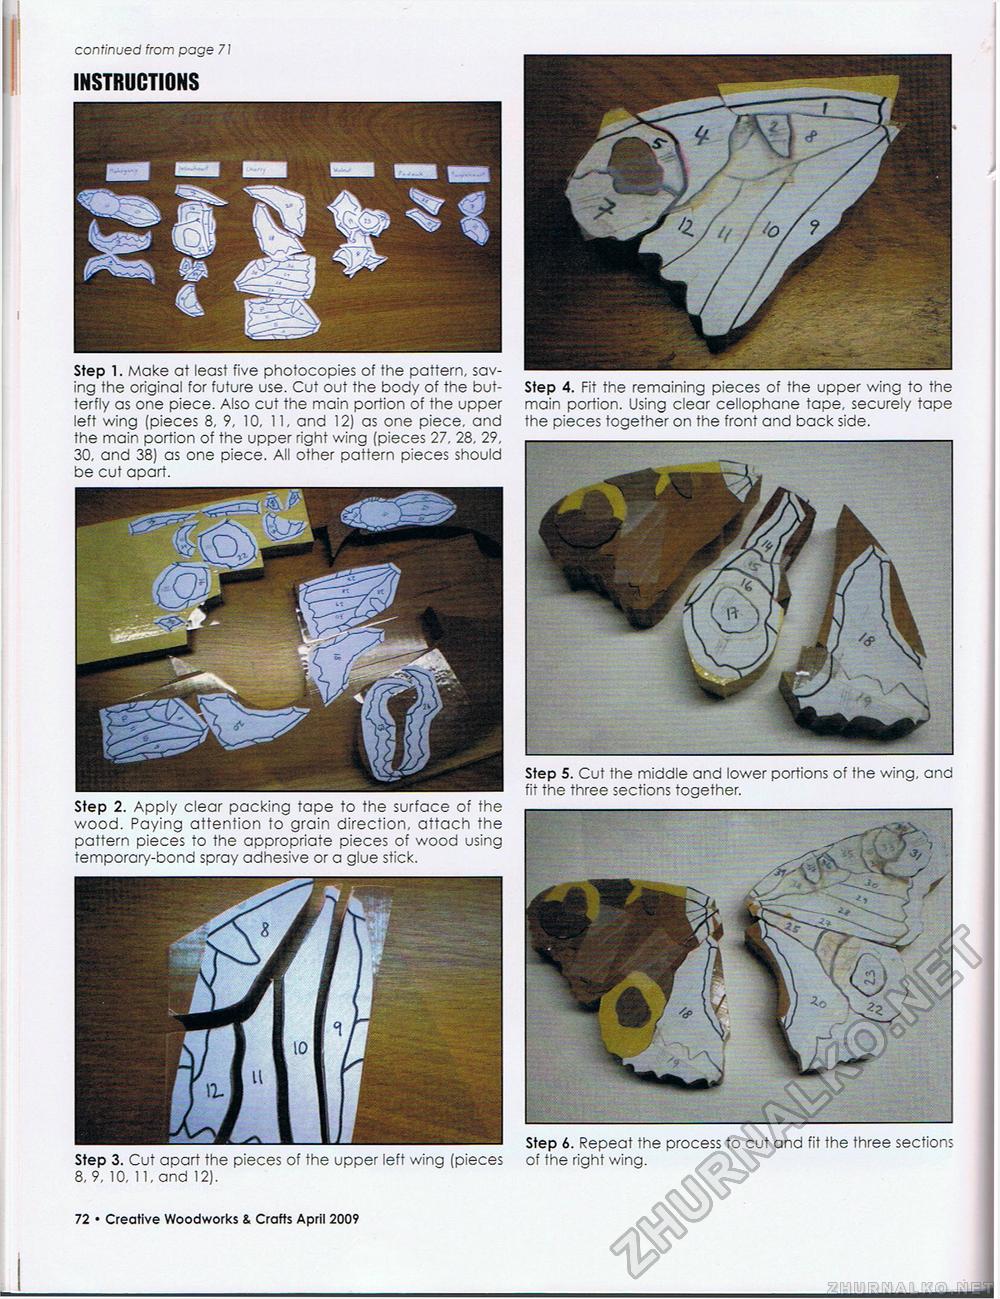
continued from page 71 INSTRUCTIONS Step 1. Make at least five photocopies of the pattern, saving the original for future use. Cut out the body of the butterfly as one piece. Also cut the main portion of the upper left wing (pieces 8, 9, 10, 11, and 12) as one piece, and the main portion of the upper right wing (pieces 27, 28, 29, 30, and 38) as one piece. All other pattern pieces should be cut apart. Step 2. Apply clear packing tape to the surface of the wood. Paying attention to grain direction, attach the pattern pieces to the appropriate pieces of wood using temporary-bond spray adhesive or a glue stick. Step 4. Fit the remaining pieces of the upper wing to the main portion. Using clear cellophane tape, securely tape the pieces together on the front and back side. Step 5. Cut the middle and lower portions of the wing, and fit the three sections together. Step 6. Repeat the process to cut and fit the three sections Step 3. Cut apart the pieces of the upper left wing (pieces of the right wing. 8, 9, 10, 11, and 12). Creative Woodworks & Crafts April 2009 • 11 |


