Creative Woodworks & crafts 2009-04, страница 66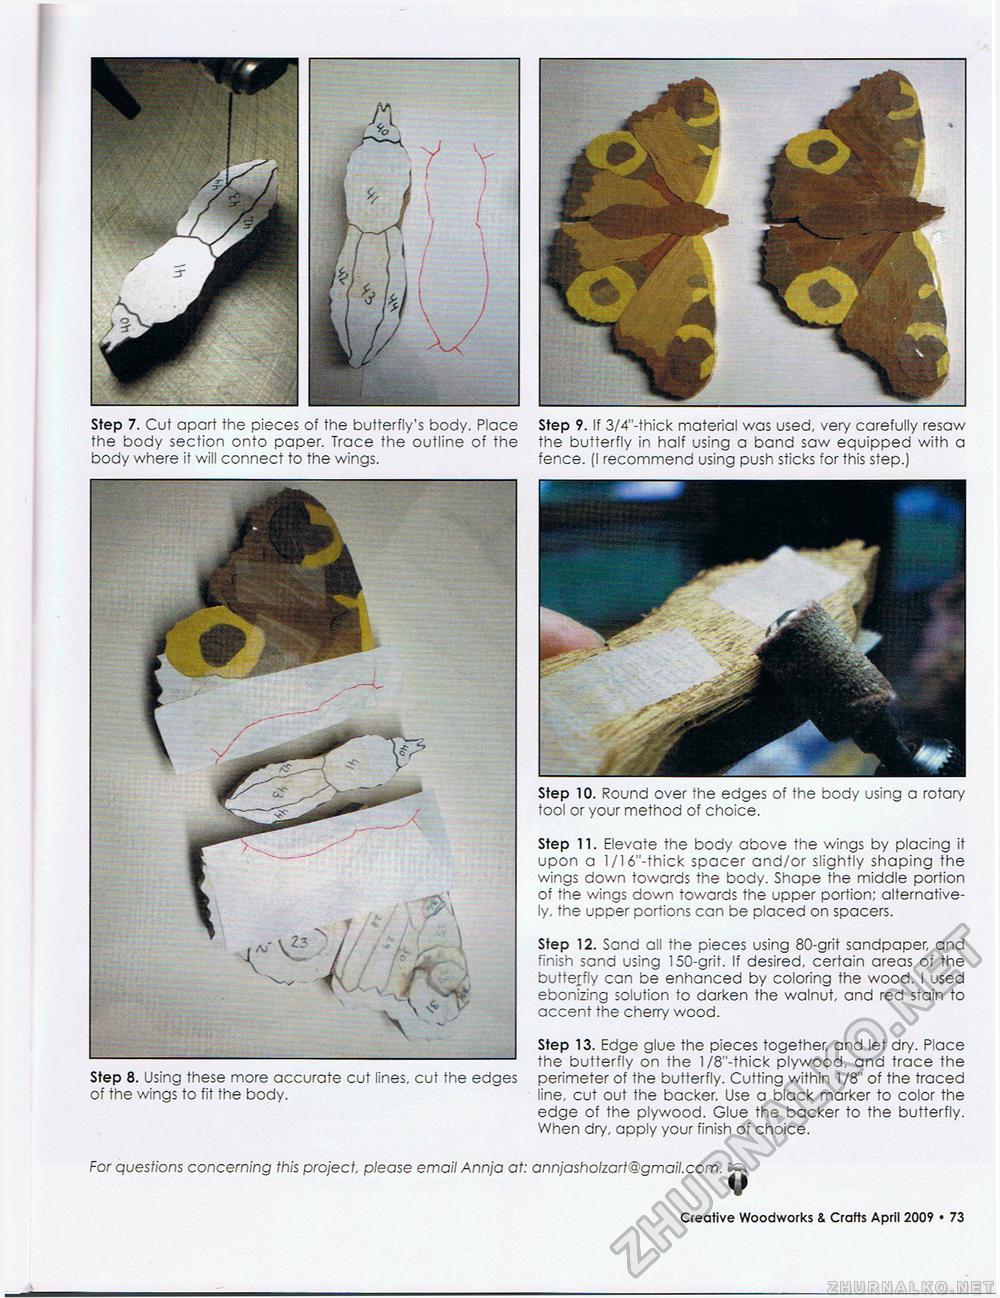
Step 7. Cut apart the pieces of the butterfly's body. Place the body section onto paper. Trace the outline of the body where it will connect to the wings. Step 9. If 3/4"-thick material was used, very carefully resaw the butterfly in half using a band saw equipped with a fence. (I recommend using push sticks for this step.) Step 10. Round over the edges of the body using a rotary tool or your method of choice. Step 11. Elevate the body above the wings by placing it upon a l/16"-thick spacer and/or slightly shaping the wings down towards the body. Shape the middle portion of the wings down towards the upper portion; alternatively, the upper portions can be placed on spacers. Step 12. Sand all the pieces using 80-grit sandpaper, and finish sand using 150-grit. If desired, certain areas of the butterfly can be enhanced by coloring the wood. I used ebonizing solution to darken the walnut, and red stain to accent the cherry wood. Step 13. Edge glue the pieces together, and let dry. Place the butterfly on the l/8"-thick plywood, and trace the perimeter of the butterfly. Cutting within 1/8" of the traced line, cut out the backer. Use a black marker to color the edge of the plywood. Glue the backer to the butterfly. When dry, apply your finish of choice. Step 8. Using these more accurate cut lines, cut the edges of the wings to fit the body. For questions concerning this project pleose email Annja at: annjasholzart@gmail.com. Creative Woodworks & Crafts April 2009 • 11 |


