Creative Woodworks & crafts 2009-04, страница 69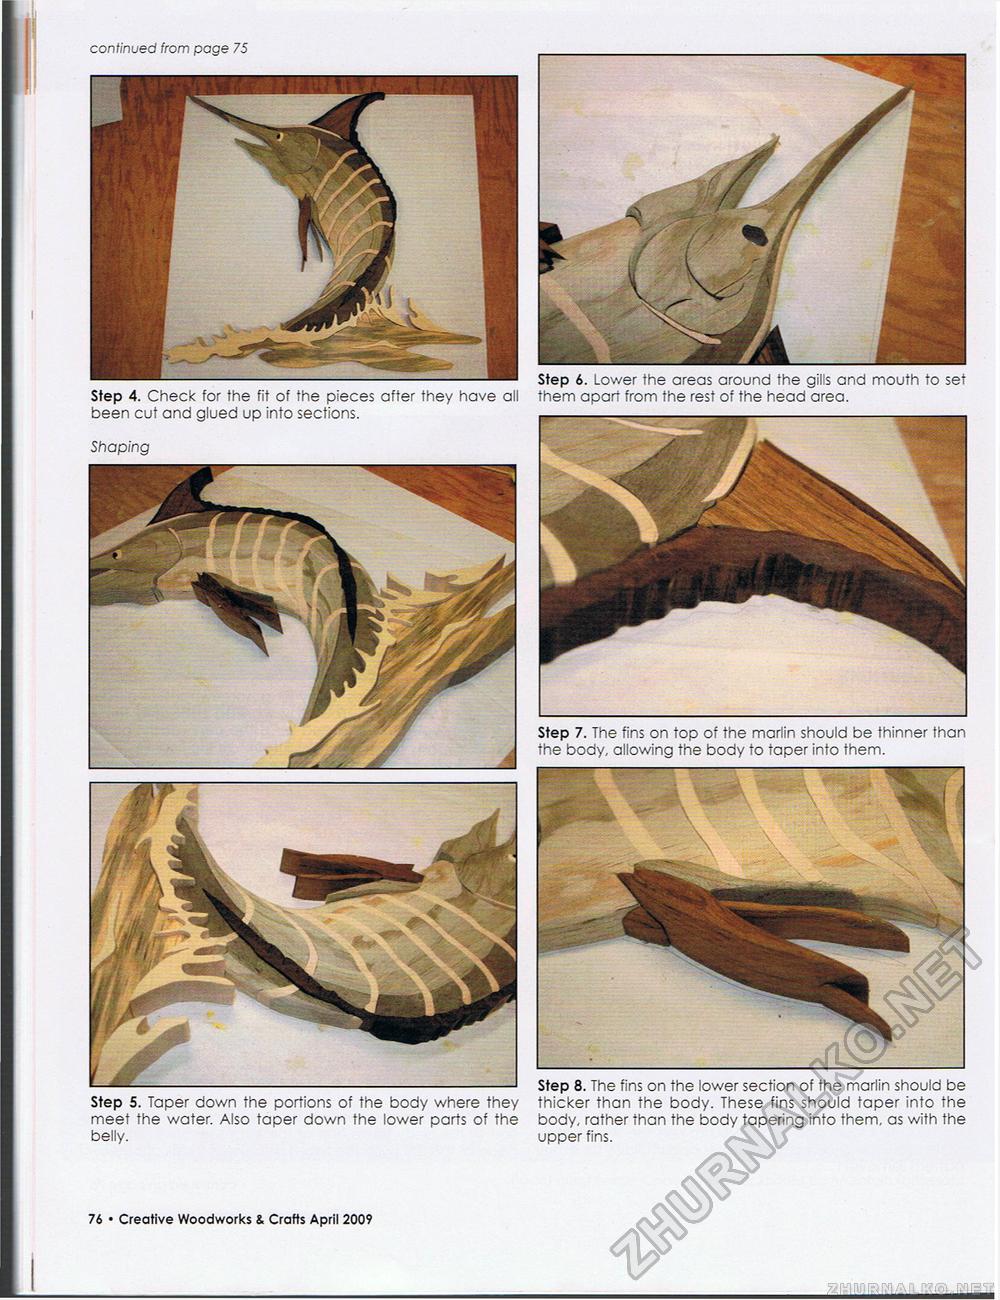
continued from page 75 Step 4. Check for the fit of the pieces after they have all been cut and glued up into sections. Shaping Step 5. Taper down the portions of the body where they meet the water. Also taper down the lower parts of the belly. Step 6. Lower the areas around the gills and mouth to set them apart from the rest of the head area. Step 7. The fins on top of the marlin should be thinner than the body, allowing the body to taper into them. Step 8. The fins on the lower section of the marlin should be thicker than the body. These fins should taper into the body, rather than the body tapering into them, as with the upper fins. 78 • Creative Woodworks & Crafts April 2009 |


