Creative Woodworks & crafts-103-2004-Holiday, страница 19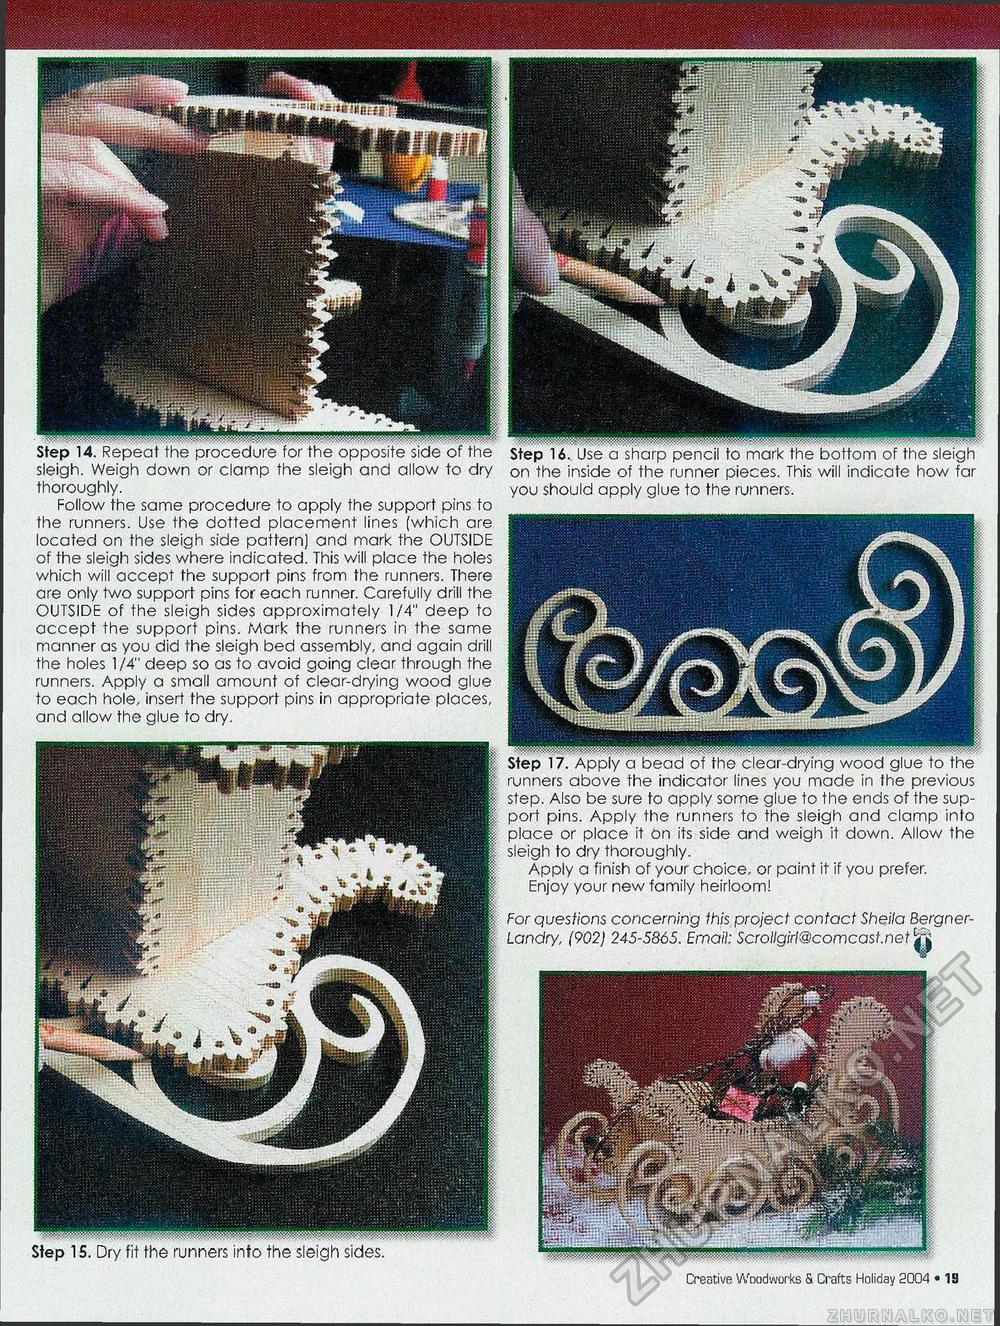
Creative Woodworks & Craft:; Holiday 2004 • 15 runners above the indicator lines you made in the previous step. Also be sure to apply some glue to the ends of the support pins. Apply the runners to the sleigh and clamp into place or place it on its side and weigh it down. Allow the sleigh to dry thoroughly. Apply a finish of your choice, or paint it if you prefer. Enjoy your new family heirloom! Forquesfions concerning this project contact Sheila Bergner-Landry, (902) 245-5865. Email: Scrollgirl@comcast.net ^ Bp'! WMMWi^BU,.....Hlll„ll„.,l.ll,^i» Step 14. Repeat the procedure for the opposite side of the sleigh. Weigh down or clamp the sleigh and allow to dry thoroughly. Follow the same procedure to apply the support pins to the runners. Use the dotted placement lines (which are located on the sleigh side pattern) and mark the OUTSIDE of the sleigh sides where indicated. This will place the holes which will accept the support pins from the runners. There are only two support pins for each runner. Carefully drill the OUTSIDE of the sleigh sides approximately 1/4" deep to accept the support pins. Mark the runners in the same manner as you did the sleigh bed assembly, and again drill the holes 1/4" deep so as to avoid going clear through the runners. Apply a small amount of clear-drying wood glue to each hole, insert the support pins in appropriate places, and allow the glue to dry. Step 16. Use a sharp pencil to mark the bottom of the sleigh on the inside of the runner pieces. This will indicate how far you should apply glue to the runners. |


