Creative Woodworks & crafts-103-2004-Holiday, страница 17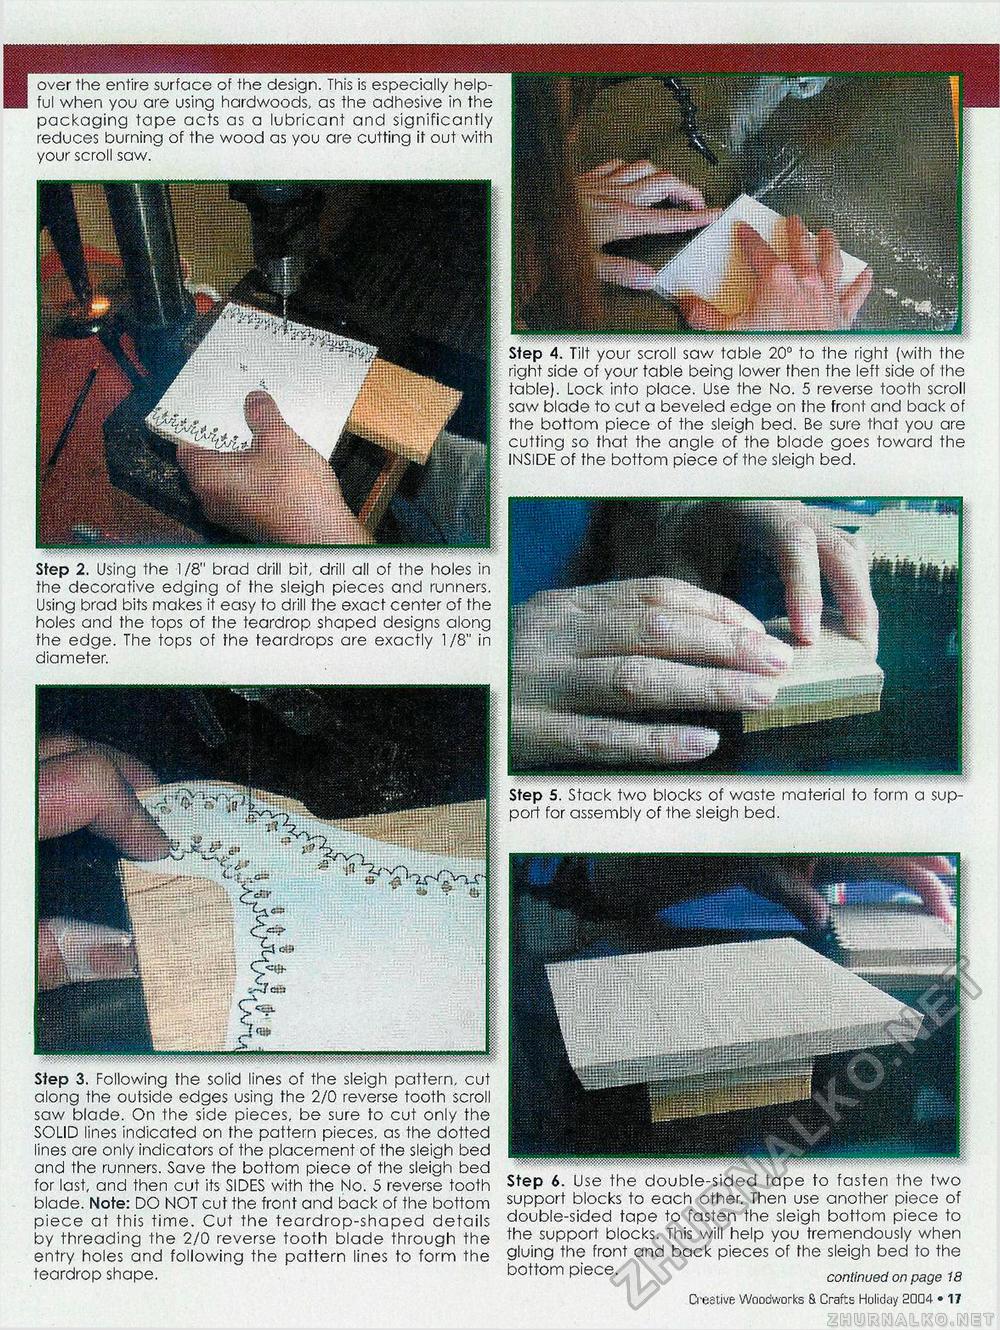
over the entire surface of the design. This is especially helpful when you are using hardwoods, as the adhesive in the packaging tape acts as a lubricant and significantly reduces burning of the wood as you are cutting it out with your scroll saw. port for assembly of the sleigh bed. Step 4. Tilt your scroll saw table 20° to the right (with the right side of your table being lower then the left side of the table). Lock into place. Use the No. 5 reverse tooth scroll saw blade to cut a beveled edge on the front and back of the bottom piece of the sleigh bed. Be sure that you are cutting so that the angle of the blade goes toward the INSIDE of the bottom piece of the sleigh bed. Step 2. Using the 1/8" brad drill bit, drill all of the holes in the decorative edging of the sleigh pieces and runners. Using brad bits makes it easy to drill the exact center of the holes and the tops of the teardrop shaped designs along the edge. The tops of the teardrops are exactly 1 /8" in diameter. Step 6. Use the double-sided tape to fasten the two support blocks to each other. Then use another piece of double-sided tape to fasten the sleigh bottom piece to the support blocks. This will help you tremendously when gluing the front and back pieces of the sleigh bed to the bottom piece. continued on page 18 Creative Woodworks & Craft:; Holiday 2004 • 15 Step 3. Following the solid lines of the sleigh pattern, cut along the outside edges using the 2/0 reverse tooth scroll saw blade. On the side pieces, be sure to cut only the SOLID lines indicated on the pattern pieces, as the dotted lines are only indicators of the placement of the sleigh bed and the runners. Save the bottom piece of the sleigh bed for last, and then cut its SIDES with the No. 5 reverse tooth blade. Note: DO NOT cut the front and back of the bottom piece at this time. Cut the teardrop-shaped details by threading the 2/0 reverse tooth blade through the entry holes and following the pattern lines to form the teardrop shape. |


