Popular Woodworking 2000-02 № 113, страница 51
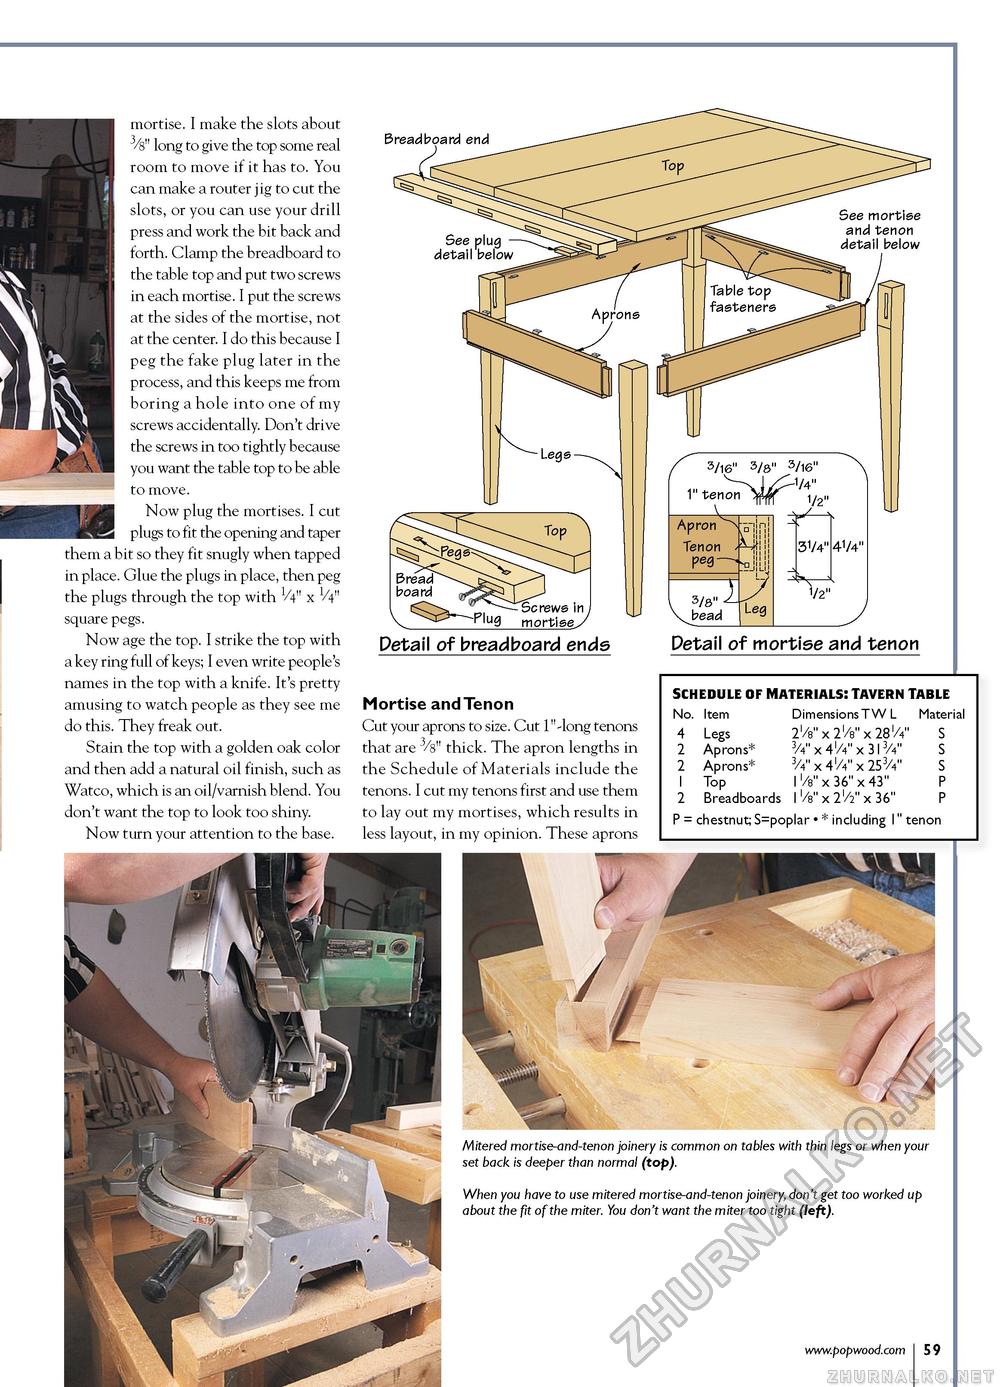
J Mil mortise. I make the slots about 3/8" long to give the top some real room to move if it has to. You can make a router jig to cut the slots, or you can use your drill press and work the bit back and forth. Clamp the breadboard to the table top and put two screws in each mortise. I put the screws at the sides of the mortise, not at the center. I do this because I peg the fake plug later in the process, and this keeps me from boring a hole into one of my screws accidentally. Don't drive the screws in too tightly because you want the table top to be able to move. Now plug the mortises. I cut plugs to fit the opening and taper them a bit so they fit snugly when tapped in place. Glue the plugs in place, then peg the plugs through the top with V4" x V4" square pegs. Now age the top. I strike the top with a key ring full of keys; I even write people's names in the top with a knife. It's pretty amusing to watch people as they see me do this. They freak out. Stain the top with a golden oak color and then add a natural oil finish, such as Watco, which is an oil/varnish blend. You don't want the top to look too shiny. Now turn your attention to the base. Breadboard end Detail of breadboard ends Mortise and Tenon Cut your aprons to size. Cut 1"-long tenons that are 3/8" thick. The apron lengths in the Schedule of Materials include the tenons. I cut my tenons first and use them to lay out my mortises, which results in less layout, in my opinion. These aprons Detail of mortise and tenon SCHEDULE OF MATERiALS: TAVERN TABLE Material S S S P P P = chestnut; S=poplar • * including 1" tenon
Dimensions T W L 2'/8" x 2'/8" x 28'/4" 3/4" x 4'/4" x 313/4" 3/4" x 4'/4" x 253/4" l'/8" x 36" x 43" Dimensions T W L 2'/8" x 2'/8" x 28'/4" 3/4" x 4'/4" x 313/4" 3/4" x 4'/4" x 253/4" l'/8" x 36" x 43" Mitered mortise-and-tenon joinery is common on tables with thin legs or when your set back is deeper than normal (top). When you have to use mitered mortise-and-tenon joinery, don't get too worked up about the fit of the miter. You don't want the miter too tight (left). |


