Popular Woodworking 2000-02 № 113, страница 53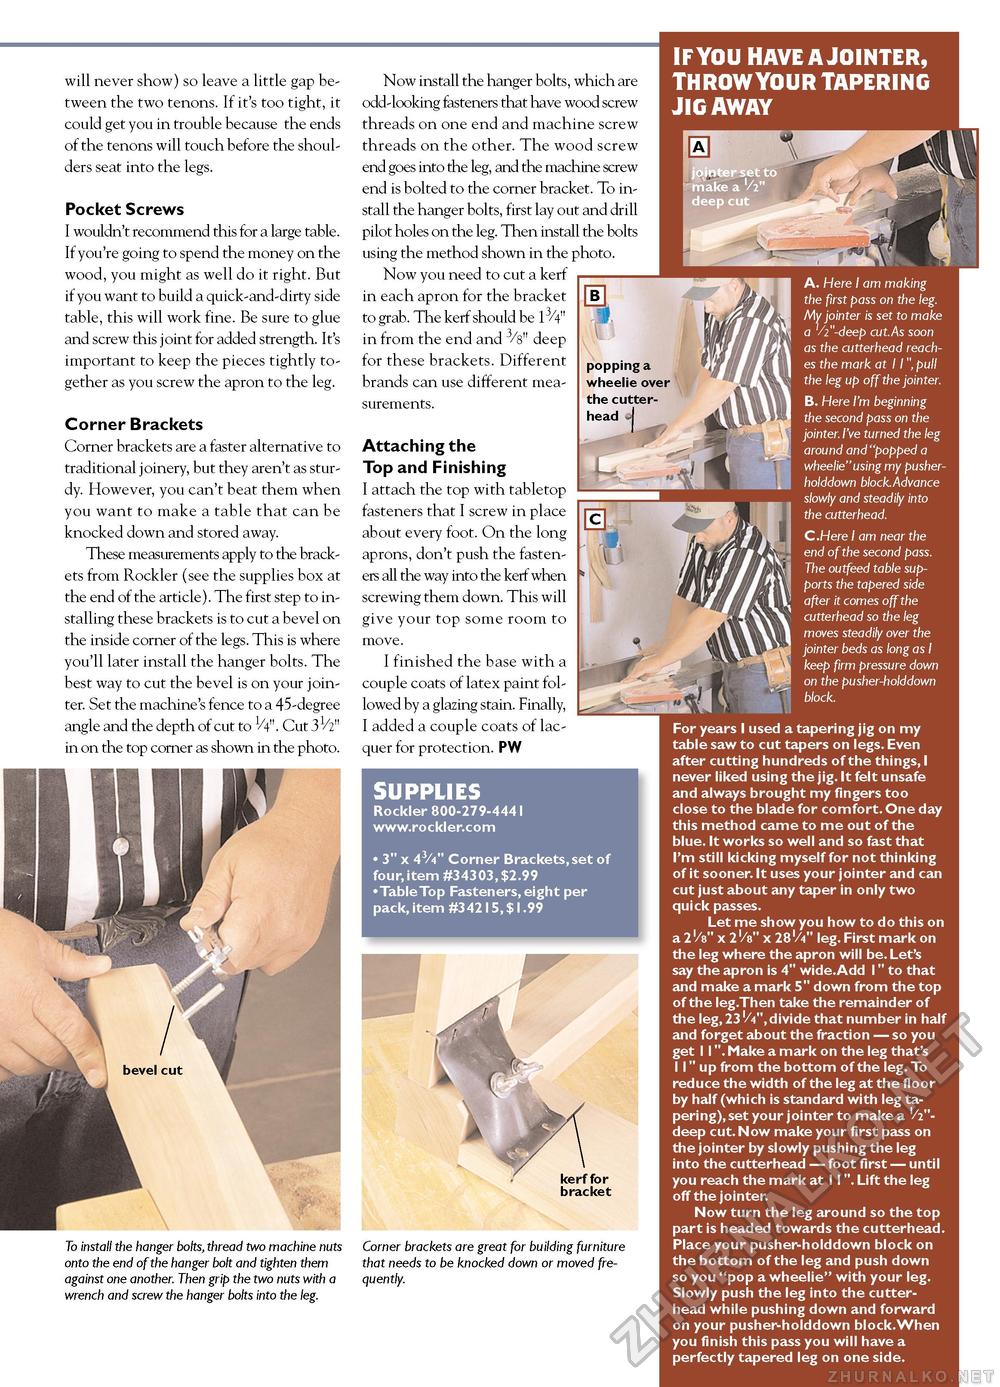
if you have a jointer, throw your tapering jig away A. Here I am making the first pass on the leg. My jointer is set to make a '/i"-deep cut.As soon as the cutterhead reaches the mark at 11", pull the leg up off the jointer. B. Here I'm beginning the second pass on the jointer. I've turned the leg around and "popped a wheelie" using my pusher-holddown block.Advance slowly and steadily into the cutterhead. will never show) so leave a little gap between the two tenons. If it's too tight, it could get you in trouble because the ends of the tenons will touch before the shoulders seat into the legs. Pocket Screws I wouldn't recommend this for a large table. If you're going to spend the money on the wood, you might as well do it right. But if you want to build a quick-and-dirty side table, this will work fine. Be sure to glue and screw this joint for added strength. It's important to keep the pieces tightly together as you screw the apron to the leg. Corner Brackets Corner brackets are a faster alternative to traditional joinery, but they aren't as sturdy. However, you can't beat them when you want to make a table that can be knocked down and stored away. These measurements apply to the brackets from Rockler (see the supplies box at the end of the article). The first step to installing these brackets is to cut a bevel on the inside corner of the legs. This is where you'll later install the hanger bolts. The best way to cut the bevel is on your jointer. Set the machine's fence to a 45-degree angle and the depth of cut to 1/4". Cut 31/2" in on the top corner as shown in the photo. bevel cut Now install the hanger bolts, which are odd-looking fasteners that have wood screw threads on one end and machine screw threads on the other. The wood screw end goes into the leg, and the machine screw end is bolted to the corner bracket. To install the hanger bolts, first lay out and drill pilot holes on the leg. Then install the bolts using the method shown in the photo. Now you need to cut a kerf in each apron for the bracket to grab. The kerf should be 13/4" in from the end and 3/8" deep for these brackets. Different brands can use different measurements. Attaching the Top and Finishing I attach the top with tabletop fasteners that I screw in place about every foot. On the long aprons, don't push the fasteners all the way into the kerf when screwing them down. This will give your top some room to move. I finished the base with a couple coats of latex paint followed by a glazing stain. Finally, I added a couple coats of lacquer for protection. pw supplies Rockler 800-279-444I www.rockler.com • 3" x 43/4" Corner Brackets, set of four,item #34303,$2.99 • Table Top Fasteners, eight per pack,item #342I5,$I.99 mr To install the hanger bolts, thread two machine nuts onto the end of the hanger bolt and tighten them against one another. Then grip the two nuts with a wrench and screw the hanger bolts into the leg. Corner brackets are great for building furniture that needs to be knocked down or moved frequently. C.Here I am near the end of the second pass. The outfeed table supports the tapered side after it comes off the cutterhead so the leg moves steadily over the jointer beds as long as I keep firm pressure down on the pusher-holddown block. For years I used a tapering jig on my table saw to cut tapers on legs. Even after cutting hundreds of the things, I never liked using the jig. It felt unsafe and always brought my fingers too close to the blade for comfort. One day this method came to me out of the blue. It works so well and so fast that I'm still kicking myself for not thinking of it sooner. It uses your jointer and can cut just about any taper in only two quick passes. Let me show you how to do this on a 2 '/8" x 2 '/8" x 28'/4" leg. First mark on the leg where the apron will be. Let's say the apron is 4" wide.Add I" to that and make a mark 5" down from the top of the leg.Then take the remainder of the leg, 23'/4",divide that number in half and forget about the fraction — so you get II". Make a mark on the leg that's II" up from the bottom of the leg. To reduce the width of the leg at the floor by half (which is standard with leg tapering), set your jointer to make a '/i"-deep cut. Now make your first pass on the jointer by slowly pushing the leg into the cutterhead — foot first — until you reach the mark at II". Lift the leg off the jointer. Now turn the leg around so the top part is headed towards the cutterhead. Place your pusher-holddown block on the bottom of the leg and push down so you "pop a wheelie" with your leg. Slowly push the leg into the cutter-head while pushing down and forward on your pusher-holddown block.When you finish this pass you will have a perfectly tapered leg on one side. |


