Popular Woodworking 2000-10 № 117, страница 28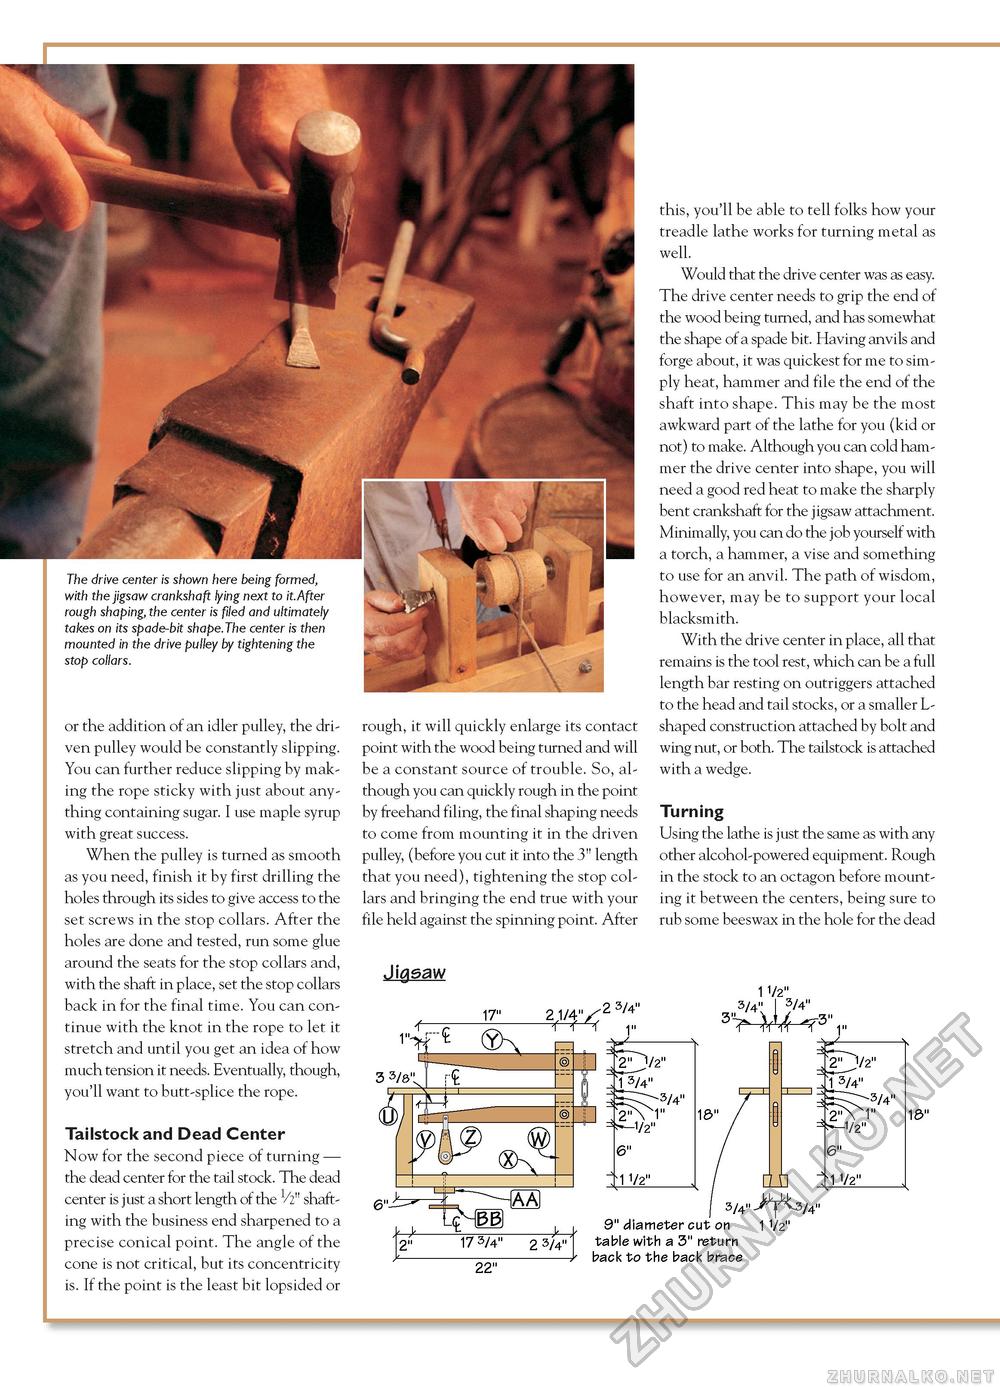
The drive center is shown here being formed, with the jigsaw crankshaft lying next to it.After rough shaping, the center is filed and ultimately takes on its spade-bit shape.The center is then mounted in the drive pulley by tightening the stop collars. or the addition of an idler pulley, the driven pulley would be constantly slipping. You can further reduce slipping by making the rope sticky with just about anything containing sugar. I use maple syrup with great success. When the pulley is turned as smooth as you need, finish it by first drilling the holes through its sides to give access to the set screws in the stop collars. After the holes are done and tested, run some glue around the seats for the stop collars and, with the shaft in place, set the stop collars back in for the final time. You can continue with the knot in the rope to let it stretch and until you get an idea of how much tension it needs. Eventually, though, you'll want to butt-splice the rope. Tailstock and Dead Center Now for the second piece of turning — the dead center for the tail stock. The dead center is just a short length of the V2" shafting with the business end sharpened to a precise conical point. The angle of the cone is not critical, but its concentricity is. If the point is the least bit lopsided or rough, it will quickly enlarge its contact point with the wood being turned and will be a constant source of trouble. So, although you can quickly rough in the point by freehand filing, the final shaping needs to come from mounting it in the driven pulley, (before you cut it into the 3" length that you need), tightening the stop collars and bringing the end true with your file held against the spinning point. After Jigsaw this, you'll be able to tell folks how your treadle lathe works for turning metal as well. Would that the drive center was as easy. The drive center needs to grip the end of the wood being turned, and has somewhat the shape of a spade bit. Having anvils and forge about, it was quickest for me to simply heat, hammer and file the end of the shaft into shape. This may be the most awkward part of the lathe for you (kid or not) to make. Although you can cold hammer the drive center into shape, you will need a good red heat to make the sharply bent crankshaft for the jigsaw attachment. Minimally, you can do the job yourself with a torch, a hammer, a vise and something to use for an anvil. The path of wisdom, however, may be to support your local blacksmith. With the drive center in place, all that remains is the tool rest, which can be a full length bar resting on outriggers attached to the head and tail stocks, or a smaller L-shaped construction attached by bolt and wing nut, or both. The tailstock is attached with a wedge. Turning Using the lathe is just the same as with any other alcohol-powered equipment. Rough in the stock to an octagon before mounting it between the centers, being sure to rub some beeswax in the hole for the dead 2 3/4" 1 1/2" 3/4" 3/4"
18" 22" 9" diameter cut on table with a 3" return back to the back brace 11 u 3/4" 1 1/2" /4" |


