Popular Woodworking 2000-10 № 117, страница 34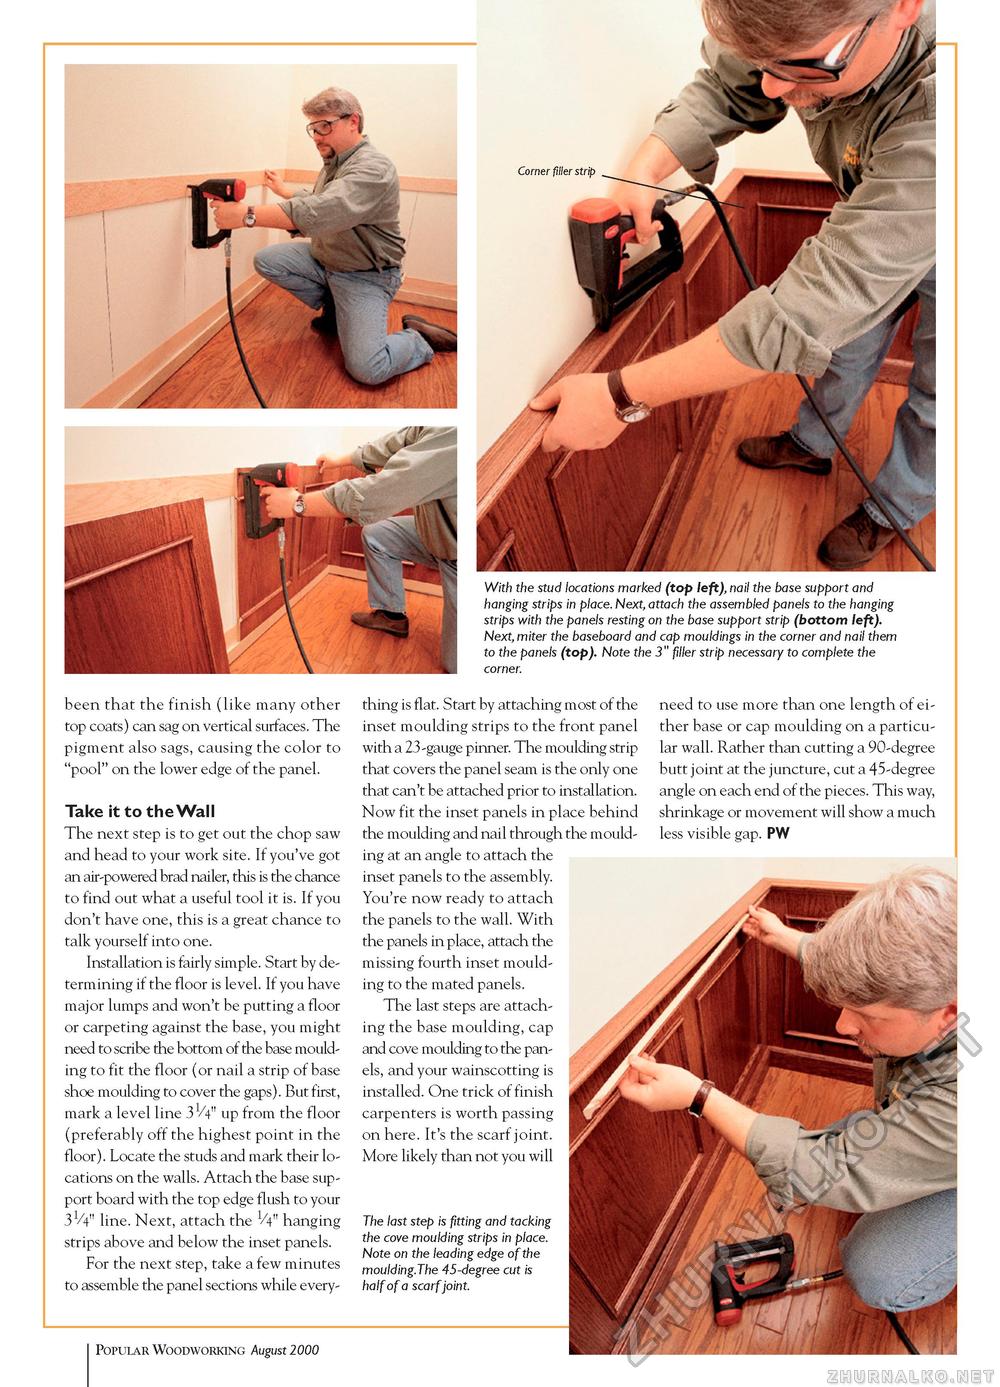
been that the finish (like many other top coats) can sag on vertical surfaces. The pigment also sags, causing the color to "pool" on the lower edge of the panel. Take it to the Wall The next step is to get out the chop saw and head to your work site. If you've got an air-powered brad nailer, this is the chance to find out what a useful tool it is. If you don't have one, this is a great chance to talk yourself into one. Installation is fairly simple. Start by determining if the floor is level. If you have major lumps and won't be putting a floor or carpeting against the base, you might need to scribe the bottom of the base moulding to fit the floor (or nail a strip of base shoe moulding to cover the gaps). But first, mark a level line 31/4" up from the floor (preferably off the highest point in the floor). Locate the studs and mark their locations on the walls. Attach the base support board with the top edge flush to your 3V4" line. Next, attach the H" hanging strips above and below the inset panels. For the next step, take a few minutes to assemble the panel sections while every 12 Popular Woodworking October 2000 thing is flat. Start by attaching most of the inset moulding strips to the front panel with a 23-gauge pinner. The moulding strip that covers the panel seam is the only one that can't be attached prior to installation. Now fit the inset panels in place behind the moulding and nail through the moulding at an angle to attach the inset panels to the assembly. You're now ready to attach the panels to the wall. With the panels in place, attach the missing fourth inset moulding to the mated panels. The last steps are attaching the base moulding, cap and cove moulding to the panels, and your wainscotting is installed. One trick of finish carpenters is worth passing on here. It's the scarf joint. More likely than not you will The last step is fitting and tacking the cove moulding strips in place. Note on the leading edge of the moulding.The 45-degree cut is half of a scarf joint. need to use more than one length of either base or cap moulding on a particular wall. Rather than cutting a 90-degree butt joint at the juncture, cut a 45-degree angle on each end of the pieces. This way, shrinkage or movement will show a much less visible gap. PW |


