Popular Woodworking 2000-10 № 117, страница 37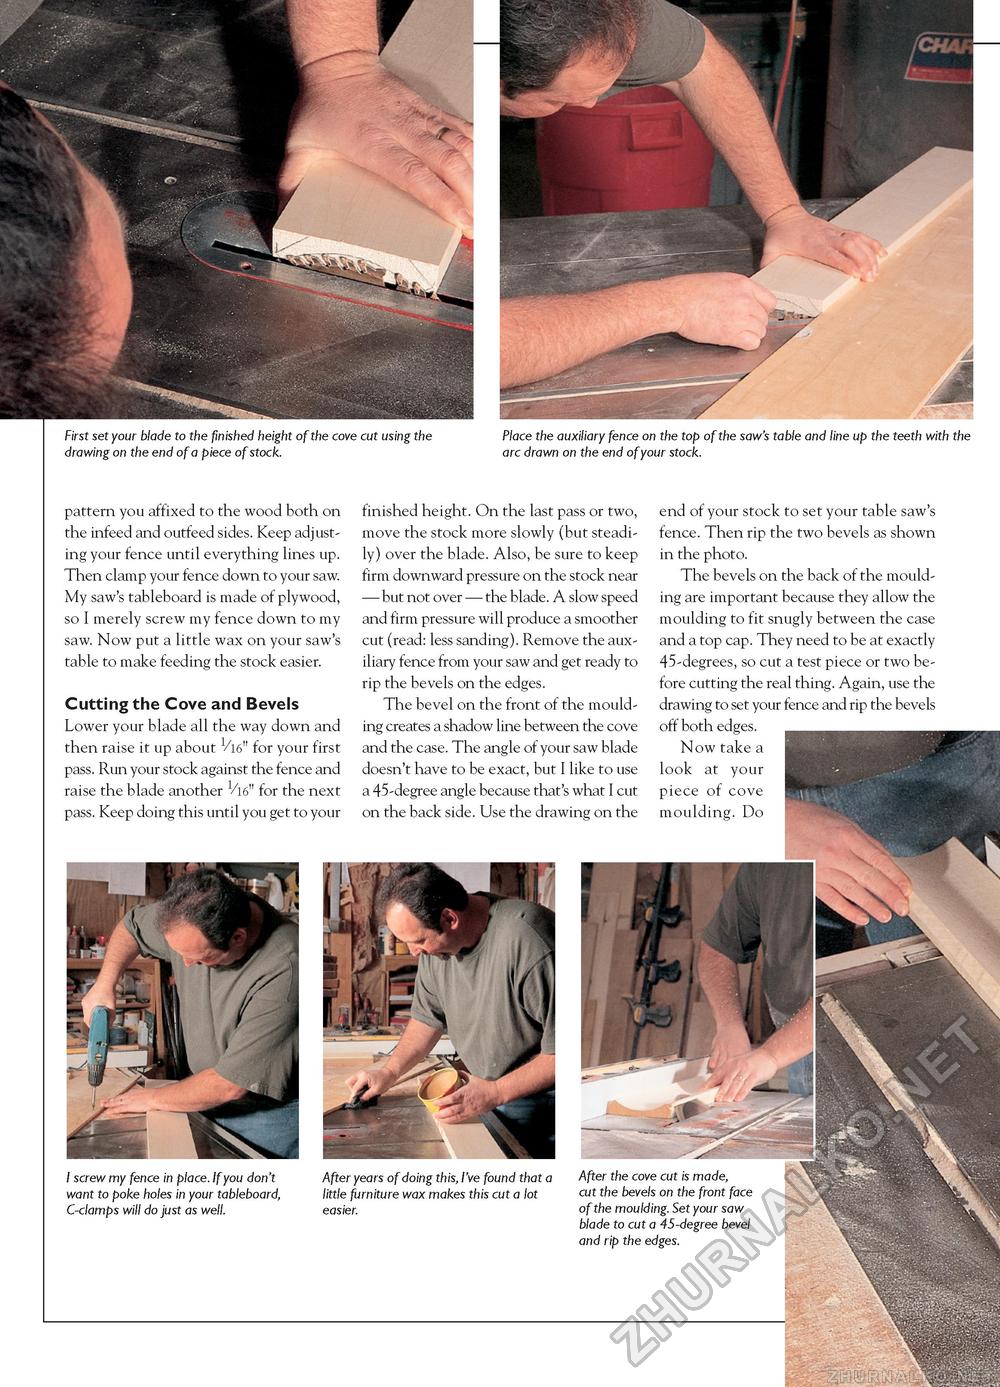
First set your blade to the finished height of the cove cut using the Place the auxiliary fence on the top of the saw's table and line up the teeth with the drawing on the end of a piece of stock. arc drawn on the end of your stock. pattern you affixed to the wood both on the infeed and outfeed sides. Keep adjusting your fence until everything lines up. Then clamp your fence down to your saw. My saw's tableboard is made of plywood, so I merely screw my fence down to my saw. Now put a little wax on your saw's table to make feeding the stock easier. Cutting the Cove and Bevels Lower your blade all the way down and then raise it up about 1/i6" for your first pass. Run your stock against the fence and raise the blade another 1/i6" for the next pass. Keep doing this until you get to your finished height. On the last pass or two, move the stock more slowly (but steadily) over the blade. Also, be sure to keep firm downward pressure on the stock near — but not over — the blade. A slow speed and firm pressure will produce a smoother cut (read: less sanding). Remove the auxiliary fence from your saw and get ready to rip the bevels on the edges. The bevel on the front of the moulding creates a shadow line between the cove and the case. The angle of your saw blade doesn't have to be exact, but I like to use a 45-degree angle because that's what I cut on the back side. Use the drawing on the end of your stock to set your table saw's fence. Then rip the two bevels as shown in the photo. The bevels on the back of the moulding are important because they allow the moulding to fit snugly between the case and a top cap. They need to be at exactly 45-degrees, so cut a test piece or two before cutting the real thing. Again, use the drawing to set your fence and rip the bevels off both edges. Now take a look at your piece of cove moulding. Do I screw my fence in place. If you don't want to poke holes in your tableboard, C-clamps will do just as well. After years of doing this, I've found that a little furniture wax makes this cut a lot easier. After the cove cut is made cut the bevels on the front face of the moulding. Set your saw blade to cut a 45-degree bevel and rip the edges. |


