Popular Woodworking 2000-10 № 117, страница 45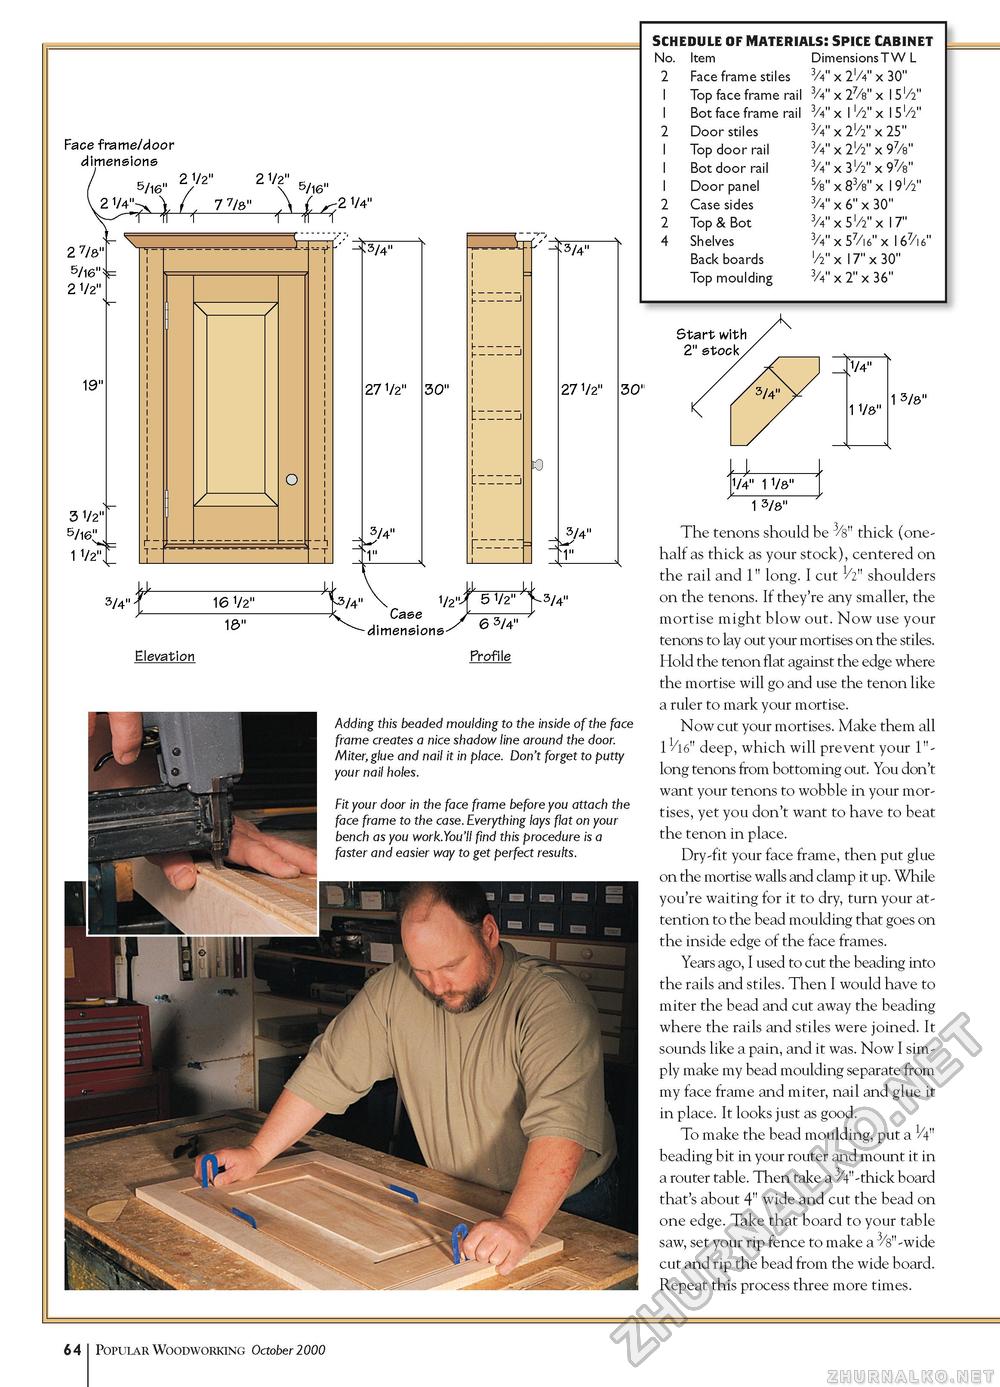
Face frame/door dimensions 5/l6" / \ 5/l6" 2 7/8" 5/16"> 2 1/2" ^2 1/4" 3 1/2" 5/16". 1 1/2"; 3/4" r1-- 3/4" 3/4" 1" 3/4" 3/4" r
16 1/2" _3/4" 18" Case dimensions 1/2"i" 5 V2" V3/4" Elevation 6 3/4" Profile Adding this beaded moulding to the inside of the face frame creates a nice shadow line around the door Miter, glue and nail it in place. Don't forget to putty your nail holes. Fit your door in the face frame before you attach the face frame to the case. Everything lays flat on your bench as you work.You'll find this procedure is a faster and easier way to get perfect results. 1/4" 1 1/8" 1 3/8" The tenons should be 3/s" thick (one-half as thick as your stock), centered on the rail and 1" long. I cut 1/2" shoulders on the tenons. If they're any smaller, the mortise might blow out. Now use your tenons to lay out your mortises on the stiles. Hold the tenon flat against the edge where the mortise will go and use the tenon like a ruler to mark your mortise. Now cut your mortises. Make them all deep, which will prevent your 1"-long tenons from bottoming out. You don't want your tenons to wobble in your mortises, yet you don't want to have to beat the tenon in place. Dry-fit your face frame, then put glue on the mortise walls and clamp it up. While you're waiting for it to dry, turn your attention to the bead moulding that goes on the inside edge of the face frames. Years ago, I used to cut the beading into the rails and stiles. Then I would have to miter the bead and cut away the beading where the rails and stiles were joined. It sounds like a pain, and it was. Now I simply make my bead moulding separate from my face frame and miter, nail and glue it in place. It looks just as good. To make the bead moulding, put a 1/4" beading bit in your router and mount it in a router table. Then take a ^V'-thick board that's about 4" wide and cut the bead on one edge. Take that board to your table saw, set your rip fence to make a 3/s"-wide cut and rip the bead from the wide board. Repeat this process three more times. 12 Popular Woodworking October 2000 |
||||||||||||||||||||||||||||||||||||||||||||||||||||||||


