Popular Woodworking 2000-10 № 117, страница 46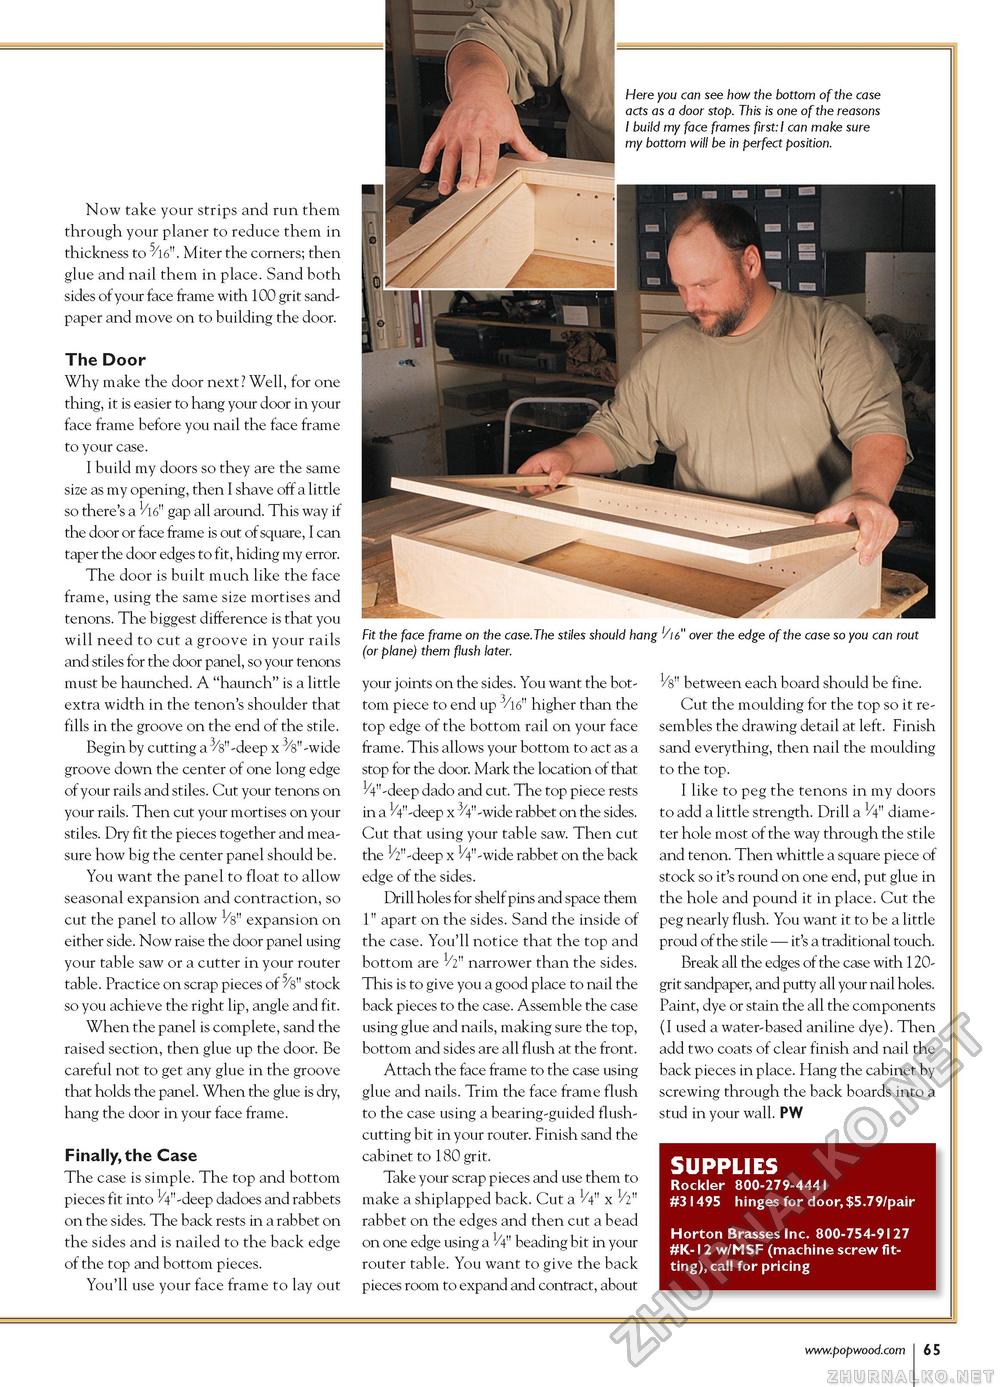
Now take your strips and run them through your planer to reduce them in thickness to 5/l6". Miter the corners; then glue and nail them in place. Sand both sides of your face frame with 100 grit sandpaper and move on to building the door. The Door Why make the door next? Well, for one thing, it is easier to hang your door in your face frame before you nail the face frame to your case. I build my doors so they are the same size as my opening, then I shave off a little so there's a gap all around. This way if the door or face frame is out of square, I can taper the door edges to fit, hiding my error. The door is built much like the face frame, using the same size mortises and tenons. The biggest difference is that you will need to cut a groove in your rails and stiles for the door panel, so your tenons must be haunched. A "haunch" is a little extra width in the tenon's shoulder that fills in the groove on the end of the stile. Begin by cutting a 3/s"-deep x 3/s"-wide groove down the center of one long edge of your rails and stiles. Cut your tenons on your rails. Then cut your mortises on your stiles. Dry fit the pieces together and measure how big the center panel should be. You want the panel to float to allow seasonal expansion and contraction, so cut the panel to allow Vs" expansion on either side. Now raise the door panel using your table saw or a cutter in your router table. Practice on scrap pieces of ^i" stock so you achieve the right lip, angle and fit. When the panel is complete, sand the raised section, then glue up the door. Be careful not to get any glue in the groove that holds the panel. When the glue is dry, hang the door in your face frame. Finally, the Case The case is simple. The top and bottom pieces fit into 1/4"-deep dadoes and rabbets on the sides. The back rests in a rabbet on the sides and is nailed to the back edge of the top and bottom pieces. You'll use your face frame to lay out Fit the face frame on the case.The stiles should hang '/i6" over the edge of the case so you can rout (or plane) them flush later. your joints on the sides. You want the bottom piece to end up higher than the top edge of the bottom rail on your face frame. This allows your bottom to act as a stop for the door. Mark the location of that 1/4"-deep dado and cut. The top piece rests in a 1/4"-deep x 3/4"-wide rabbet on the sides. Cut that using your table saw. Then cut the h" -deep x /4"-wide rabbet on the back edge of the sides. Drill holes for shelf pins and space them 1" apart on the sides. Sand the inside of the case. You'll notice that the top and bottom are 1/2" narrower than the sides. This is to give you a good place to nail the back pieces to the case. Assemble the case using glue and nails, making sure the top, bottom and sides are all flush at the front. Attach the face frame to the case using glue and nails. Trim the face frame flush to the case using a bearing-guided flush-cutting bit in your router. Finish sand the cabinet to 1s0 grit. Take your scrap pieces and use them to make a shiplapped back. Cut a 1/4" x V2" rabbet on the edges and then cut a bead on one edge using a 1/4" beading bit in your router table. You want to give the back pieces room to expand and contract, about Vi" between each board should be fine. Cut the moulding for the top so it resembles the drawing detail at left. Finish sand everything, then nail the moulding to the top. I like to peg the tenons in my doors to add a little strength. Drill a 1/4" diameter hole most of the way through the stile and tenon. Then whittle a square piece of stock so it's round on one end, put glue in the hole and pound it in place. Cut the peg nearly flush. You want it to be a little proud of the stile — it's a traditional touch. Break all the edges of the case with 120-grit sandpaper, and putty all your nail holes. Paint, dye or stain the all the components (I used a water-based aniline dye). Then add two coats of clear finish and nail the back pieces in place. Hang the cabinet by screwing through the back boards into a stud in your wall. PW SUPPLIES Rockier 800-279-4441 #31495 hinges for door,$5.79/pair Horton Brasses Inc. 800-754-9127 #K-12 w/MSF (machine screw fitting), call for pricing |


