Popular Woodworking 2000-12 № 119, страница 34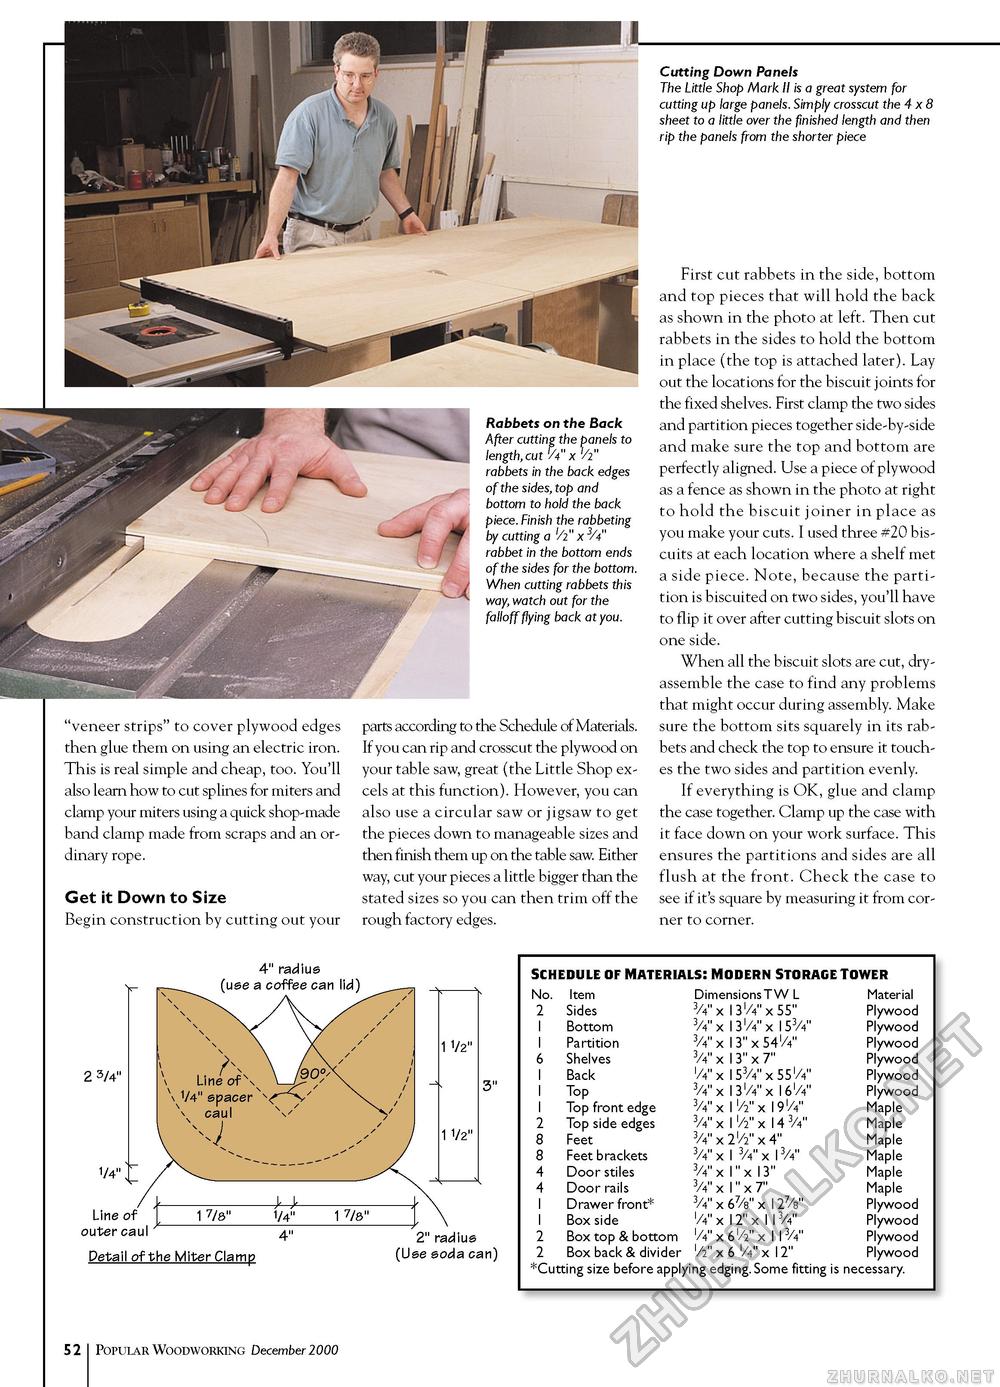
Rabbets on the Back After cutting the panels to length,cut V4" x l/i" rabbets in the back edges of the sides, top and bottom to hold the back piece. Finish the rabbeting by cutting a '/i" x rabbet in the bottom ends of the sides for the bottom. When cutting rabbets this way, watch out for the falloff flying back at you. "veneer strips" to cover plywood edges then glue them on using an electric iron. This is real simple and cheap, too. You'll also learn how to cut splines for miters and clamp your miters using a quick shop-made band clamp made from scraps and an ordinary rope. Get it Down to Size Begin construction by cutting out your Cutting Down Panels The Little Shop Mark II is a great system for cutting up large panels. Simply crosscut the 4 x 8 sheet to a little over the finished length and then rip the panels from the shorter piece parts according to the Schedule of Materials. If you can rip and crosscut the plywood on your table saw, great (the Little Shop excels at this function). However, you can also use a circular saw or jigsaw to get the pieces down to manageable sizes and then finish them up on the table saw. Either way, cut your pieces a little bigger than the stated sizes so you can then trim off the rough factory edges. First cut rabbets in the side, bottom and top pieces that will hold the back as shown in the photo at left. Then cut rabbets in the sides to hold the bottom in place (the top is attached later). Lay out the locations for the biscuit joints for the fixed shelves. First clamp the two sides and partition pieces together side-by-side and make sure the top and bottom are perfectly aligned. Use a piece of plywood as a fence as shown in the photo at right to hold the biscuit joiner in place as you make your cuts. I used three #20 biscuits at each location where a shelf met a side piece. Note, because the partition is biscuited on two sides, you'll have to flip it over after cutting biscuit slots on one side. When all the biscuit slots are cut, dry-assemble the case to find any problems that might occur during assembly. Make sure the bottom sits squarely in its rabbets and check the top to ensure it touches the two sides and partition evenly. If everything is OK, glue and clamp the case together. Clamp up the case with it face down on your work surface. This ensures the partitions and sides are all flush at the front. Check the case to see if it's square by measuring it from corner to corner. 2 3/4" 1/4" 4" radius (use a coffee can lid) Line of outer caul Detail of the Miter Clamp 2" radius (Use soda can) 2" radius (Use soda can)
52 Popular Woodworking December 1000 |
||||||||||||||||||||||||||||||||||||||||||||||||||||||||||||||||||||||||||||


