Popular Woodworking 2000-12 № 119, страница 37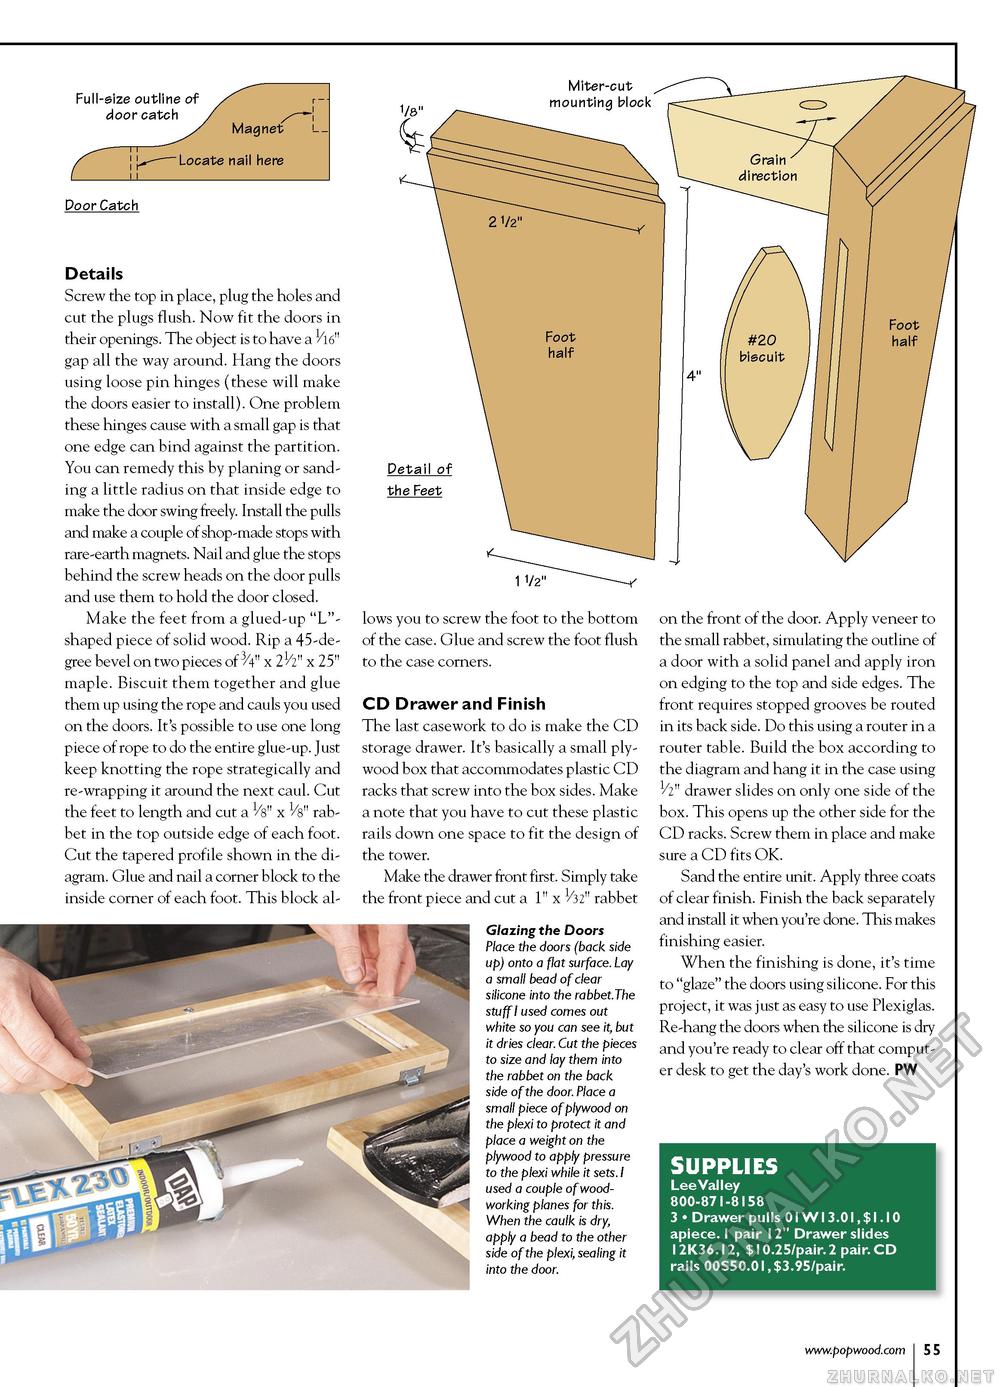
Full-size outline of door catch Door Catch Details Screw the top in place, plug the holes and cut the plugs flush. Now fit the doors in their openings. The object is to have a gap all the way around. Hang the doors using loose pin hinges (these will make the doors easier to install). One problem these hinges cause with a small gap is that one edge can bind against the partition. You can remedy this by planing or sanding a little radius on that inside edge to make the door swing freely. Install the pulls and make a couple of shop-made stops with rare-earth magnets. Nail and glue the stops behind the screw heads on the door pulls and use them to hold the door closed. Make the feet from a glued-up "L"-shaped piece of solid wood. Rip a 45-de-gree bevel on two pieces of ^V" x 21/2" x 25" maple. Biscuit them together and glue them up using the rope and cauls you used on the doors. It's possible to use one long piece of rope to do the entire glue-up. Just keep knotting the rope strategically and re-wrapping it around the next caul. Cut the feet to length and cut a Vs" x Vs" rabbet in the top outside edge of each foot. Cut the tapered profile shown in the diagram. Glue and nail a corner block to the inside corner of each foot. This block al lows you to screw the foot to the bottom of the case. Glue and screw the foot flush to the case corners. CD Drawer and Finish The last casework to do is make the CD storage drawer. It's basically a small plywood box that accommodates plastic CD racks that screw into the box sides. Make a note that you have to cut these plastic rails down one space to fit the design of the tower. Make the drawer front first. Simply take the front piece and cut a 1" x 1/32" rabbet Glazing the Doors Place the doors (back side up) onto a flat surface. Lay a small bead of clear silicone into the rabbet.The stuff I used comes out white so you can see it,but it dries clear. Cut the pieces to size and lay them into the rabbet on the back side of the door. Place a small piece of plywood on the plexi to protect it and place a weight on the plywood to apply pressure to the plexi while it sets. I used a couple of woodworking planes for this. When the caulk is dry, apply a bead to the other side of the plexi, sealing it into the door. on the front of the door. Apply veneer to the small rabbet, simulating the outline of a door with a solid panel and apply iron on edging to the top and side edges. The front requires stopped grooves be routed in its back side. Do this using a router in a router table. Build the box according to the diagram and hang it in the case using 1/2" drawer slides on only one side of the box. This opens up the other side for the CD racks. Screw them in place and make sure a CD fits OK. Sand the entire unit. Apply three coats of clear finish. Finish the back separately and install it when you're done. This makes finishing easier. When the finishing is done, it's time to "glaze" the doors using silicone. For this project, it was just as easy to use Plexiglas. Re-hang the doors when the silicone is dry and you're ready to clear off that computer desk to get the day's work done. PW SUPPLIES Lee Valley 800-871-8158 3 • Drawer pulls 01W13.01,$1.10 apiece. 1 pair 12" Drawer slides 12K36.12, $10.25/pair. 2 pair. CD rails 00S50.01, $3.95/pair. |


