Popular Woodworking 2000-12 № 119, страница 36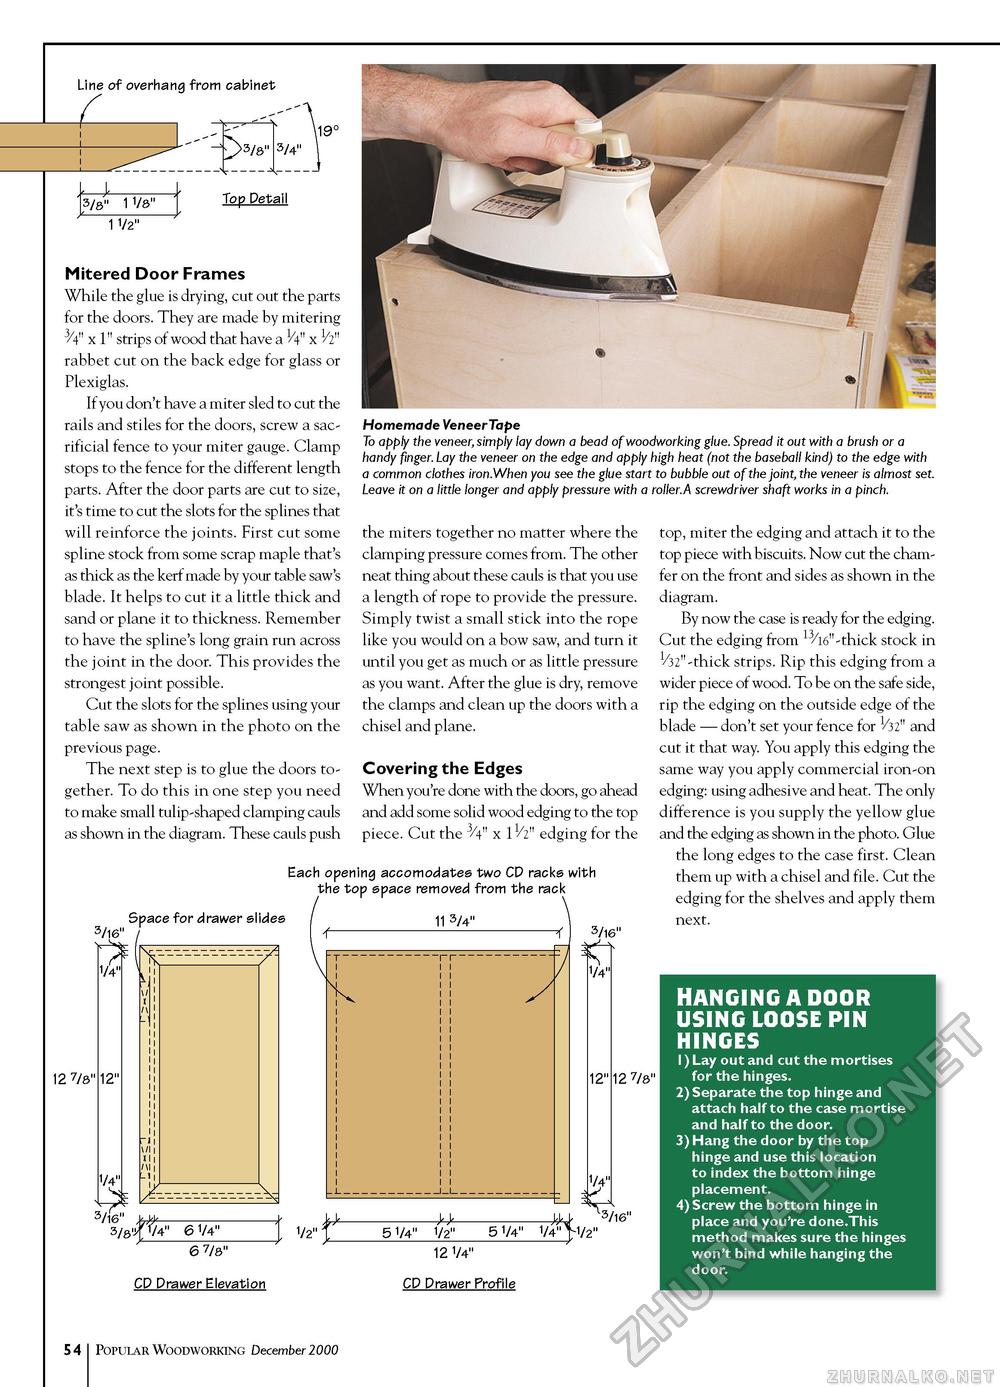
Line of overhang from cabinet 4- 3/8" 1 1/8" •r----- Top Detail \19° 3/4" 1 1/2" Mitered Door Frames While the glue is drying, cut out the parts for the doors. They are made by mitering 3/4" x 1" strips of wood that have a H" x 1/2" rabbet cut on the back edge for glass or Plexiglas. If you don't have a miter sled to cut the rails and stiles for the doors, screw a sacrificial fence to your miter gauge. Clamp stops to the fence for the different length parts. After the door parts are cut to size, it's time to cut the slots for the splines that will reinforce the joints. First cut some spline stock from some scrap maple that's as thick as the kerf made by your table saw's blade. It helps to cut it a little thick and sand or plane it to thickness. Remember to have the spline's long grain run across the joint in the door. This provides the strongest joint possible. Cut the slots for the splines using your table saw as shown in the photo on the previous page. The next step is to glue the doors together. To do this in one step you need to make small tulip-shaped clamping cauls as shown in the diagram. These cauls push Homemade Veneer Tape To apply the veneer, simply lay down a bead of woodworking glue. Spread it out with a brush or a handy finger. Lay the veneer on the edge and apply high heat (not the baseball kind) to the edge with a common clothes iron.When you see the glue start to bubble out of the joint, the veneer is almost set. Leave it on a little longer and apply pressure with a roller.A screwdriver shaft works in a pinch. the miters together no matter where the clamping pressure comes from. The other neat thing about these cauls is that you use a length of rope to provide the pressure. Simply twist a small stick into the rope like you would on a bow saw, and turn it until you get as much or as little pressure as you want. After the glue is dry, remove the clamps and clean up the doors with a chisel and plane. Covering the Edges When you're done with the doors, go ahead and add some solid wood edging to the top piece. Cut the 3/4" x 11/2" edging for the Each opening accomodates two CD racks with the top space removed from the rack 3/l6" Space for drawer slides 12 7/8" 11 3/4" 3/l6" £ 12" 3/l6" 3/8'tf 1/4" 1/2 6 7/8" 5 1/4" 1/2" 5 1/4" V4" >1/2" CD Drawer Elevation 12 1/4" CD Drawer Profile 1/4" S: 12 7/8" 3/16" top, miter the edging and attach it to the top piece with biscuits. Now cut the chamfer on the front and sides as shown in the diagram. By now the case is ready for the edging. Cut the edging from 13/l6"-thick stock in 1/32"-thick strips. Rip this edging from a wider piece of wood. To be on the safe side, rip the edging on the outside edge of the blade — don't set your fence for 1/32" and cut it that way. You apply this edging the same way you apply commercial iron-on edging: using adhesive and heat. The only difference is you supply the yellow glue and the edging as shown in the photo. Glue the long edges to the case first. Clean them up with a chisel and file. Cut the edging for the shelves and apply them next. HANGING A DOOR USING LoosE pin hinges 1) Lay out and cut the mortises for the hinges. 2) Separate the top hinge and attach half to the case mortise and half to the door. 3) Hang the door by the top hinge and use this location to index the bottom hinge placement. 4) Screw the bottom hinge in place and you're done.This method makes sure the hinges won't bind while hanging the door. 54 Popular Woodworking December 1000 |


