Popular Woodworking 2001-06 № 122, страница 48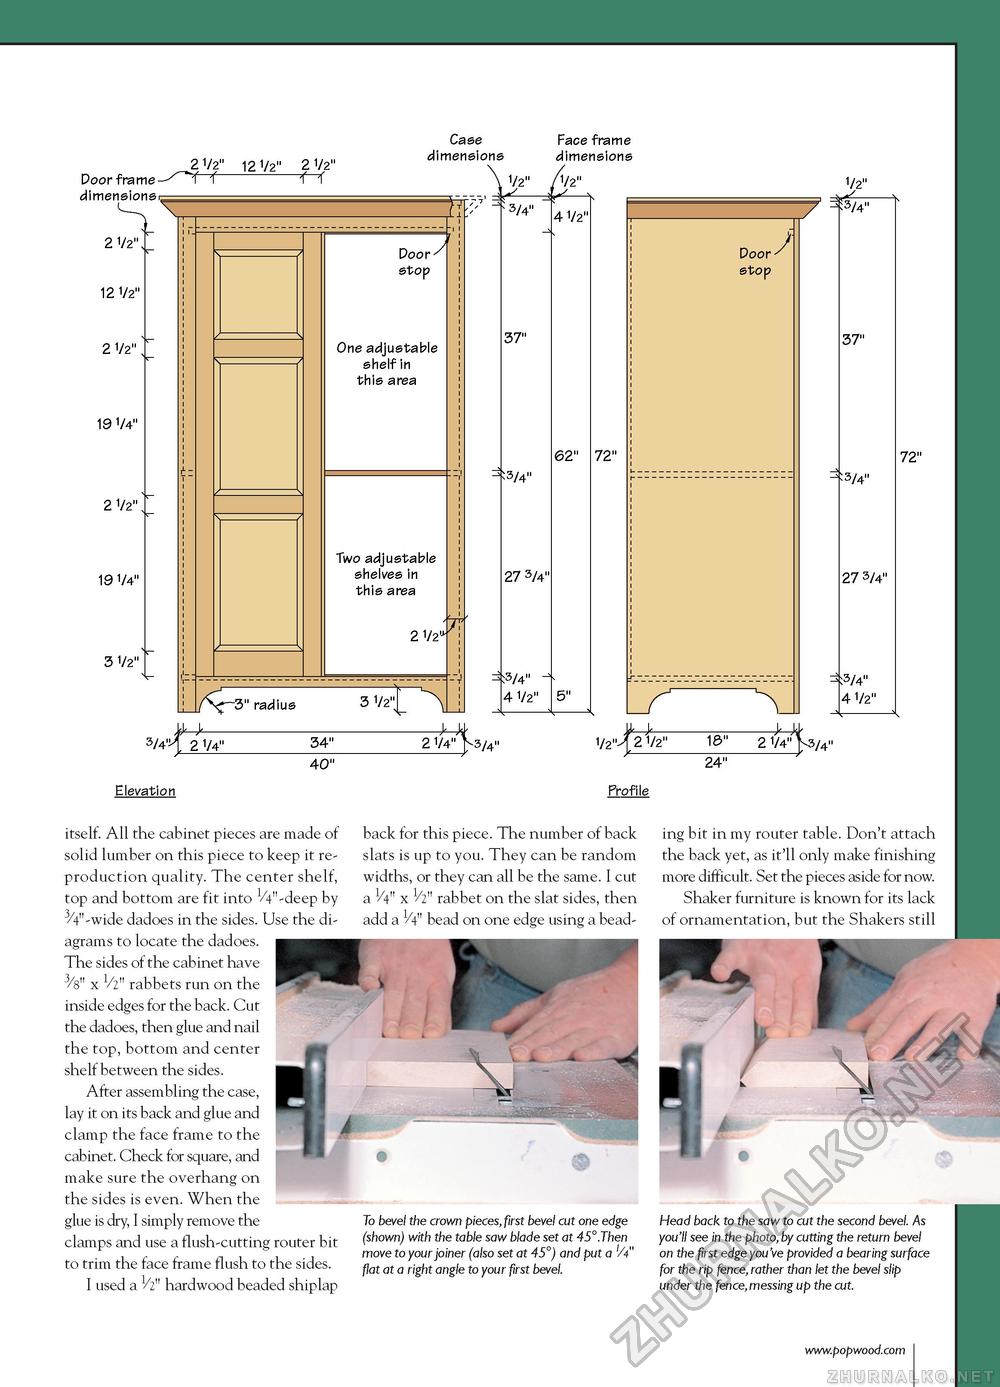
Door frame-dimensionsc 2 1/2" 12 1/2" 2 1/2" 19 1/4" 2 1/2" 19 1/4" 3 1/2" 2 1/2" 12 1/2" 2 1/2" -r-r Case dimensions Face frame dimensions Door stop One adjustable shelf in this area Two adjustable shelves in this area 2 1/2l radius 3 1/2 3/4H 2 1/4" Elevation 34" 2 1/4^3/4" 40" 1/2M 2 1/2" 18" 2 V4"N3/4" Profile itself. All the cabinet pieces are made of solid lumber on this piece to keep it reproduction quality. The center shelf, top and bottom are fit into VV'-deep by 3/4"-wide dadoes in the sides. Use the diagrams to locate the dadoes. The sides of the cabinet have 3/s" x Vz" rabbets run on the inside edges for the back. Cut the dadoes, then glue and nail the top, bottom and center shelf between the sides. After assembling the case, lay it on its back and glue and clamp the face frame to the cabinet. Check for square, and make sure the overhang on the sides is even. When the glue is dry, I simply remove the clamps and use a flush-cutting router bit to trim the face frame flush to the sides. I used a 1/z" hardwood beaded shiplap back for this piece. The number of back slats is up to you. They can be random widths, or they can all be the same. I cut a V4" x Vz" rabbet on the slat sides, then add a 1/4" bead on one edge using a bead ing bit in my router table. Don't attach the back yet, as it'll only make finishing more difficult. Set the pieces aside for now. Shaker furniture is known for its lack of ornamentation, but the Shakers still To bevel the crown pieces, first bevel cut one (shown) with the table saw blade set at 45°.Then move to your joiner (also set at 45°) and put a 'A" flat at a right angle to your first bevel. Head back to the saw to cut the second bevel. As you'll see in the photo, by cutting the return bevel on the first edge you've provided a bearing surface for the rip fence, rather than let the bevel slip under the fence,messing up the cut. |


