Popular Woodworking 2001-06 № 122, страница 53
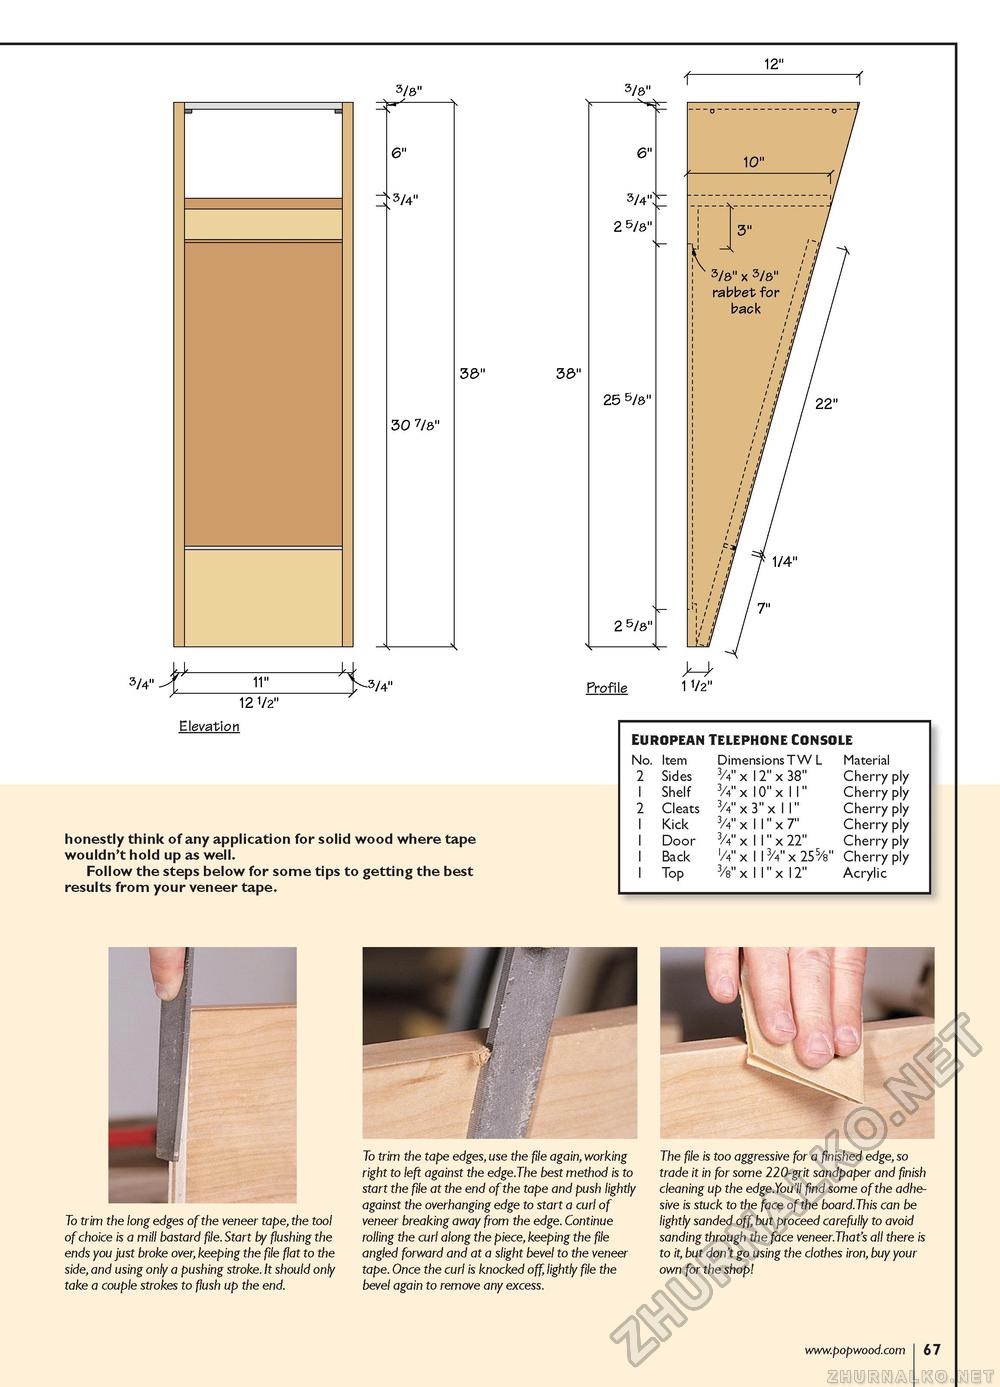
12" 3/8" 6" 3/4" 30 7/8" 38" 38" 3/8" 6" 3/4" 2 5/8" 25 5/8" 2 5/8" ' 3/8" x 3/8" rabbet for / back 3/4" ^ 11" 12 1/2" Hl _jN3/4" Profile 1 1/2" Elevation honestly think of any application for solid wood where tape wouldn't hold up as well. Follow the steps below for some tips to getting the best results from your veneer tape. EUROPEAN TELEPHONE CONSOLE EUROPEAN TELEPHONE CONSOLE
To trim the long edges of the veneer tape, the tool of choice is a mill bastard file. Start by flushing the ends you just broke over, keeping the file flat to the side, and using only a pushing stroke. It should only take a couple strokes to flush up the end. To trim the tape edges, use the file again, working right to left against the edge.The best method is to start the file at the end of the tape and push lightly against the overhanging edge to start a curl of veneer breaking away from the edge. Continue rolling the curl along the piece, keeping the file angled forward and at a slight bevel to the veneer tape. Once the curl is knocked off, lightly file the bevel again to remove any excess. The file is too aggressive for a finished edge, so trade it in for some 220-grit sandpaper and finish cleaning up the edge.You'll find some of the adhesive is stuck to the face of the board.This can be lightly sanded off, but proceed carefully to avoid sanding through the face veneer.That's all there is to it, but don't go using the clothes iron, buy your own for the shop! |
||||||||||||||||||||||||||||||||||||||||


