Popular Woodworking 2002-02 № 126, страница 62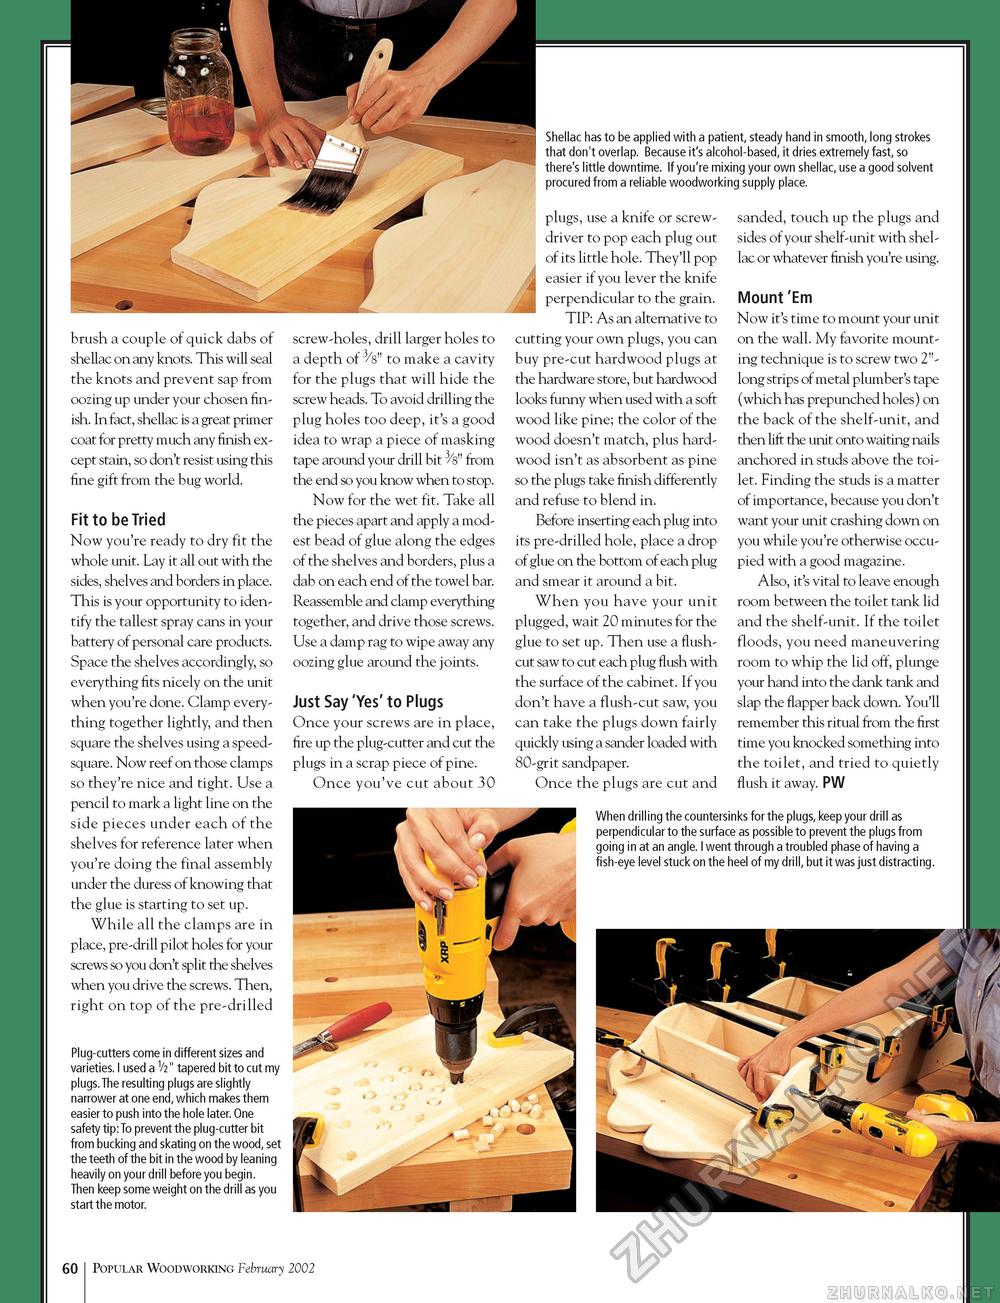
brush a couple of quick dabs of shellac on any knots. This will seal the knots and prevent sap from oozing up under your chosen finish. In fact, shellac is a great primer coat for pretty much any finish except stain, so don't resist using this fine gift from the bug world. Fit to be Tried Now you're ready to dry fit the whole unit. Lay it all out with the sides, shelves and borders in place. This is your opportunity to identify the tallest spray cans in your battery of personal care products. Space the shelves accordingly, so everything fits nicely on the unit when you're done. Clamp everything together lightly, and then square the shelves using a speed-square. Now reef on those clamps so they're nice and tight. Use a pencil to mark a light line on the side pieces under each of the shelves for reference later when you're doing the final assembly under the duress of knowing that the glue is starting to set up. While all the clamps are in place, pre-drill pilot holes for your screws so you don't split the shelves when you drive the screws. Then, right on top of the pre-drilled Plug-cutters come in different sizes and varieties. I used a V2" tapered bit to cut my plugs.The resulting plugs are slightly narrower at one end, which makes them easier to push into the hole later. One safety tip:To prevent the plug-cutter bit from bucking and skating on the wood, set the teeth of the bit in the wood by leaning heavily on your drill before you begin. Then keep some weight on the drill as you start the motor. Shellac has to be applied with a patient, steady hand in smooth, long strokes that don't overlap. Because it's alcohol-based, it dries extremely fast, so there's little downtime. If you're mixing your own shellac, use a good solvent procured from a reliable woodworking supply place. screw-holes, drill larger holes to a depth of 3/s" to make a cavity for the plugs that will hide the screw heads. To avoid drilling the plug holes too deep, it's a good idea to wrap a piece of masking tape around your drill bit ^s" from the end so you know when to stop. Now for the wet fit. Take all the pieces apart and apply a modest bead of glue along the edges of the shelves and borders, plus a dab on each end of the towel bar. Reassemble and clamp everything together, and drive those screws. Use a damp rag to wipe away any oozing glue around the joints. Just Say 'Yes' to Plugs Once your screws are in place, fire up the plug-cutter and cut the plugs in a scrap piece of pine. Once you've cut about 30 plugs, use a knife or screwdriver to pop each plug out of its little hole. They'll pop easier if you lever the knife perpendicular to the grain. TIP: As an alternative to cutting your own plugs, you can buy pre-cut hardwood plugs at the hardware store, but hardwood looks funny when used with a soft wood like pine; the color of the wood doesn't match, plus hardwood isn't as absorbent as pine so the plugs take finish differently and refuse to blend in. Before inserting each plug into its pre-drilled hole, place a drop of glue on the bottom of each plug and smear it around a bit. When you have your unit plugged, wait 20 minutes for the glue to set up. Then use a flush-cut saw to cut each plug flush with the surface of the cabinet. If you don't have a flush-cut saw, you can take the plugs down fairly quickly using a sander loaded with s0-grit sandpaper. Once the plugs are cut and sanded, touch up the plugs and sides of your shelf-unit with shellac or whatever finish you're using. Mount 'Em Now it's time to mount your unit on the wall. My favorite mounting technique is to screw two 2"-long strips of metal plumber's tape (which has prepunched holes) on the back of the shelf-unit, and then lift the unit onto waiting nails anchored in studs above the toilet. Finding the studs is a matter of importance, because you don't want your unit crashing down on you while you're otherwise occupied with a good magazine. Also, it's vital to leave enough room between the toilet tank lid and the shelf-unit. If the toilet floods, you need maneuvering room to whip the lid off, plunge your hand into the dank tank and slap the flapper back down. You'll remember this ritual from the first time you knocked something into the toilet, and tried to quietly flush it away. PW When drilling the countersinks for the plugs, keep your drill as perpendicular to the surface as possible to prevent the plugs from going in at an angle. I went through a troubled phase of having a fish-eye level stuck on the heel of my drill, but it was just distracting. 60 Popular Woodworking February 2002 |


