Popular Woodworking 2002-02 № 126, страница 67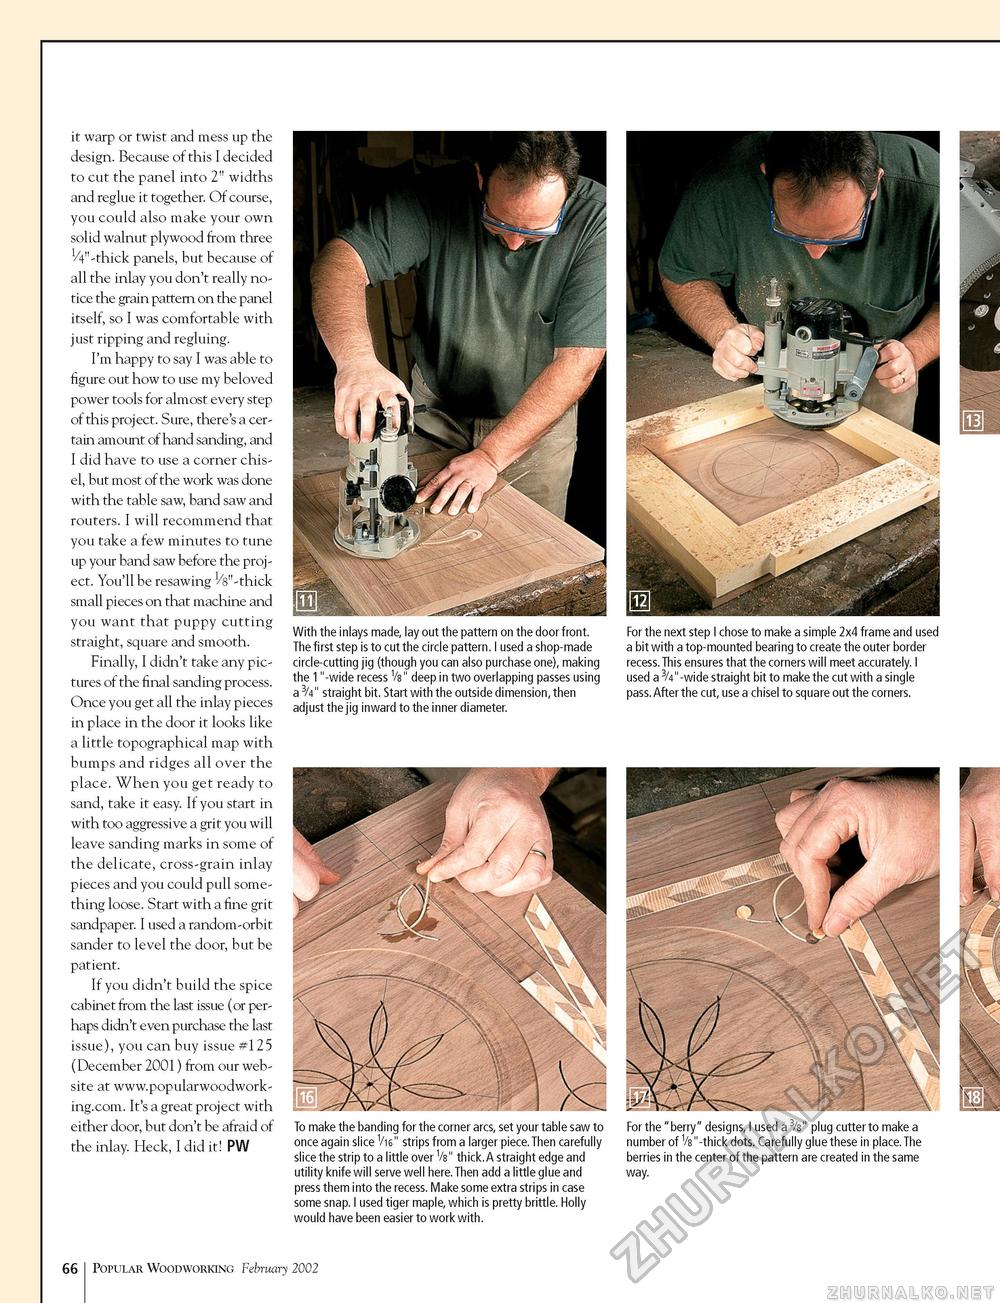
it warp or twist and mess up the design. Because of this I decided to cut the panel into 2" widths and reglue it together. Of course, you could also make your own solid walnut plywood from three 1/4"-thick panels, but because of all the inlay you don't really notice the grain pattern on the panel itself, so I was comfortable with just ripping and regluing. I'm happy to say I was able to figure out how to use my beloved power tools for almost every step of this project. Sure, there's a certain amount of hand sanding, and I did have to use a corner chisel, but most of the work was done with the table saw, band saw and routers. I will recommend that you take a few minutes to tune up your band saw before the project. You'll be resawing 1/s"-thick small pieces on that machine and you want that puppy cutting straight, square and smooth. Finally, I didn't take any pictures of the final sanding process. Once you get all the inlay pieces in place in the door it looks like a little topographical map with bumps and ridges all over the place. When you get ready to sand, take it easy. If you start in with too aggressive a grit you will leave sanding marks in some of the delicate, cross-grain inlay pieces and you could pull something loose. Start with a fine grit sandpaper. I used a random-orbit sander to level the door, but be patient. If you didn't build the spice cabinet from the last issue (or perhaps didn't even purchase the last issue), you can buy issue #125 (December 2001) from our website at www.popularwoodwork-ing.com. It's a great project with either door, but don't be afraid of the inlay. Heck, I did it! PW With the inlays made, lay out the pattern on the door front. The first step is to cut the circle pattern. I used a shop-made circle-cutting jig (though you can also purchase one), making the 1"-wide recess Vs" deep in two overlapping passes using a 3/4" straight bit. Start with the outside dimension, then adjust the jig inward to the inner diameter. For the next step I chose to make a simple 2x4 frame and used a bit with a top-mounted bearing to create the outer border recess.This ensures that the corners will meet accurately. I used a 3/4"-wide straight bit to make the cut with a single pass. After the cut, use a chisel to square out the corners. To make the banding for the corner arcs, set your table saw to once again slice Vi6" strips from a larger piece.Then carefully slice the strip to a little over Vs" thick.A straight edge and utility knife will serve well here.Then add a little glue and press them into the recess. Make some extra strips in case some snap. I used tiger maple, which is pretty brittle. Holly would have been easier to work with. For the "berry" designs, I used a 3/s" plug cutter to make a number of V8"-thick dots. Carefully glue these in place.The berries in the center of the pattern are created in the same way. 66 Popular Woodworking February 2002 |


