Popular Woodworking 2002-04 № 127, страница 22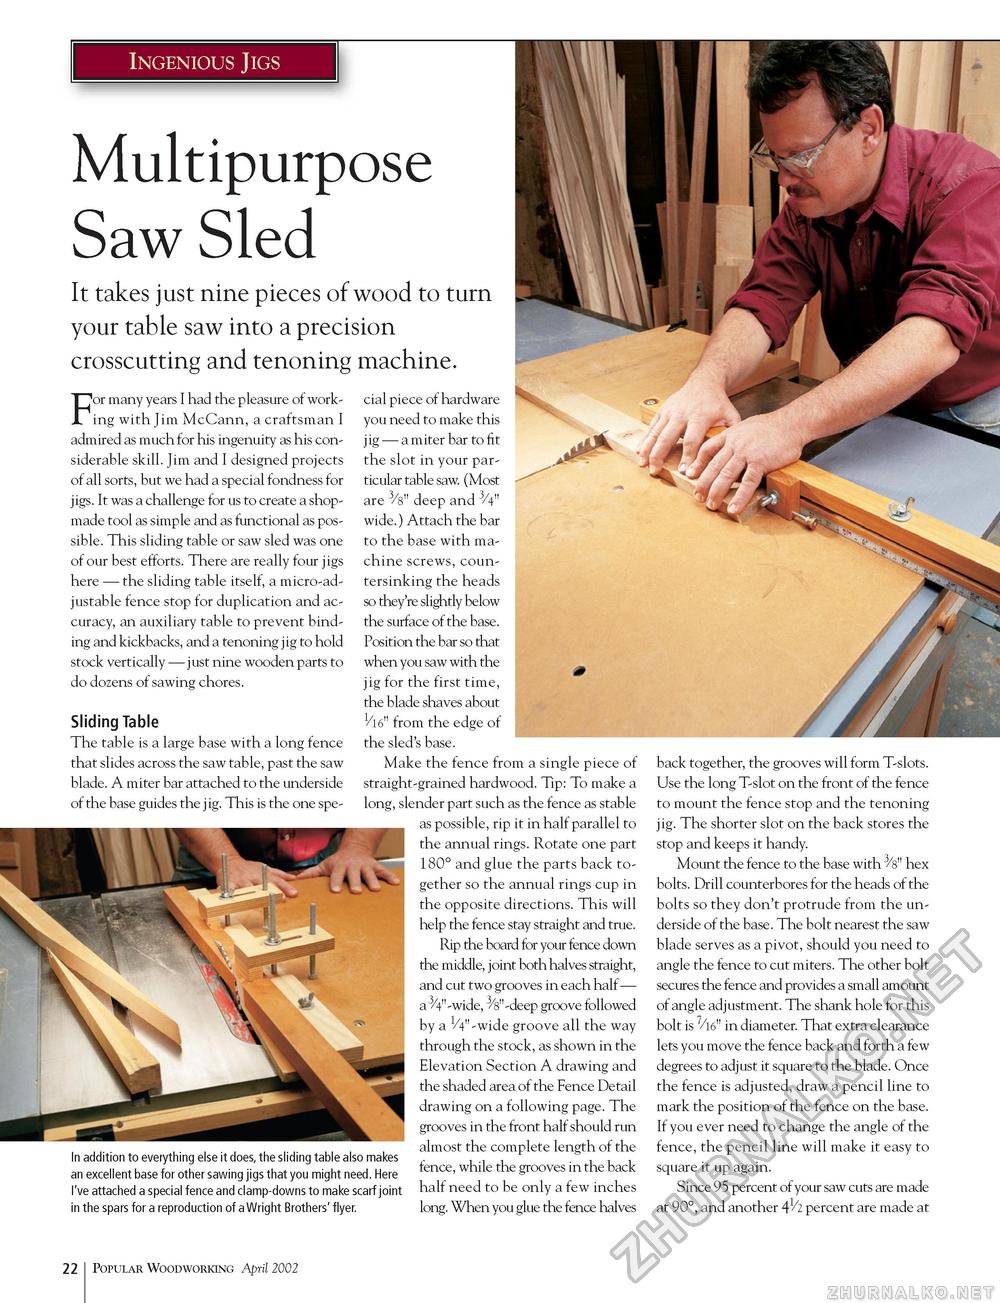
Multipurpose Saw Sled It takes just nine pieces of wood to turn your table saw into a precision crosscutting and tenoning machine. For many years I had the pleasure of working with Jim McCann, a craftsman I admired as much for his ingenuity as his considerable skill. Jim and I designed projects of all sorts, but we had a special fondness for jigs. It was a challenge for us to create a shop-made tool as simple and as functional as possible. This sliding table or saw sled was one of our best efforts. There are really four jigs here — the sliding table itself, a micro-adjustable fence stop for duplication and accuracy, an auxiliary table to prevent binding and kickbacks, and a tenoning jig to hold stock vertically — just nine wooden parts to do dozens of sawing chores. Sliding Table The table is a large base with a long fence that slides across the saw table, past the saw blade. A miter bar attached to the underside of the base guides the jig. This is the one spe In addition to everything else it does, the sliding table also makes an excellent base for other sawing jigs that you might need. Here I've attached a special fence and clamp-downs to make scarf joint in the spars for a reproduction of a Wright Brothers' flyer. cial piece of hardware you need to make this jig — a miter bar to fit the slot in your particular table saw. (Most are 3/8" deep and 3/4" wide.) Attach the bar to the base with machine screws, countersinking the heads so they're slightly below the surface of the base. Position the bar so that when you saw with the jig for the first time, the blade shaves about from the edge of the sled's base. Make the fence from a single piece of straight-grained hardwood. Tip: To make a long, slender part such as the fence as stable as possible, rip it in half parallel to the annual rings. Rotate one part 180° and glue the parts back together so the annual rings cup in the opposite directions. This will help the fence stay straight and true. Rip the board for your fence down the middle, joint both halves straight, and cut two grooves in each half— a 3/4"-wide, 3/8"-deep groove followed by a VV'-wide groove all the way through the stock, as shown in the Elevation Section A drawing and the shaded area of the Fence Detail drawing on a following page. The grooves in the front half should run almost the complete length of the fence, while the grooves in the back half need to be only a few inches long. When you glue the fence halves back together, the grooves will form T-slots. Use the long T-slot on the front of the fence to mount the fence stop and the tenoning jig. The shorter slot on the back stores the stop and keeps it handy. Mount the fence to the base with 3/8" hex bolts. Drill counterbores for the heads of the bolts so they don't protrude from the underside of the base. The bolt nearest the saw blade serves as a pivot, should you need to angle the fence to cut miters. The other bolt secures the fence and provides a small amount of angle adjustment. The shank hole for this bolt is 7/l6" in diameter. That extra clearance lets you move the fence back and forth a few degrees to adjust it square to the blade. Once the fence is adjusted, draw a pencil line to mark the position of the fence on the base. If you ever need to change the angle of the fence, the pencil line will make it easy to square it up again. Since 95 percent of your saw cuts are made at 90°, and another 41/2 percent are made at 22 Popular Woodworking April 2002 |


