Popular Woodworking 2002-04 № 127, страница 23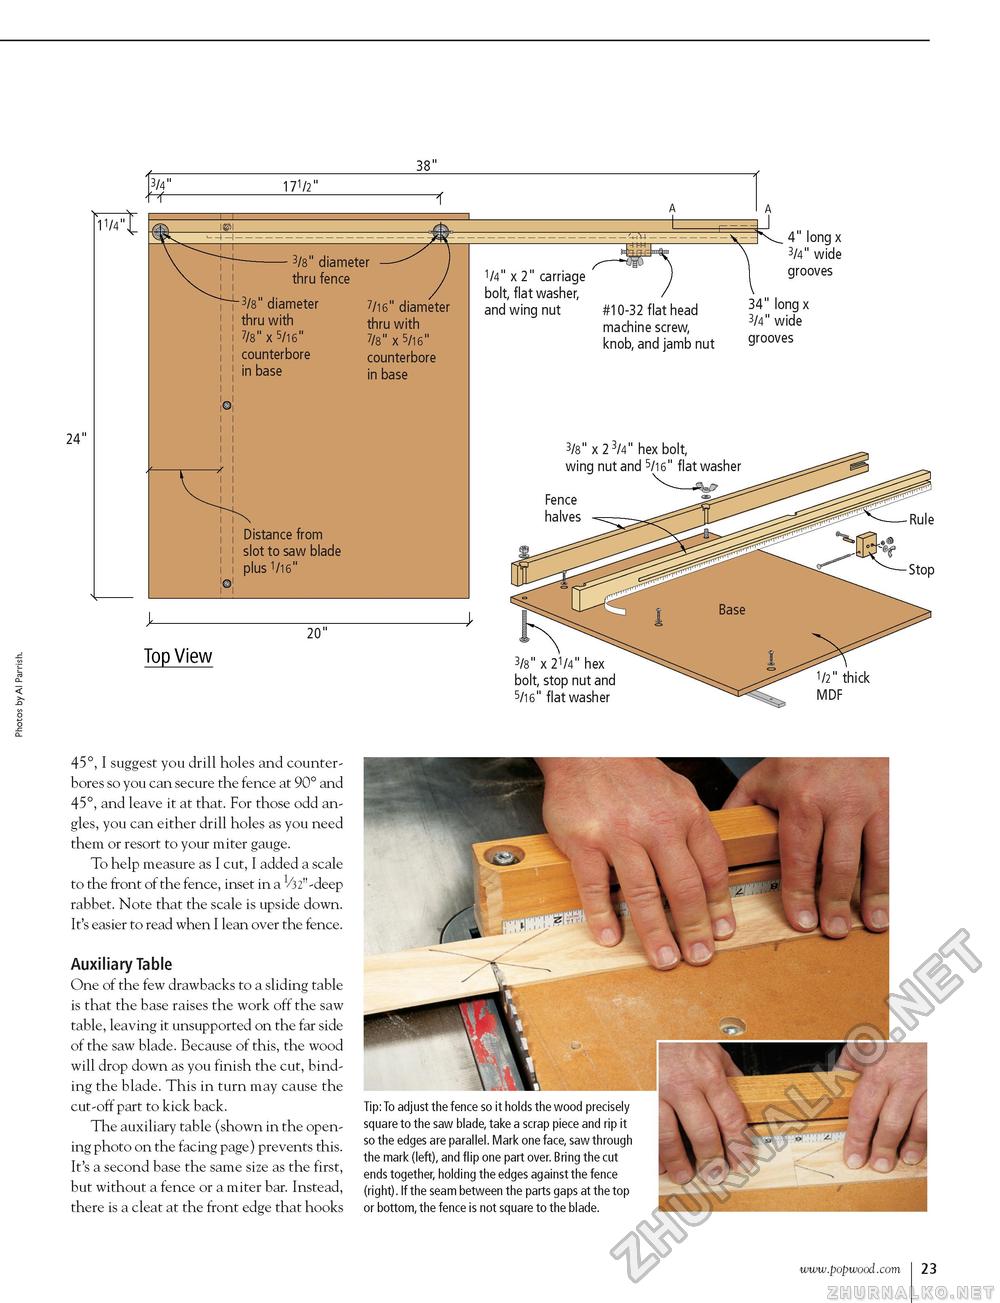
38" 3/4" 171/2" 24" 11/4 X U- - 3/8" diameter thru fence 3/8" diameter thru with 7/8" x 5/16" counterbore in base 7/16" diameter thru with 7/8" x 5/16" counterbore in base Distance from slot to saw blade plus 1/16" 1/4" x 2" carriage bolt, flat washer, and wing nut #10-32 flat head machine screw, knob, and jamb nut 4" long x 3/4" wide grooves long x wide 34 3/4 grooves 3/8" x 23/4" hex bolt, wing nut and 5/16" flat washer Fence halves Rule 20" Top View 3/8" x 21/4" hex bolt, stop nut and 5/16" flat washer 1/2" thick MDF 45°, I suggest you drill holes and counter-bores so you can secure the fence at 90° and 45°, and leave it at that. For those odd angles, you can either drill holes as you need them or resort to your miter gauge. To help measure as I cut, I added a scale to the front of the fence, inset in a ^/32"-deep rabbet. Note that the scale is upside down. It's easier to read when I lean over the fence. Auxiliary Table One of the few drawbacks to a sliding table is that the base raises the work off the saw table, leaving it unsupported on the far side of the saw blade. Because of this, the wood will drop down as you finish the cut, binding the blade. This in turn may cause the cut-off part to kick back. The auxiliary table (shown in the opening photo on the facing page) prevents this. It's a second base the same size as the first, but without a fence or a miter bar. Instead, there is a cleat at the front edge that hooks Tip: To adjust the fence so it holds the wood precisely square to the saw blade, take a scrap piece and rip it so the edges are parallel. Mark one face, saw through the mark (left), and flip one part over. Bring the cut ends together, holding the edges against the fence (right). If the seam between the parts gaps at the top or bottom, the fence is not square to the blade. A A |


