Popular Woodworking 2002-04 № 127, страница 53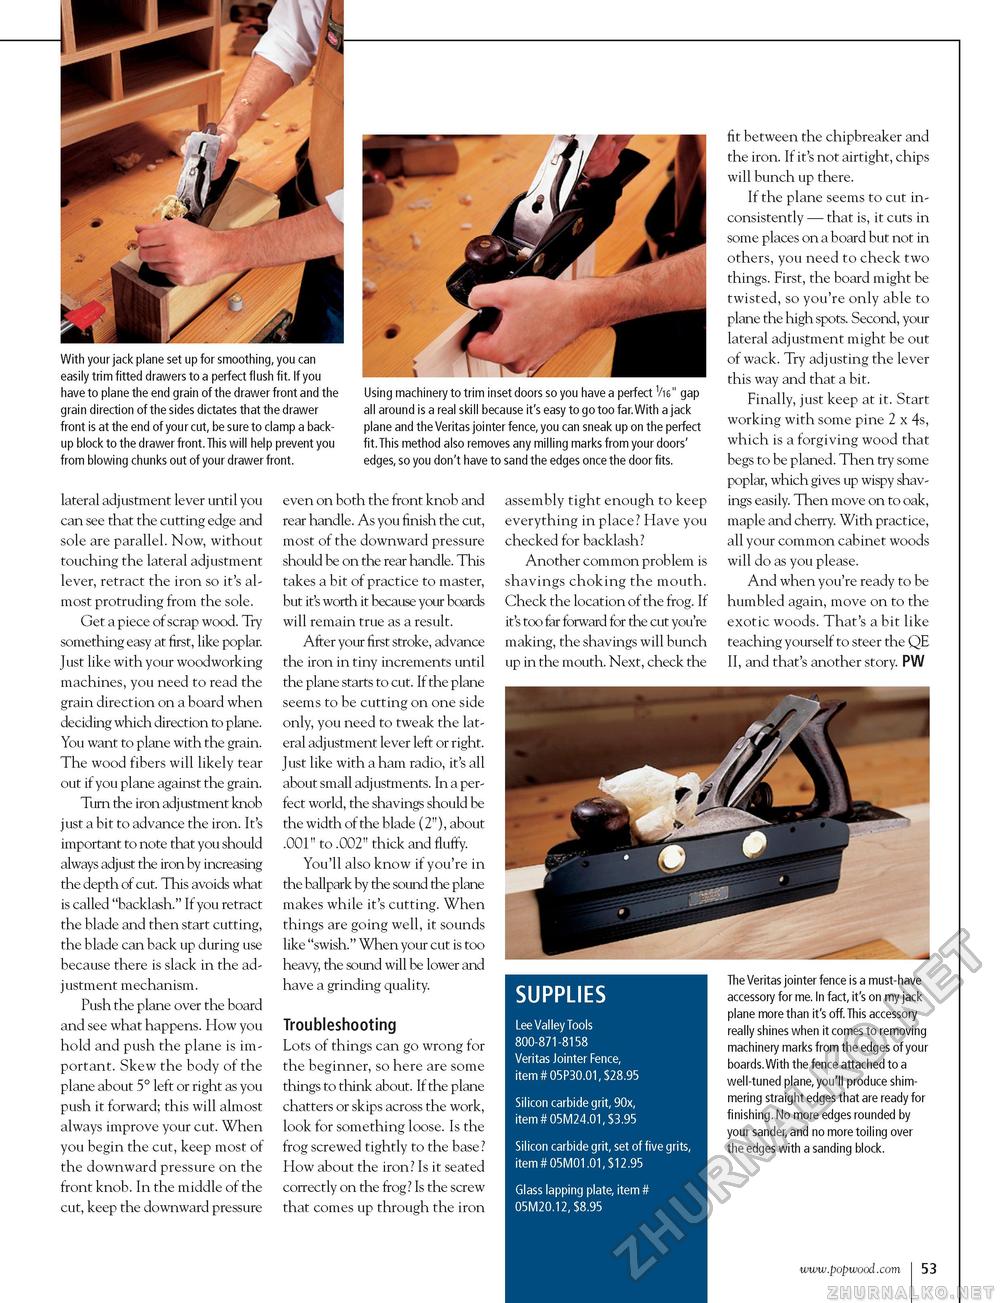
With your jack plane set up for smoothing, you can easily trim fitted drawers to a perfect flush fit. If you have to plane the end grain of the drawer front and the grain direction of the sides dictates that the drawer front is at the end of your cut, be sure to clamp a backup block to the drawer front. This will help prevent you from blowing chunks out of your drawer front. Using machinery to trim inset doors so you have a perfect V1611 gap all around is a real skill because it's easy to go too far.With a jack plane and the Veritas jointer fence, you can sneak up on the perfect fit.This method also removes any milling marks from your doors' edges, so you don't have to sand the edges once the door fits. lateral adjustment lever until you can see that the cutting edge and sole are parallel. Now, without touching the lateral adjustment lever, retract the iron so it's almost protruding from the sole. Get a piece of scrap wood. Try something easy at first, like poplar. Just like with your woodworking machines, you need to read the grain direction on a board when deciding which direction to plane. You want to plane with the grain. The wood fibers will likely tear out if you plane against the grain. Turn the iron adjustment knob just a bit to advance the iron. It's important to note that you should always adjust the iron by increasing the depth of cut. This avoids what is called "backlash." If you retract the blade and then start cutting, the blade can back up during use because there is slack in the adjustment mechanism. Push the plane over the board and see what happens. How you hold and push the plane is important. Skew the body of the plane about 5° left or right as you push it forward; this will almost always improve your cut. When you begin the cut, keep most of the downward pressure on the front knob. In the middle of the cut, keep the downward pressure even on both the front knob and rear handle. As you finish the cut, most of the downward pressure should be on the rear handle. This takes a bit of practice to master, but it's worth it because your boards will remain true as a result. After your first stroke, advance the iron in tiny increments until the plane starts to cut. If the plane seems to be cutting on one side only, you need to tweak the lateral adjustment lever left or right. Just like with a ham radio, it's all about small adjustments. In a perfect world, the shavings should be the width of the blade (2"), about .001" to .002" thick and fluffy. You'll also know if you're in the ballpark by the sound the plane makes while it's cutting. When things are going well, it sounds like "swish." When your cut is too heavy, the sound will be lower and have a grinding quality. Troubleshooting Lots of things can go wrong for the beginner, so here are some things to think about. If the plane chatters or skips across the work, look for something loose. Is the frog screwed tightly to the base? How about the iron? Is it seated correctly on the frog? Is the screw that comes up through the iron assembly tight enough to keep everything in place? Have you checked for backlash? Another common problem is shavings choking the mouth. Check the location of the frog. If it's too far forward for the cut you're making, the shavings will bunch up in the mouth. Next, check the fit between the chipbreaker and the iron. If it's not airtight, chips will bunch up there. If the plane seems to cut inconsistently — that is, it cuts in some places on a board but not in others, you need to check two things. First, the board might be twisted, so you're only able to plane the high spots. Second, your lateral adjustment might be out of wack. Try adjusting the lever this way and that a bit. Finally, just keep at it. Start working with some pine 2 x 4s, which is a forgiving wood that begs to be planed. Then try some poplar, which gives up wispy shavings easily. Then move on to oak, maple and cherry. With practice, all your common cabinet woods will do as you please. And when you're ready to be humbled again, move on to the exotic woods. That's a bit like teaching yourself to steer the QE II, and that's another story. PW SUPPLIES Lee Valley Tools 800-871-8158 Veritas Jointer Fence, item # 05P30.01, $28.95 Silicon carbide grit, 90x, item # 05M24.01, $3.95 Silicon carbide grit, set of five grits, item # 05M01.01, $12.95 Glass lapping plate, item # 05M20.12, $8.95 The Veritas jointer fence is a must-have accessory for me. In fact, it's on my jack plane more than it's off. This accessory really shines when it comes to removing machinery marks from the edges of your boards.With the fence attached to a well-tuned plane, you'll produce shimmering straight edges that are ready for finishing. No more edges rounded by your sander, and no more toiling over the edges with a sanding block. 53 |


