Popular Woodworking 2002-06 № 128, страница 62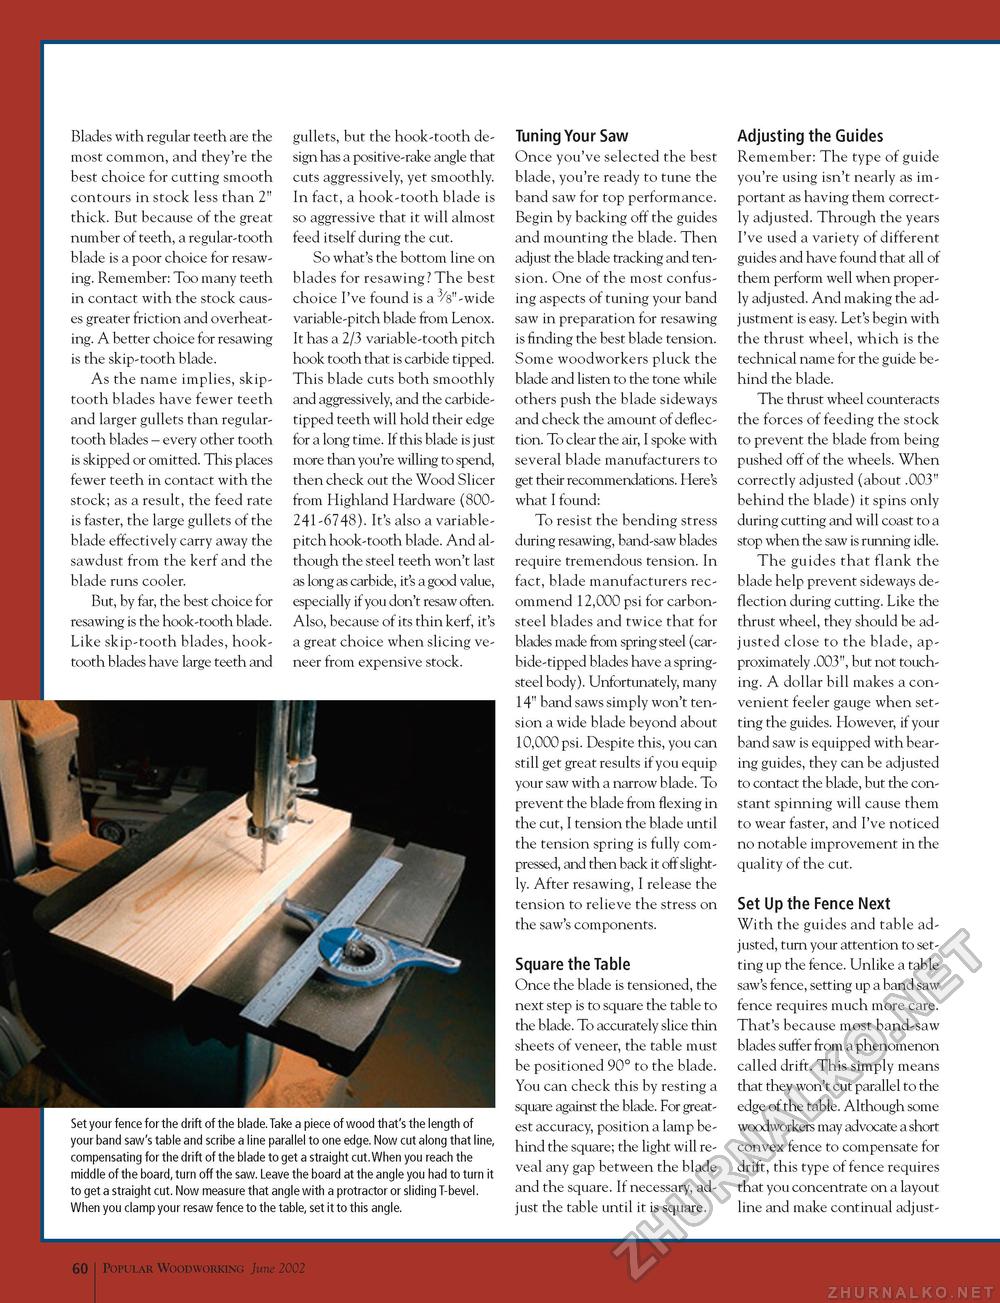
Blades with regular teeth are the most common, and they're the best choice for cutting smooth contours in stock less than 2" thick. But because of the great number of teeth, a regular-tooth blade is a poor choice for resaw-ing. Remember: Too many teeth in contact with the stock causes greater friction and overheating. A better choice for resawing is the skip-tooth blade. As the name implies, skip-tooth blades have fewer teeth and larger gullets than regular-tooth blades - every other tooth is skipped or omitted. This places fewer teeth in contact with the stock; as a result, the feed rate is faster, the large gullets of the blade effectively carry away the sawdust from the kerf and the blade runs cooler. But, by far, the best choice for resawing is the hook-tooth blade. Like skip-tooth blades, hook-tooth blades have large teeth and gullets, but the hook-tooth design has a positive-rake angle that cuts aggressively, yet smoothly. In fact, a hook-tooth blade is so aggressive that it will almost feed itself during the cut. So what's the bottom line on blades for resawing? The best choice I've found is a 3/s"-wide variable-pitch blade from Lenox. It has a 2/3 variable-tooth pitch hook tooth that is carbide tipped. This blade cuts both smoothly and aggressively, and the carbide-tipped teeth will hold their edge for a long time. If this blade is just more than you're willing to spend, then check out the Wood Slicer from Highland Hardware (800241-6748). It's also a variable-pitch hook-tooth blade. And although the steel teeth won't last as long as carbide, it's a good value, especially if you don't resaw often. Also, because of its thin kerf, it's a great choice when slicing veneer from expensive stock. Set your fence for the drift of the blade.Take a piece of wood that's the length of your band saw's table and scribe a line parallel to one edge. Now cut along that line, compensating for the drift of the blade to get a straight cut.When you reach the middle of the board, turn off the saw. Leave the board at the angle you had to turn it to get a straight cut. Now measure that angle with a protractor or sliding T-bevel. When you clamp your resaw fence to the table, set it to this angle. Tuning Your Saw Once you've selected the best blade, you're ready to tune the band saw for top performance. Begin by backing off the guides and mounting the blade. Then adjust the blade tracking and tension. One of the most confusing aspects of tuning your band saw in preparation for resawing is finding the best blade tension. Some woodworkers pluck the blade and listen to the tone while others push the blade sideways and check the amount of deflection. To clear the air, I spoke with several blade manufacturers to get their recommendations. Here's what I found: To resist the bending stress during resawing, band-saw blades require tremendous tension. In fact, blade manufacturers recommend 12,000 psi for carbon-steel blades and twice that for blades made from spring steel (carbide-tipped blades have a spring-steel body). Unfortunately, many 14" band saws simply won't tension a wide blade beyond about 10,000 psi. Despite this, you can still get great results if you equip your saw with a narrow blade. To prevent the blade from flexing in the cut, I tension the blade until the tension spring is fully compressed, and then back it off slightly. After resawing, I release the tension to relieve the stress on the saw's components. Square the Table Once the blade is tensioned, the next step is to square the table to the blade. To accurately slice thin sheets of veneer, the table must be positioned 90° to the blade. You can check this by resting a square against the blade. For greatest accuracy, position a lamp behind the square; the light will reveal any gap between the blade and the square. If necessary, adjust the table until it is square. Adjusting the Guides Remember: The type of guide you're using isn't nearly as important as having them correctly adjusted. Through the years I've used a variety of different guides and have found that all of them perform well when properly adjusted. And making the adjustment is easy. Let's begin with the thrust wheel, which is the technical name for the guide behind the blade. The thrust wheel counteracts the forces of feeding the stock to prevent the blade from being pushed off of the wheels. When correctly adjusted (about .003" behind the blade) it spins only during cutting and will coast to a stop when the saw is running idle. The guides that flank the blade help prevent sideways deflection during cutting. Like the thrust wheel, they should be adjusted close to the blade, approximately .003", but not touching. A dollar bill makes a convenient feeler gauge when setting the guides. However, if your band saw is equipped with bearing guides, they can be adjusted to contact the blade, but the constant spinning will cause them to wear faster, and I've noticed no notable improvement in the quality of the cut. Set Up the Fence Next With the guides and table adjusted, turn your attention to setting up the fence. Unlike a table saw's fence, setting up a band saw fence requires much more care. That's because most band-saw blades suffer from a phenomenon called drift. This simply means that they won't cut parallel to the edge of the table. Although some woodworkers may advocate a short convex fence to compensate for drift, this type of fence requires that you concentrate on a layout line and make continual adjust- 60 Popular Woodworking June 2002 |


