Popular Woodworking 2003-02 № 132, страница 73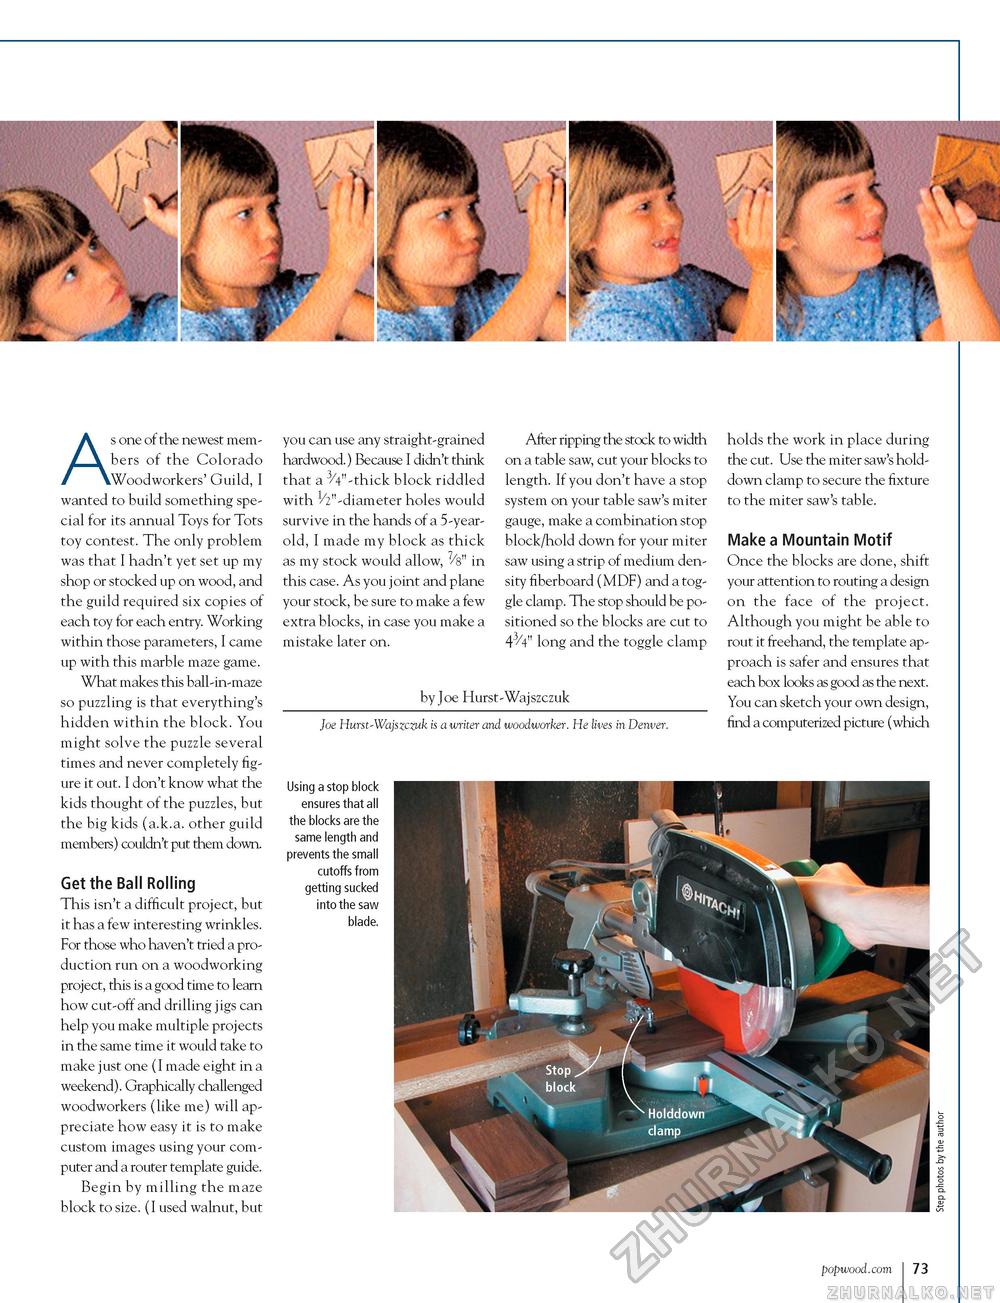
As one of the newest members of the Colorado Woodworkers' Guild, I wanted to build something special for its annual Toys for Tots toy contest. The only problem was that I hadn't yet set up my shop or stocked up on wood, and the guild required six copies of each toy for each entry. Working within those parameters, I came up with this marble maze game. What makes this ball-in-maze so puzzling is that everything's hidden within the block. You might solve the puzzle several times and never completely figure it out. I don't know what the kids thought of the puzzles, but the big kids (a.k.a. other guild members) couldn't put them down. Get the Ball Rolling This isn't a difficult project, but it has a few interesting wrinkles. For those who haven't tried a production run on a woodworking project, this is a good time to learn how cut-off and drilling jigs can help you make multiple projects in the same time it would take to make just one (I made eight in a weekend). Graphically challenged woodworkers (like me) will appreciate how easy it is to make custom images using your computer and a router template guide. Begin by milling the maze block to size. (I used walnut, but you can use any straight-grained hardwood.) Because I didn't think that a 3/4"-thick block riddled with 1/2"-diameter holes would survive in the hands of a 5-year-old, I made my block as thick as my stock would allow, 7/s" in this case. As you joint and plane your stock, be sure to make a few extra blocks, in case you make a mistake later on. After ripping the stock to width on a table saw, cut your blocks to length. If you don't have a stop system on your table saw's miter gauge, make a combination stop block/hold down for your miter saw using a strip of medium density fiberboard (MDF) and a toggle clamp. The stop should be positioned so the blocks are cut to 43/4" long and the toggle clamp holds the work in place during the cut. Use the miter saw's hold-down clamp to secure the fixture to the miter saw's table. Make a Mountain Motif Once the blocks are done, shift your attention to routing a design on the face of the project. Although you might be able to rout it freehand, the template approach is safer and ensures that each box looks as good as the next. You can sketch your own design, find a computerized picture (which by Joe Hurst-Wajszczuk Joe Hurst-Wajszczuk is a writer and woodworker. He lives in Denver. Using a stop block ensures that all the blocks are the same length and prevents the small cutoffs from getting sucked into the saw blade. popwood.com 73 |


