Popular Woodworking 2003-02 № 132, страница 75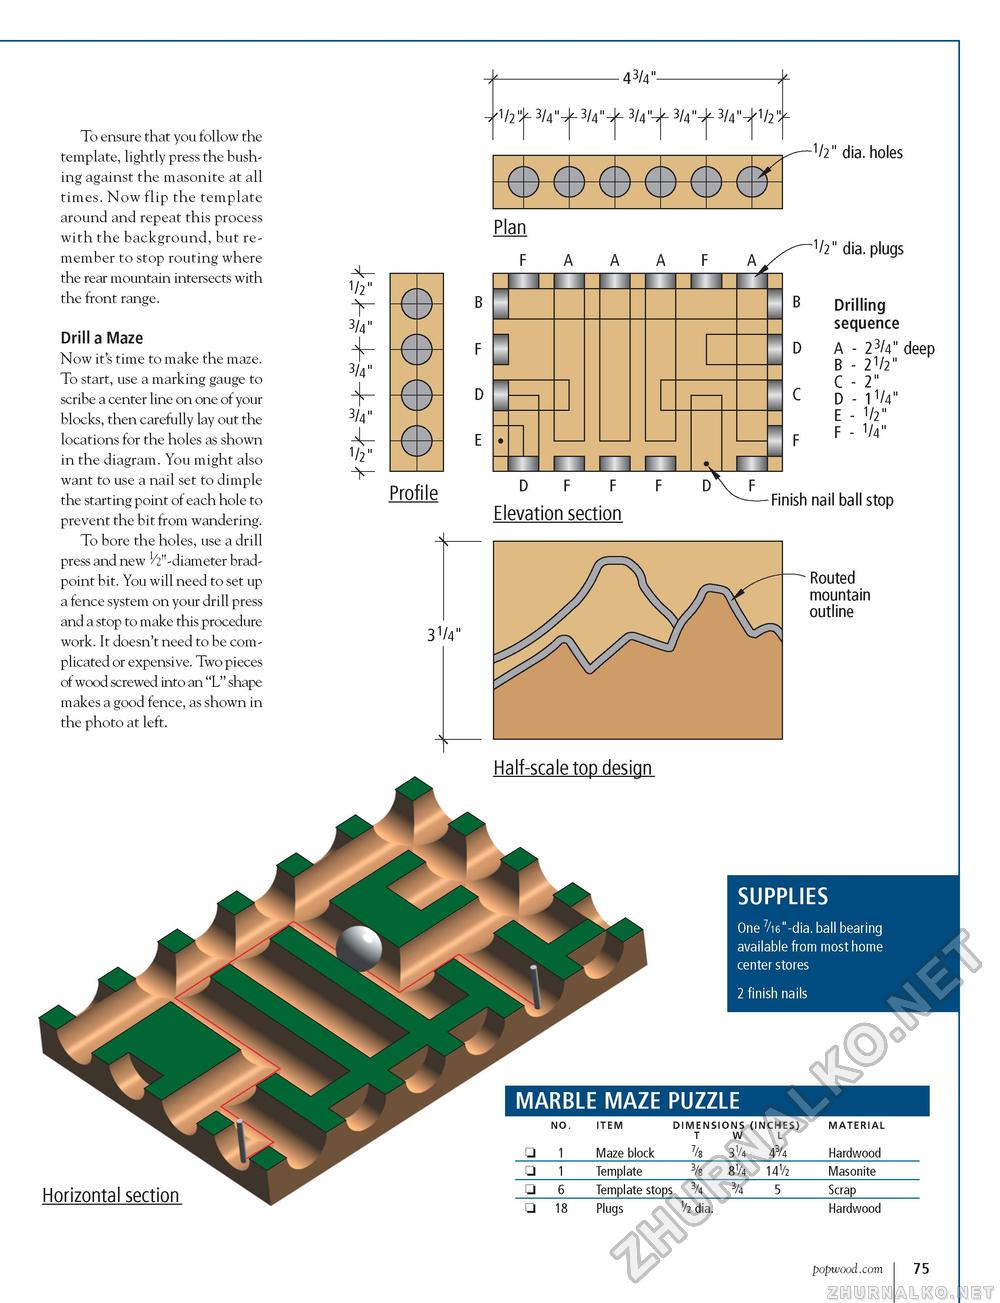
To ensure that you follow the template, lightly press the bushing against the masonite at all times. Now flip the template around and repeat this process with the background, but remember to stop routing where the rear mountain intersects with the front range. Drill a Maze Now it's time to make the maze. To start, use a marking gauge to scribe a center line on one of your blocks, then carefully lay out the locations for the holes as shown in the diagram. You might also want to use a nail set to dimple the starting point of each hole to prevent the bit from wandering. To bore the holes, use a drill press and new ^"-diameter brad-point bit. You will need to set up a fence system on your drill press and a stop to make this procedure work. It doesn't need to be complicated or expensive. Two pieces of wood screwed into an "L" shape makes a good fence, as shown in the photo at left. 1/2^3/4"- -3/4"- -43/4"- ^ 3/4" -3/4"- -3/4"- 'V2'"- ©-©-©-e-e-e^ Plan 1/2 "r 3/4 3/4 3/4 //2 e e e e t~~T -1/2" dia. holes _1/2" dia. plugs B Drilling sequence D A - 23/4" deep B - 21/2" C - 2" C D - 1 V4" E - 1/2" F F - 1/4" Profile D F F Elevation section 3V4" Finish nail ball stop Routed mountain outline Half-scale top design SUPPLIES One 7/16"-dia. ball bearing available from most home center stores 2 finish nails
F popwood.com 75 |
||||||||||||||||||


