Popular Woodworking 2003-02 № 132, страница 74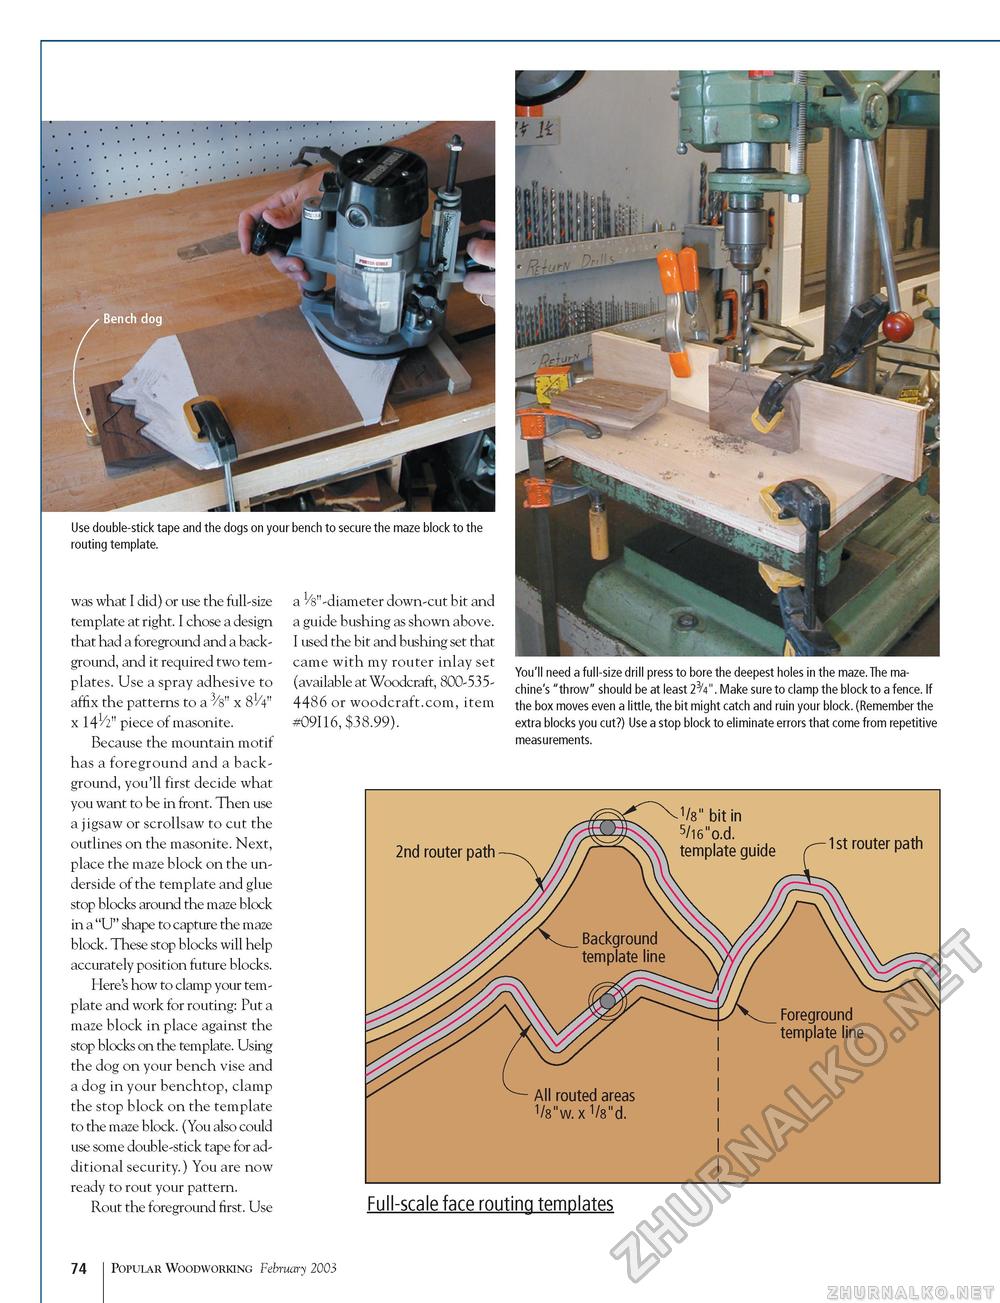
Use double-stick tape and the dogs on your bench to secure the maze block to the routing template. was what I did) or use the full-size template at right. I chose a design that had a foreground and a background, and it required two templates. Use a spray adhesive to affix the patterns to a 3/s" x 81/4" x piece of masonite. Because the mountain motif has a foreground and a background, you'll first decide what you want to be in front. Then use a jigsaw or scrollsaw to cut the outlines on the masonite. Next, place the maze block on the underside of the template and glue stop blocks around the maze block in a "U" shape to capture the maze block. These stop blocks will help accurately position future blocks. Here's how to clamp your template and work for routing: Put a maze block in place against the stop blocks on the template. Using the dog on your bench vise and a dog in your benchtop, clamp the stop block on the template to the maze block. (You also could use some double-stick tape for additional security.) You are now ready to rout your pattern. Rout the foreground first. Use a //8"-diameter down-cut bit and a guide bushing as shown above. I used the bit and bushing set that came with my router inlay set (available at Woodcraft, 800-5354486 or woodcraft.com, item #09116, $38.99). You'll need a full-size drill press to bore the deepest holes in the maze.The machine's "throw" should be at least 23/4". Make sure to clamp the block to a fence. If the box moves even a little, the bit might catch and ruin your block. (Remember the extra blocks you cut?) Use a stop block to eliminate errors that come from repetitive measurements. Full-scale face routing templates 74 Popular Woodworking February 2003 |


