Popular Woodworking 2003-06 № 134, страница 79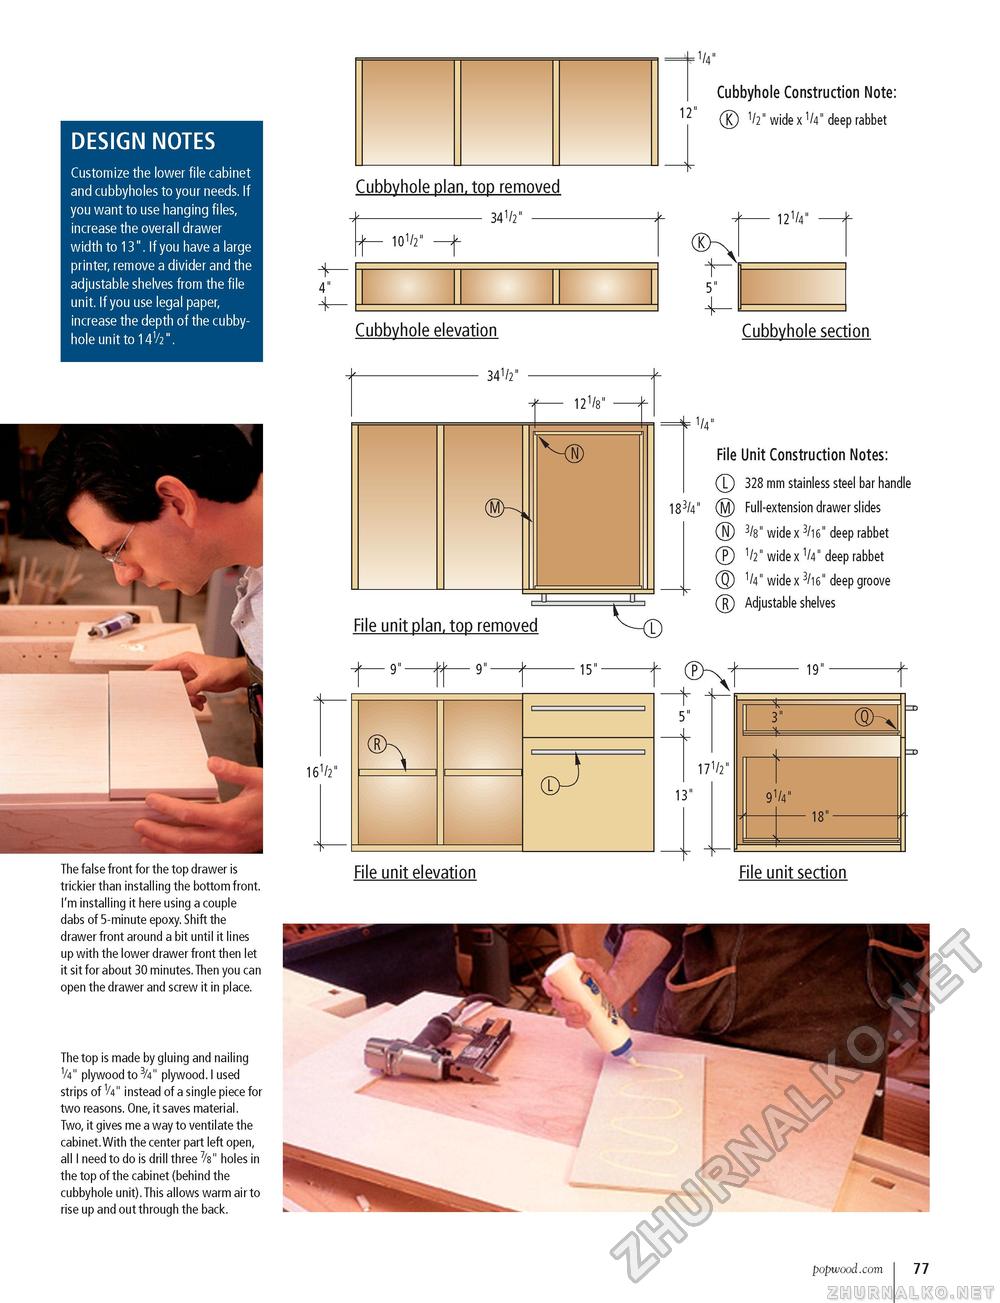
DESIGN NOTES Customize the lower file cabinet and cubbyholes to your needs. If you want to use hanging files, increase the overall drawer width to 13". If you have a large printer, remove a divider and the adjustable shelves from the file unit. If you use legal paper, increase the depth of the cubbyhole unit to 14V2". Cubbyhole Construction Note: 2 (K) 1/2" wide x V deep rabbet The false front for the top drawer is trickier than installing the bottom front. I'm installing it here using a couple dabs of 5-minute epoxy. Shift the drawer front around a bit until it lines up with the lower drawer front then let it sit for about 30 minutes. Then you can open the drawer and screw it in place. The top is made by gluing and nailing V4" plywood to 3/4" plywood. I used strips of V4" instead of a single piece for two reasons. One, it saves material. Two, it gives me a way to ventilate the cabinet.With the center part left open, all I need to do is drill three 7/s" holes in the top of the cabinet (behind the cubbyhole unit).This allows warm air to rise up and out through the back. Cubbyhole plan, top removed -34V2" - 10V Cubbyhole elevation 12V Cubbyhole section
File unit plan, top removed 1/4" File Unit Construction Notes: (T) 328 mm stainless steel bar handle 183/4" (M) Full-extension drawer slides (N 3/8" wide x 3/16" deep rabbet (P) 1/2" wide x V4" deep rabbet (Q) 1/4" wide x 3/16" deep groove (R) Adjustable shelves 16V File unit elevation 15"- 5" 17 V 13" 19" 19"
File unit section popwood.com 77 |
||||||||||||||


