Popular Woodworking 2003-06 № 134, страница 78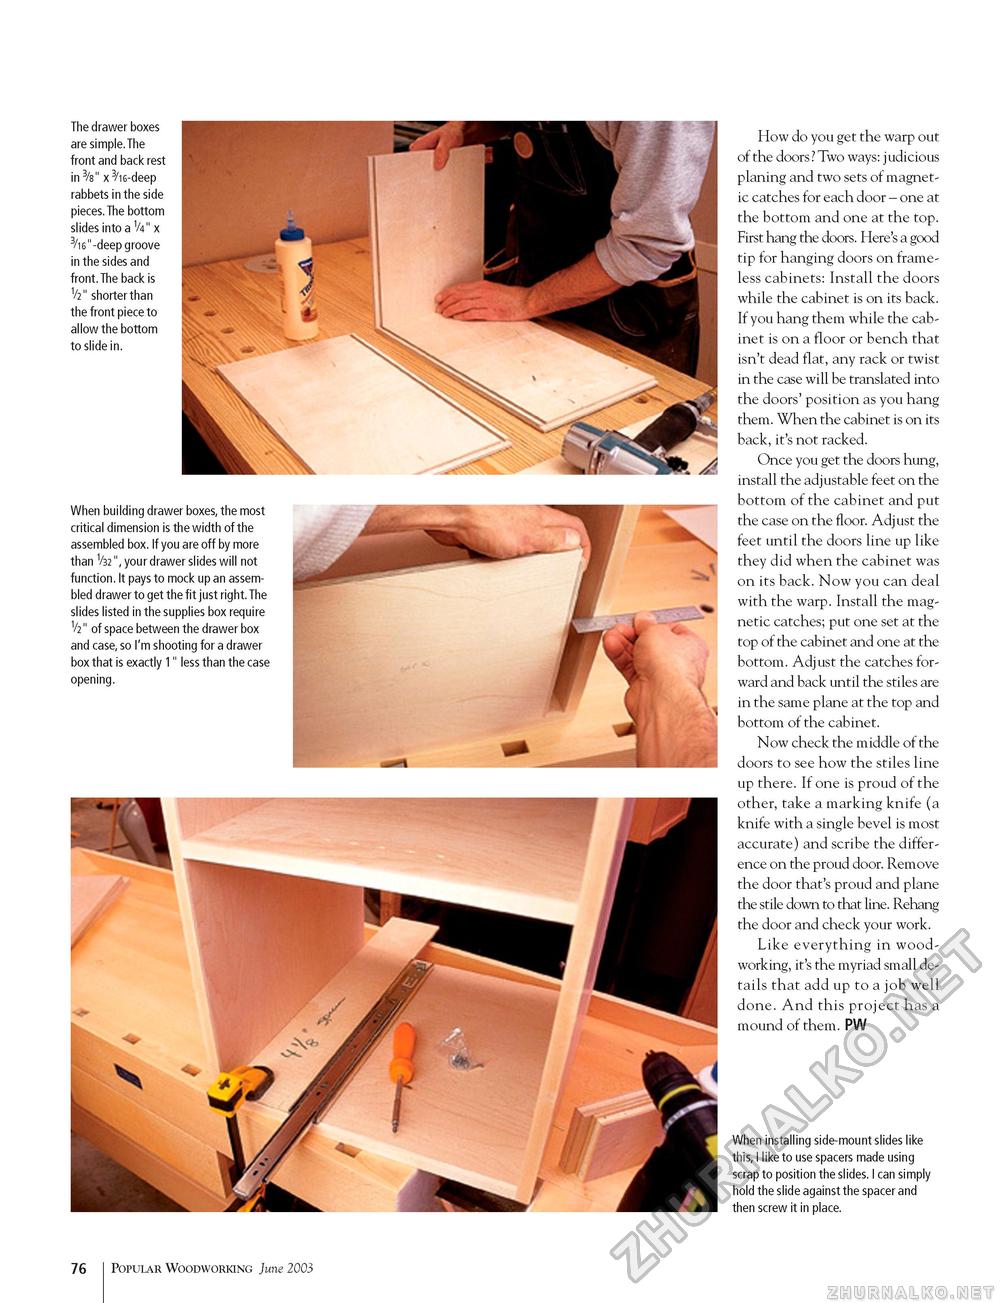
The drawer boxes are simple.The front and back rest in 3/8" x 3/K-deep rabbets in the side pieces. The bottom slides into a V4" x ^"-deep groove in the sides and front. The back is V2" shorter than the front piece to allow the bottom to slide in. When building drawer boxes, the most critical dimension is the width of the assembled box. If you are off by more than V32",your drawer slides will not function. It pays to mock up an assembled drawer to get the fit just right. The slides listed in the supplies box require V2" of space between the drawer box and case, so I'm shooting for a drawer box that is exactly V less than the case opening. How do you get the warp out of the doors? Two ways: judicious planing and two sets of magnetic catches for each door - one at the bottom and one at the top. First hang the doors. Here's a good tip for hanging doors on frame-less cabinets: Install the doors while the cabinet is on its back. If you hang them while the cabinet is on a floor or bench that isn't dead flat, any rack or twist in the case will be translated into the doors' position as you hang them. When the cabinet is on its back, it's not racked. Once you get the doors hung, install the adjustable feet on the bottom of the cabinet and put the case on the floor. Adjust the feet until the doors line up like they did when the cabinet was on its back. Now you can deal with the warp. Install the magnetic catches; put one set at the top of the cabinet and one at the bottom. Adjust the catches forward and back until the stiles are in the same plane at the top and bottom of the cabinet. Now check the middle of the doors to see how the stiles line up there. If one is proud of the other, take a marking knife (a knife with a single bevel is most accurate) and scribe the difference on the proud door. Remove the door that's proud and plane the stile down to that line. Rehang the door and check your work. Like everything in woodworking, it's the myriad small details that add up to a job well done. And this project has a mound of them. PW When installing side-mount slides like this, I like to use spacers made using scrap to position the slides. I can simply hold the slide against the spacer and then screw it in place. 76 Popular Woodworking June 2003 |


