Popular Woodworking 2003-08 № 135, страница 28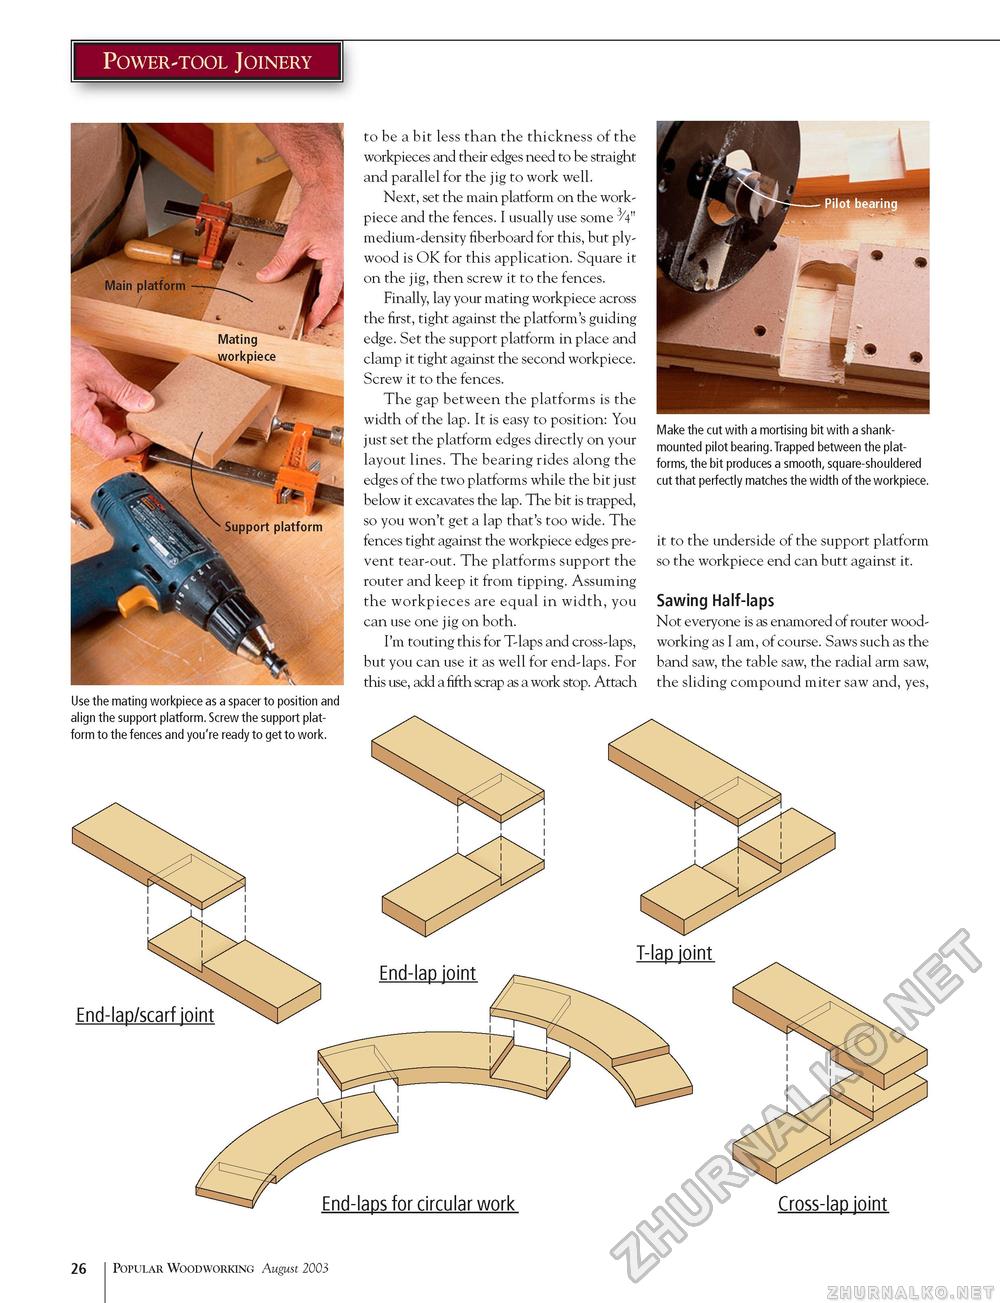
Power-tool Joinery to be a bit less than the thickness of the workpieces and their edges need to be straight and parallel for the jig to work well. Next, set the main platform on the work-piece and the fences. I usually use some ^V" medium-density fiberboard for this, but plywood is OK for this application. Square it on the jig, then screw it to the fences. Finally, lay your mating workpiece across the first, tight against the platform's guiding edge. Set the support platform in place and clamp it tight against the second workpiece. Screw it to the fences. The gap between the platforms is the width of the lap. It is easy to position: You just set the platform edges directly on your layout lines. The bearing rides along the edges of the two platforms while the bit just below it excavates the lap. The bit is trapped, so you won't get a lap that's too wide. The fences tight against the workpiece edges prevent tear-out. The platforms support the router and keep it from tipping. Assuming the workpieces are equal in width, you can use one jig on both. I'm touting this for T-laps and cross-laps, but you can use it as well for end-laps. For this use, add a fifth scrap as a work stop. Attach Make the cut with a mortising bit with a shank-mounted pilot bearing.Trapped between the platforms, the bit produces a smooth, square-shouldered cut that perfectly matches the width of the workpiece. it to the underside of the support platform so the workpiece end can butt against it. Sawing Half-laps Not everyone is as enamored of router woodworking as I am, of course. Saws such as the band saw, the table saw, the radial arm saw, the sliding compound miter saw and, yes, Use the mating workpiece as a spacer to position and align the support platform. Screw the support platform to the fences and you're ready to get to work. End-lap/scarf joint End-laps for circular work Cross-lap joint 26 Popular Woodworking August 2003 |


