Popular Woodworking 2003-08 № 135, страница 31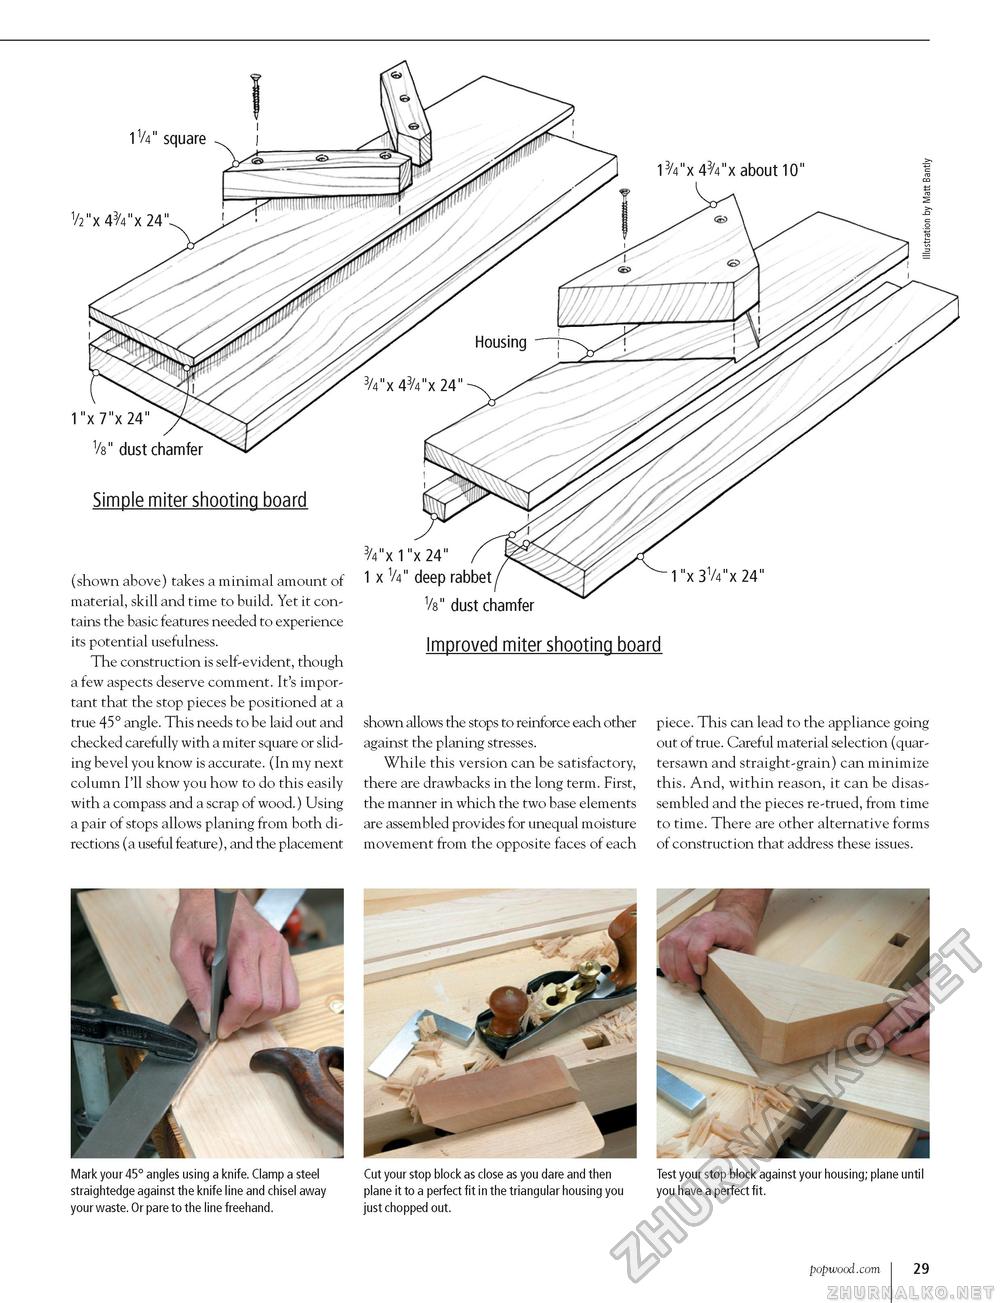
1V4" square 1/2"x 43/4"x 24" 1"x 7"x 24" 3" dust chamfer Simple miter shooting board (shown above) takes a minimal amount of material, skill and time to build. Yet it contains the basic features needed to experience its potential usefulness. The construction is self-evident, though a few aspects deserve comment. It's important that the stop pieces be positioned at a true 45° angle. This needs to be laid out and checked carefully with a miter square or sliding bevel you know is accurate. (In my next column I'll show you how to do this easily with a compass and a scrap of wood.) Using a pair of stops allows planing from both directions (a useful feature), and the placement 3/4"x 1"x 24" 1 x V4" deep rabbet Vs" dust chamfer 1"x 3V4"x 24" Improved miter shooting board shown allows the stops to reinforce each other against the planing stresses. While this version can be satisfactory, there are drawbacks in the long term. First, the manner in which the two base elements are assembled provides for unequal moisture movement from the opposite faces of each piece. This can lead to the appliance going out of true. Careful material selection (quar-tersawn and straight-grain) can minimize this. And, within reason, it can be disassembled and the pieces re-trued, from time to time. There are other alternative forms of construction that address these issues. Mark your 45° angles using a knife. Clamp a steel Cut your stop block as close as you dare and then Test your stop block against your housing; plane until straightedge against the knife line and chisel away plane it to a perfect fit in the triangular housing you you have a perfect fit. your waste. Or pare to the line freehand. just chopped out. www.popwood.com 29 |


