Popular Woodworking 2003-08 № 135, страница 29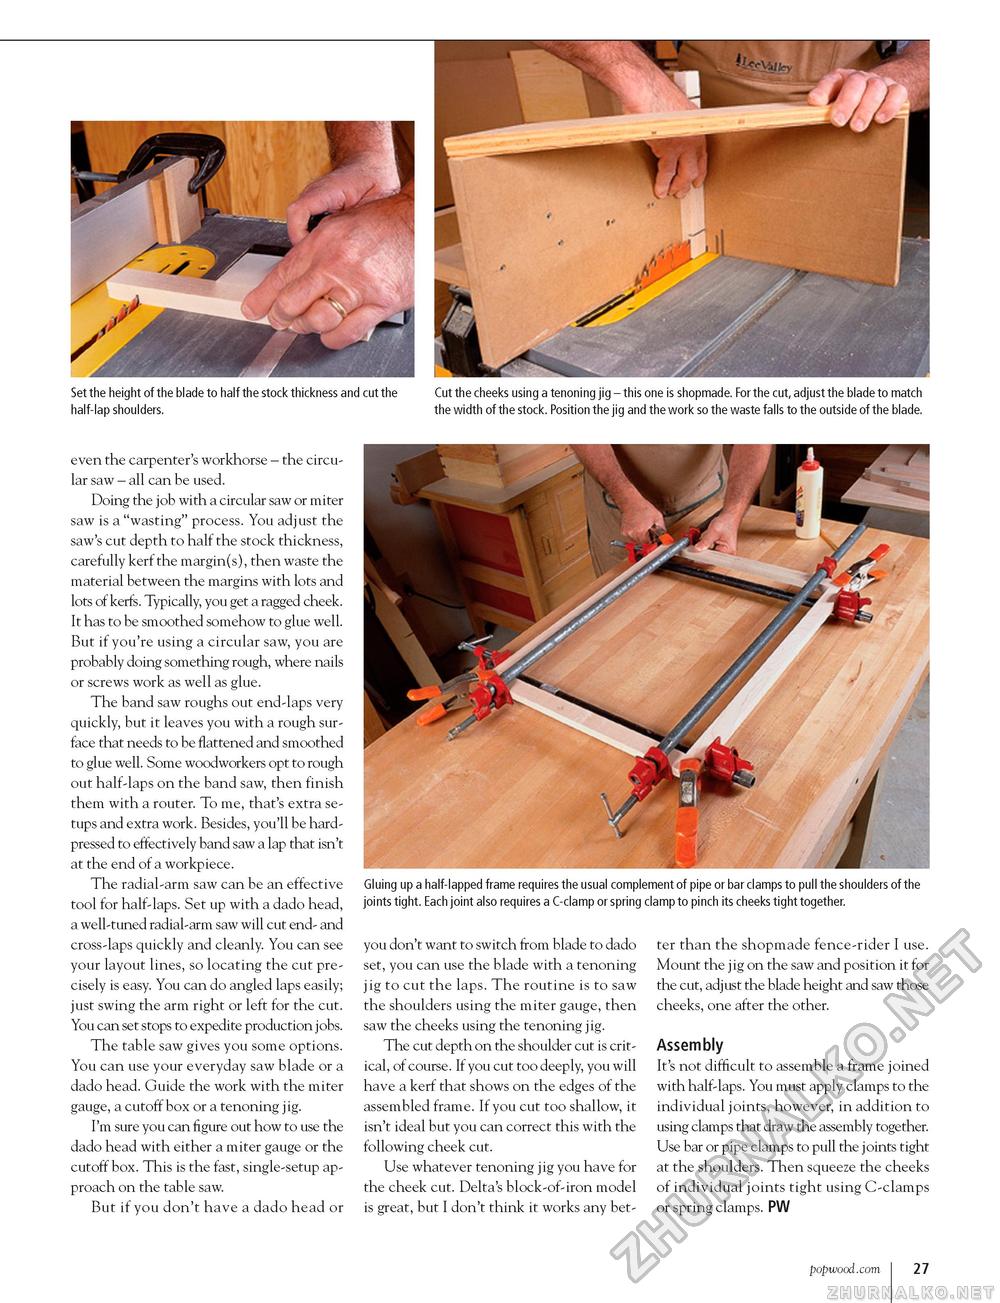
Set the height of the blade to half the stock thickness and cut the half-lap shoulders. Cut the cheeks using a tenoning jig - this one is shopmade. For the cut, adjust the blade to match the width of the stock.Position the jig and the work so the waste falls to the outside of the blade. even the carpenter's workhorse - the circular saw - all can be used. Doing the job with a circular saw or miter saw is a "wasting" process. You adjust the saw's cut depth to half the stock thickness, carefully kerf the margin(s), then waste the material between the margins with lots and lots of kerfs. Typically, you get a ragged cheek. It has to be smoothed somehow to glue well. But if you're using a circular saw, you are probably doing something rough, where nails or screws work as well as glue. The band saw roughs out end-laps very quickly, but it leaves you with a rough surface that needs to be flattened and smoothed to glue well. Some woodworkers opt to rough out half-laps on the band saw, then finish them with a router. To me, that's extra setups and extra work. Besides, you'll be hard-pressed to effectively band saw a lap that isn't at the end of a workpiece. The radial-arm saw can be an effective tool for half-laps. Set up with a dado head, a well-tuned radial-arm saw will cut end- and cross-laps quickly and cleanly. You can see your layout lines, so locating the cut precisely is easy. You can do angled laps easily; just swing the arm right or left for the cut. You can set stops to expedite production jobs. The table saw gives you some options. You can use your everyday saw blade or a dado head. Guide the work with the miter gauge, a cutoff box or a tenoning jig. I'm sure you can figure out how to use the dado head with either a miter gauge or the cutoff box. This is the fast, single-setup approach on the table saw. But if you don't have a dado head or Gluing up a half-lapped frame requires the usual complement of pipe or bar clamps to pull the shoulders of the joints tight. Each joint also requires a C-clamp or spring clamp to pinch its cheeks tight together. you don't want to switch from blade to dado set, you can use the blade with a tenoning jig to cut the laps. The routine is to saw the shoulders using the miter gauge, then saw the cheeks using the tenoning jig. The cut depth on the shoulder cut is critical, of course. If you cut too deeply, you will have a kerf that shows on the edges of the assembled frame. If you cut too shallow, it isn't ideal but you can correct this with the following cheek cut. Use whatever tenoning jig you have for the cheek cut. Delta's block-of-iron model is great, but I don't think it works any bet ter than the shopmade fence-rider I use. Mount the jig on the saw and position it for the cut, adjust the blade height and saw those cheeks, one after the other. Assembly It's not difficult to assemble a frame joined with half-laps. You must apply clamps to the individual joints, however, in addition to using clamps that draw the assembly together. Use bar or pipe clamps to pull the joints tight at the shoulders. Then squeeze the cheeks of individual joints tight using C-clamps or spring clamps. PW www.popwood.com 27 |


