Popular Woodworking 2003-08 № 135, страница 39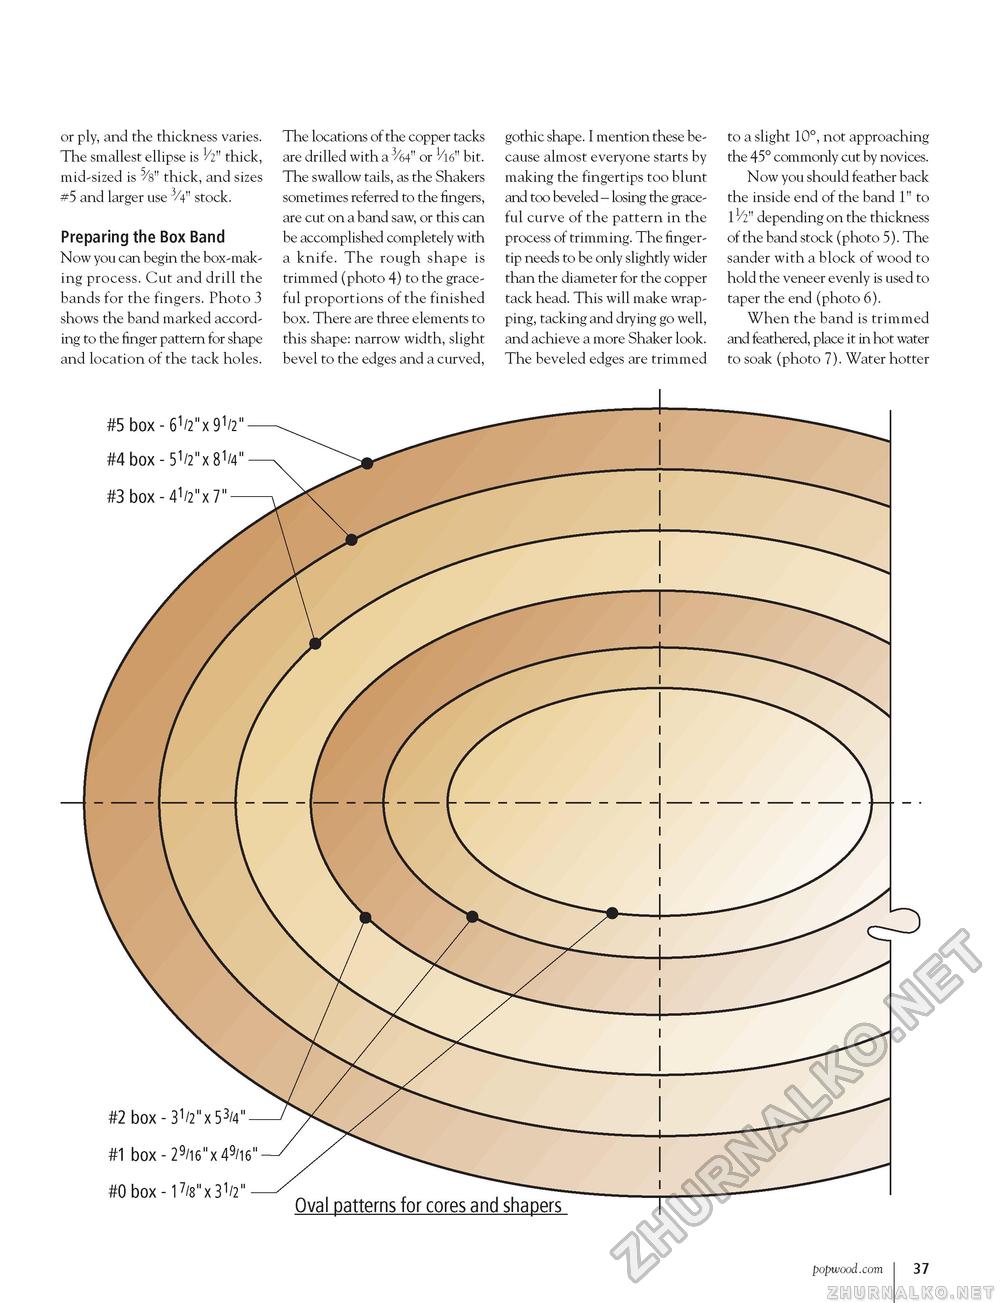
or ply, and the thickness varies. The smallest ellipse is V2" thick, mid-sized is ^s" thick, and sizes #5 and larger use 3/4" stock. Preparing the Box Band Now you can begin the box-making process. Cut and drill the bands for the fingers. Photo 3 shows the band marked according to the finger pattern for shape and location of the tack holes. The locations of the copper tacks are drilled with a 3/64" or 1/16" bit. The swallow tails, as the Shakers sometimes referred to the fingers, are cut on a band saw, or this can be accomplished completely with a knife. The rough shape is trimmed (photo 4) to the graceful proportions of the finished box. There are three elements to this shape: narrow width, slight bevel to the edges and a curved, gothic shape. I mention these because almost everyone starts by making the fingertips too blunt and too beveled - losing the graceful curve of the pattern in the process of trimming. The fingertip needs to be only slightly wider than the diameter for the copper tack head. This will make wrapping, tacking and drying go well, and achieve a more Shaker look. The beveled edges are trimmed to a slight 10°, not approaching the 45° commonly cut by novices. Now you should feather back the inside end of the band 1" to 1/2" depending on the thickness of the band stock (photo 5). The sander with a block of wood to hold the veneer evenly is used to taper the end (photo 6). When the band is trimmed and feathered, place it in hot water to soak (photo 7). Water hotter #5 box - 61/2"x 91/2" #4 box - 51/2"x 8V #3 box - 41/2"x 7"
Oval patterns for cores and shapers www.popwood.com 37 |


