Popular Woodworking 2003-08 № 135, страница 41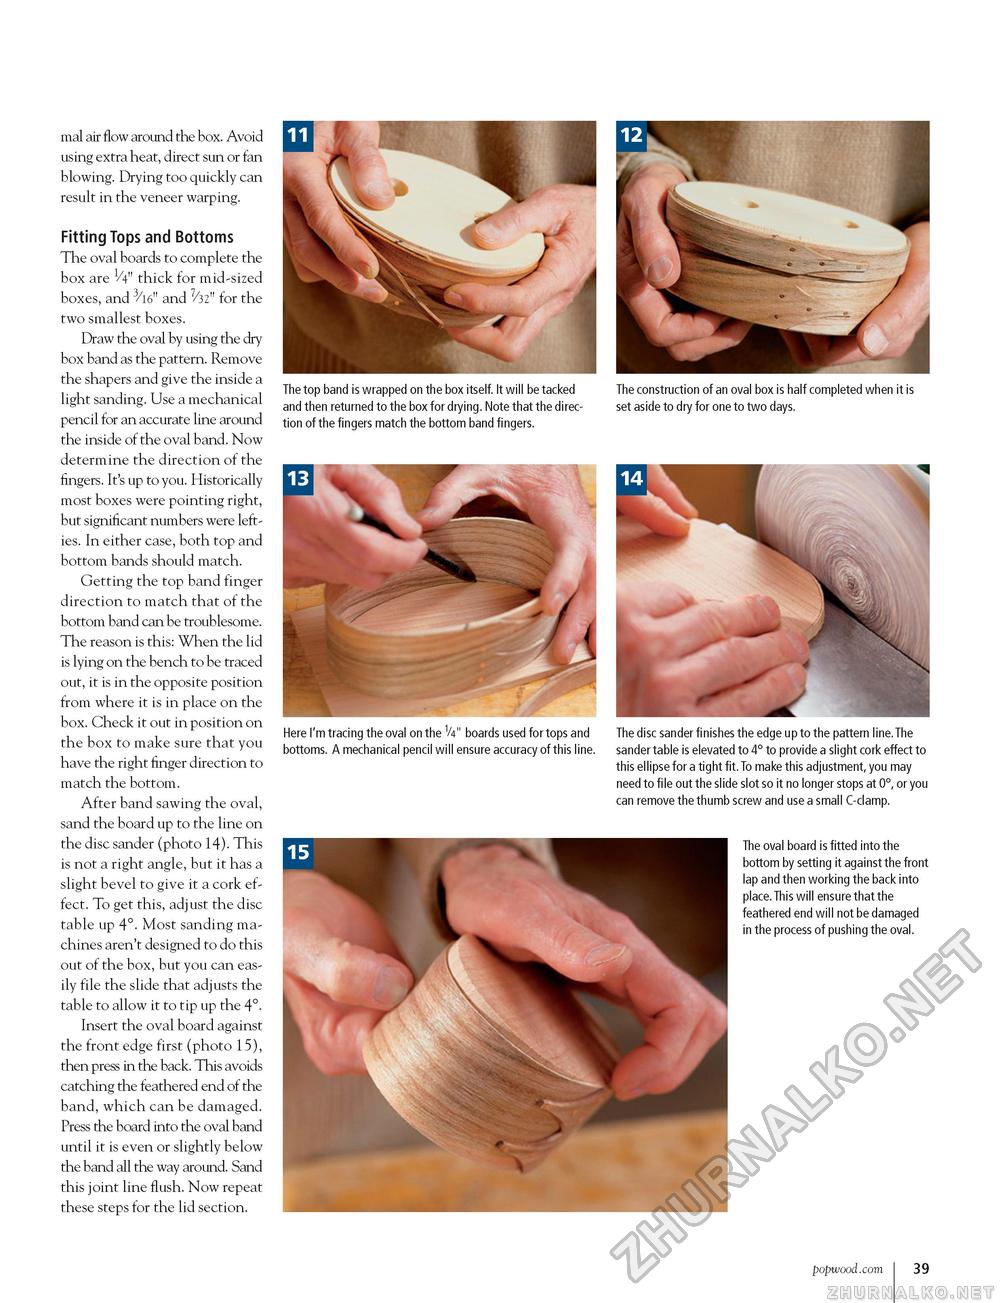
mal air flow around the box. Avoid using extra heat, direct sun or fan blowing. Drying too quickly can result in the veneer warping. Fitting Tops and Bottoms The oval boards to complete the box are 1/4" thick for mid-sized boxes, and 3/16" and 7/32" for the two smallest boxes. Draw the oval by using the dry box band as the pattern. Remove the shapers and give the inside a light sanding. Use a mechanical pencil for an accurate line around the inside of the oval band. Now determine the direction of the fingers. It's up to you. Historically most boxes were pointing right, but significant numbers were lefties. In either case, both top and bottom bands should match. Getting the top band finger direction to match that of the bottom band can be troublesome. The reason is this: When the lid is lying on the bench to be traced out, it is in the opposite position from where it is in place on the box. Check it out in position on the box to make sure that you have the right finger direction to match the bottom. After band sawing the oval, sand the board up to the line on the disc sander (photo 14). This is not a right angle, but it has a slight bevel to give it a cork effect. To get this, adjust the disc table up 4°. Most sanding machines aren't designed to do this out of the box, but you can easily file the slide that adjusts the table to allow it to tip up the 4°. Insert the oval board against the front edge first (photo 15), then press in the back. This avoids catching the feathered end of the band, which can be damaged. Press the board into the oval band until it is even or slightly below the band all the way around. Sand this joint line flush. Now repeat these steps for the lid section. The top band is wrapped on the box itself. It will be tacked The construction of an oval box is half completed when it is and then returned to the box for drying. Note that the direc- set aside to dry for one to two days. tion of the fingers match the bottom band fingers. Here I'm tracing the oval on the V4" boards used for tops and bottoms. A mechanical pencil will ensure accuracy of this line. The disc sander finishes the edge up to the pattern line.The sander table is elevated to 4° to provide a slight cork effect to this ellipse for a tight fit.To make this adjustment, you may need to file out the slide slot so it no longer stops at 0°, or you can remove the thumb screw and use a small C-clamp. The oval board is fitted into the bottom by setting it against the front lap and then working the back into place. This will ensure that the feathered end will not be damaged in the process of pushing the oval. www.popwood.com 39 |


