Popular Woodworking 2003-11 № 137, страница 55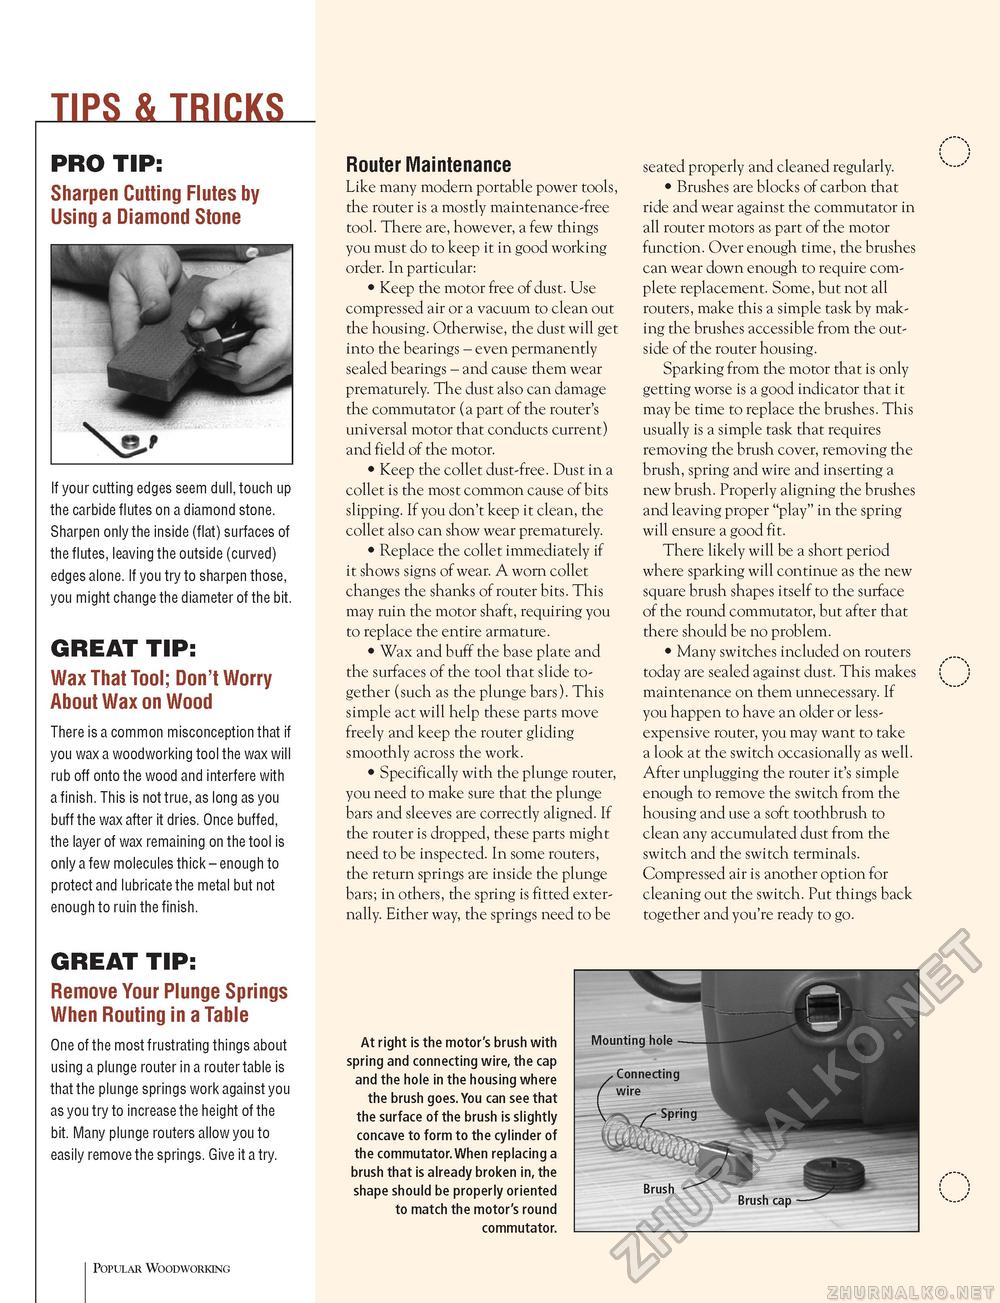
TIPS & TRICKS PRO TIP: Sharpen Cutting Flutes by Using a Diamond Stone If your cutting edges seem dull, touch up the carbide flutes on a diamond stone. Sharpen only the inside (flat) surfaces of the flutes, leaving the outside (curved) edges alone. If you try to sharpen those, you might change the diameter of the bit. GREAT TIP: Wax That Tool; Don't Worry About Wax on Wood There is a common misconception that if you wax a woodworking tool the wax will rub off onto the wood and interfere with a finish. This is not true, as long as you buff the wax after it dries. Once buffed, the layer of wax remaining on the tool is only a few molecules thick - enough to protect and lubricate the metal but not enough to ruin the finish. GREAT TIP: Remove Your Plunge Springs When Routing in a Table One of the most frustrating things about using a plunge router in a router table is that the plunge springs work against you as you try to increase the height of the bit. Many plunge routers allow you to easily remove the springs. Give it a try. Router Maintenance Like many modern portable power tools, the router is a mostly maintenance-free tool. There are, however, a few things you must do to keep it in good working order. In particular: • Keep the motor free of dust. Use compressed air or a vacuum to clean out the housing. Otherwise, the dust will get into the bearings - even permanently sealed bearings - and cause them wear prematurely. The dust also can damage the commutator (a part of the router's universal motor that conducts current) and field of the motor. • Keep the collet dust-free. Dust in a collet is the most common cause of bits slipping. If you don't keep it clean, the collet also can show wear prematurely. • Replace the collet immediately if it shows signs of wear. A worn collet changes the shanks of router bits. This may ruin the motor shaft, requiring you to replace the entire armature. • Wax and buff the base plate and the surfaces of the tool that slide together (such as the plunge bars). This simple act will help these parts move freely and keep the router gliding smoothly across the work. • Specifically with the plunge router, you need to make sure that the plunge bars and sleeves are correctly aligned. If the router is dropped, these parts might need to be inspected. In some routers, the return springs are inside the plunge bars; in others, the spring is fitted externally. Either way, the springs need to be seated properly and cleaned regularly. • Brushes are blocks of carbon that ride and wear against the commutator in all router motors as part of the motor function. Over enough time, the brushes can wear down enough to require complete replacement. Some, but not all routers, make this a simple task by making the brushes accessible from the outside of the router housing. Sparking from the motor that is only getting worse is a good indicator that it may be time to replace the brushes. This usually is a simple task that requires removing the brush cover, removing the brush, spring and wire and inserting a new brush. Properly aligning the brushes and leaving proper "play" in the spring will ensure a good fit. There likely will be a short period where sparking will continue as the new square brush shapes itself to the surface of the round commutator, but after that there should be no problem. • Many switches included on routers today are sealed against dust. This makes maintenance on them unnecessary. If you happen to have an older or less-expensive router, you may want to take a look at the switch occasionally as well. After unplugging the router it's simple enough to remove the switch from the housing and use a soft toothbrush to clean any accumulated dust from the switch and the switch terminals. Compressed air is another option for cleaning out the switch. Put things back together and you're ready to go. At right is the motor's brush with spring and connecting wire, the cap and the hole in the housing where the brush goes. You can see that the surface of the brush is slightly concave to form to the cylinder of the commutator.When replacing a brush that is already broken in, the shape should be properly oriented to match the motor's round commutator. Popular Woodworking |


