Popular Woodworking 2003-11 № 137, страница 59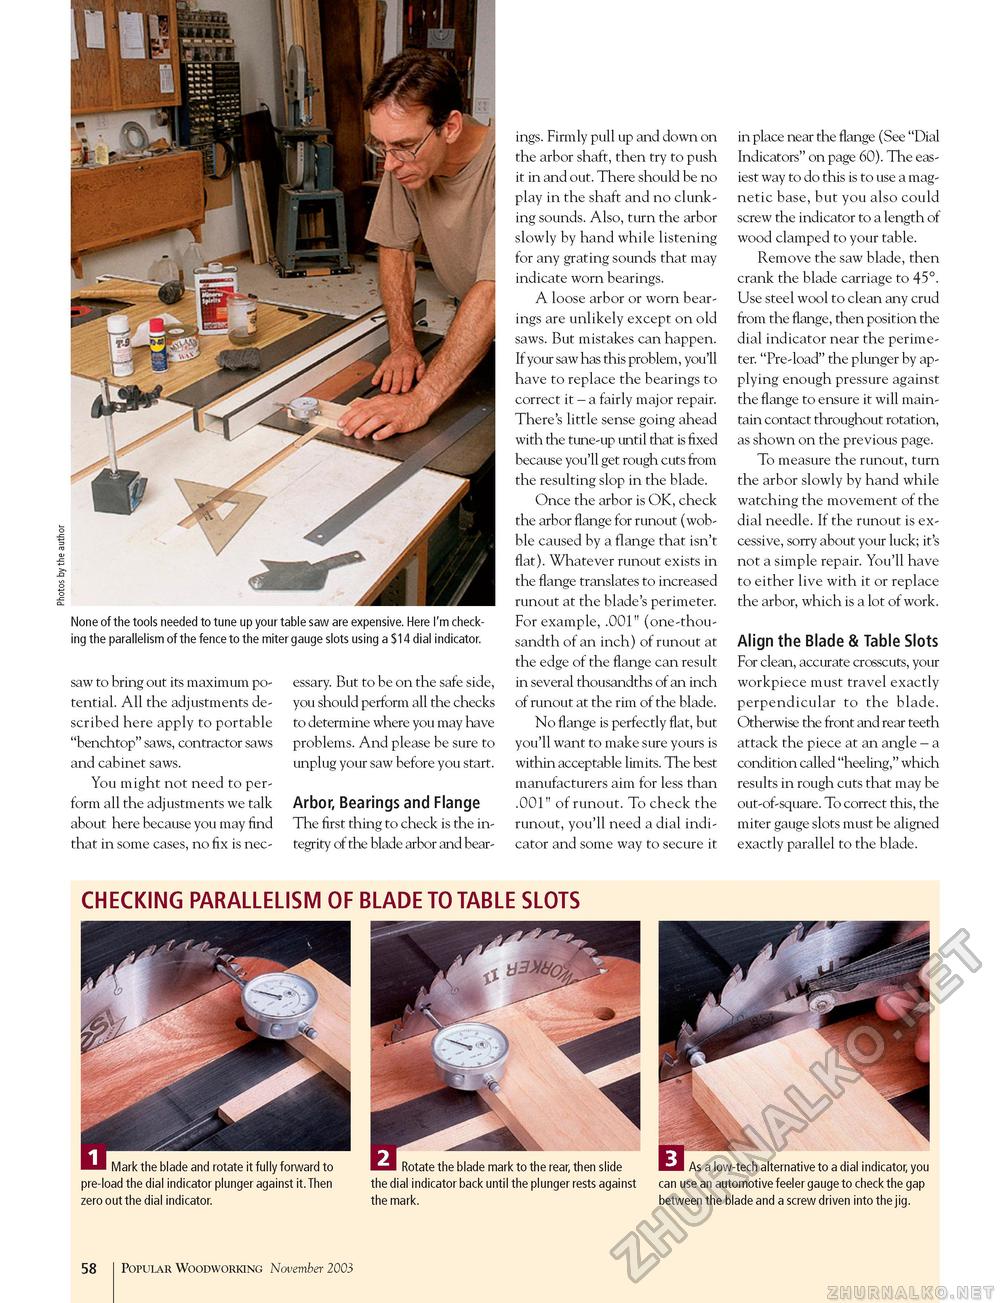
None of the tools needed to tune up your table saw are expensive. Here I'm checking the parallelism of the fence to the miter gauge slots using a $14 dial indicator. saw to bring out its maximum potential. All the adjustments described here apply to portable "benchtop" saws, contractor saws and cabinet saws. You might not need to perform all the adjustments we talk about here because you may find that in some cases, no fix is nec essary. But to be on the safe side, you should perform all the checks to determine where you may have problems. And please be sure to unplug your saw before you start. Arbor, Bearings and Flange The first thing to check is the integrity of the blade arbor and bear ings. Firmly pull up and down on the arbor shaft, then try to push it in and out. There should be no play in the shaft and no clunking sounds. Also, turn the arbor slowly by hand while listening for any grating sounds that may indicate worn bearings. A loose arbor or worn bearings are unlikely except on old saws. But mistakes can happen. If your saw has this problem, you'll have to replace the bearings to correct it - a fairly major repair. There's little sense going ahead with the tune-up until that is fixed because you'll get rough cuts from the resulting slop in the blade. Once the arbor is OK, check the arbor flange for runout (wobble caused by a flange that isn't flat). Whatever runout exists in the flange translates to increased runout at the blade's perimeter. For example, .001" (one-thousandth of an inch) of runout at the edge of the flange can result in several thousandths of an inch of runout at the rim of the blade. No flange is perfectly flat, but you'll want to make sure yours is within acceptable limits. The best manufacturers aim for less than .001" of runout. To check the runout, you'll need a dial indicator and some way to secure it in place near the flange (See "Dial Indicators" on page 60). The easiest way to do this is to use a magnetic base, but you also could screw the indicator to a length of wood clamped to your table. Remove the saw blade, then crank the blade carriage to 45°. Use steel wool to clean any crud from the flange, then position the dial indicator near the perimeter. "Pre-load" the plunger by applying enough pressure against the flange to ensure it will maintain contact throughout rotation, as shown on the previous page. To measure the runout, turn the arbor slowly by hand while watching the movement of the dial needle. If the runout is excessive, sorry about your luck; it's not a simple repair. You'll have to either live with it or replace the arbor, which is a lot of work. Align the Blade & Table Slots For clean, accurate crosscuts, your workpiece must travel exactly perpendicular to the blade. Otherwise the front and rear teeth attack the piece at an angle - a condition called "heeling," which results in rough cuts that may be out-of-square. To correct this, the miter gauge slots must be aligned exactly parallel to the blade. CHECKING PARALLELISM OF BLADE TO TABLE SLOTS pre-load the dial indicator plunger against it. Then the dial indicator back until the plunger rests against can use an automotive feeler gauge to check the gap zero out the dial indicator. the mark. between the blade and a screw driven into the jig. 58 Popular Woodworking November 2003 |


