Popular Woodworking 2004-02 № 139, страница 69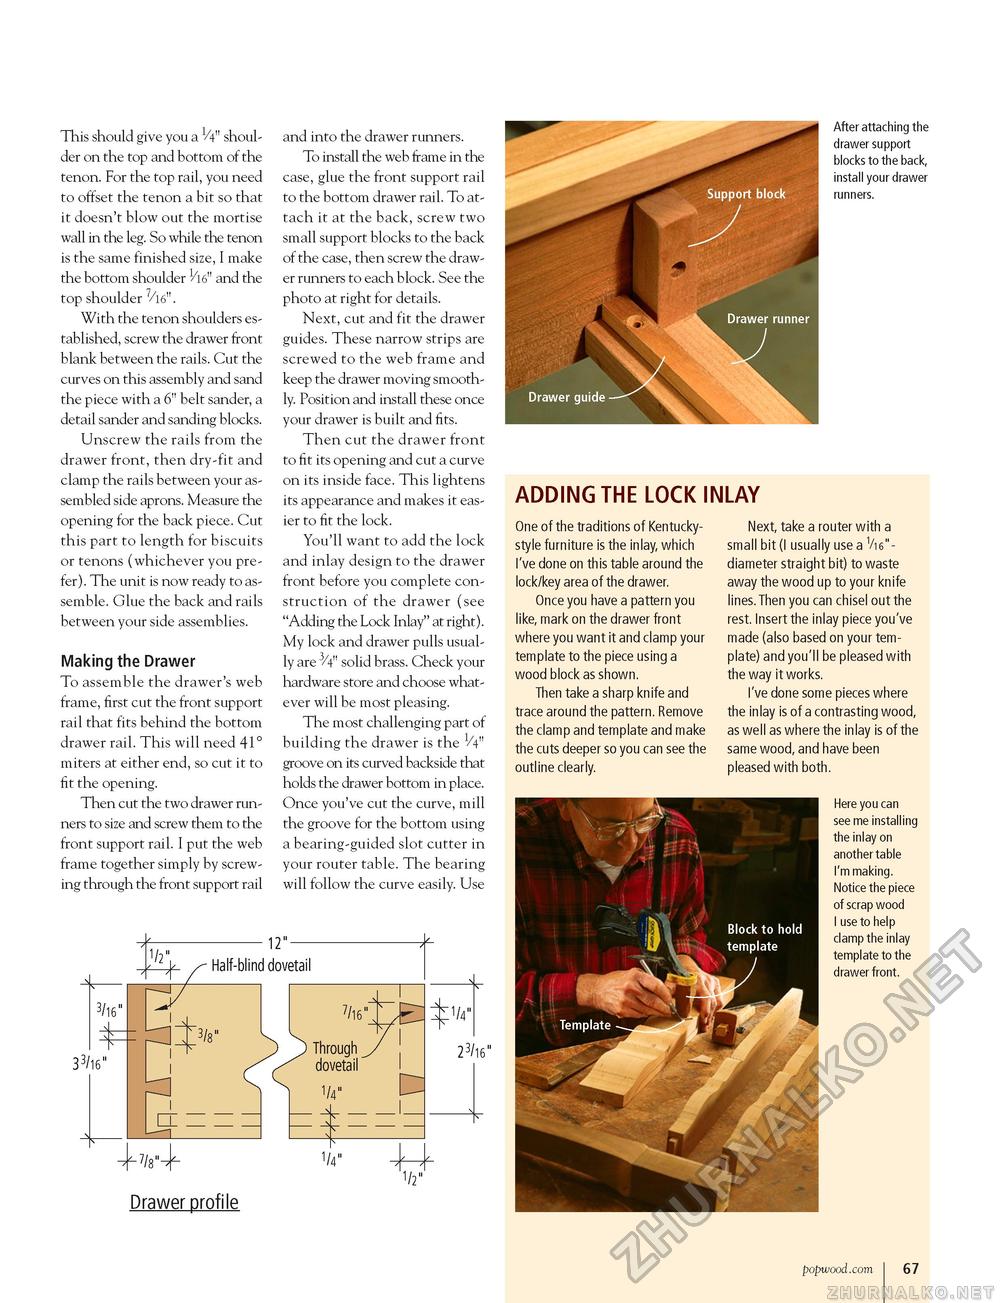
ADDING THE LOCK INLAY This should give you a 1/4" shoulder on the top and bottom of the tenon. For the top rail, you need to offset the tenon a bit so that it doesn't blow out the mortise wall in the leg. So while the tenon is the same finished size, I make the bottom shoulder 1/l6" and the top shoulder 7/l6". With the tenon shoulders established, screw the drawer front blank between the rails. Cut the curves on this assembly and sand the piece with a 6" belt sander, a detail sander and sanding blocks. Unscrew the rails from the drawer front, then dry-fit and clamp the rails between your assembled side aprons. Measure the opening for the back piece. Cut this part to length for biscuits or tenons (whichever you prefer). The unit is now ready to assemble. Glue the back and rails between your side assemblies. Making the Drawer To assemble the drawer's web frame, first cut the front support rail that fits behind the bottom drawer rail. This will need 41° miters at either end, so cut it to fit the opening. Then cut the two drawer runners to size and screw them to the front support rail. I put the web frame together simply by screwing through the front support rail and into the drawer runners. To install the web frame in the case, glue the front support rail to the bottom drawer rail. To attach it at the back, screw two small support blocks to the back of the case, then screw the drawer runners to each block. See the photo at right for details. Next, cut and fit the drawer guides. These narrow strips are screwed to the web frame and keep the drawer moving smoothly. Position and install these once your drawer is built and fits. Then cut the drawer front to fit its opening and cut a curve on its inside face. This lightens its appearance and makes it easier to fit the lock. You'll want to add the lock and inlay design to the drawer front before you complete construction of the drawer (see "Adding the Lock Inlay" at right). My lock and drawer pulls usually are 3/4" solid brass. Check your hardware store and choose whatever will be most pleasing. The most challenging part of building the drawer is the 1/4" groove on its curved backside that holds the drawer bottom in place. Once you've cut the curve, mill the groove for the bottom using a bearing-guided slot cutter in your router table. The bearing will follow the curve easily. Use One of the traditions of Kentucky-style furniture is the inlay, which I've done on this table around the lock/key area of the drawer. Once you have a pattern you like, mark on the drawer front where you want it and clamp your template to the piece using a wood block as shown. Then take a sharp knife and trace around the pattern. Remove the clamp and template and make the cuts deeper so you can see the outline clearly. After attaching the drawer support blocks to the back, install your drawer runners. Next, take a router with a small bit (I usually use a Vi6"-diameter straight bit) to waste away the wood up to your knife lines. Then you can chisel out the rest. Insert the inlay piece you've made (also based on your template) and you'll be pleased with the way it works. I've done some pieces where the inlay is of a contrasting wood, as well as where the inlay is of the same wood, and have been pleased with both. Here you can see me installing the inlay on another table I'm making. Notice the piece of scrap wood I use to help clamp the inlay template to the drawer front. popwood.com 67 |


