Popular Woodworking 2004-02 № 139, страница 71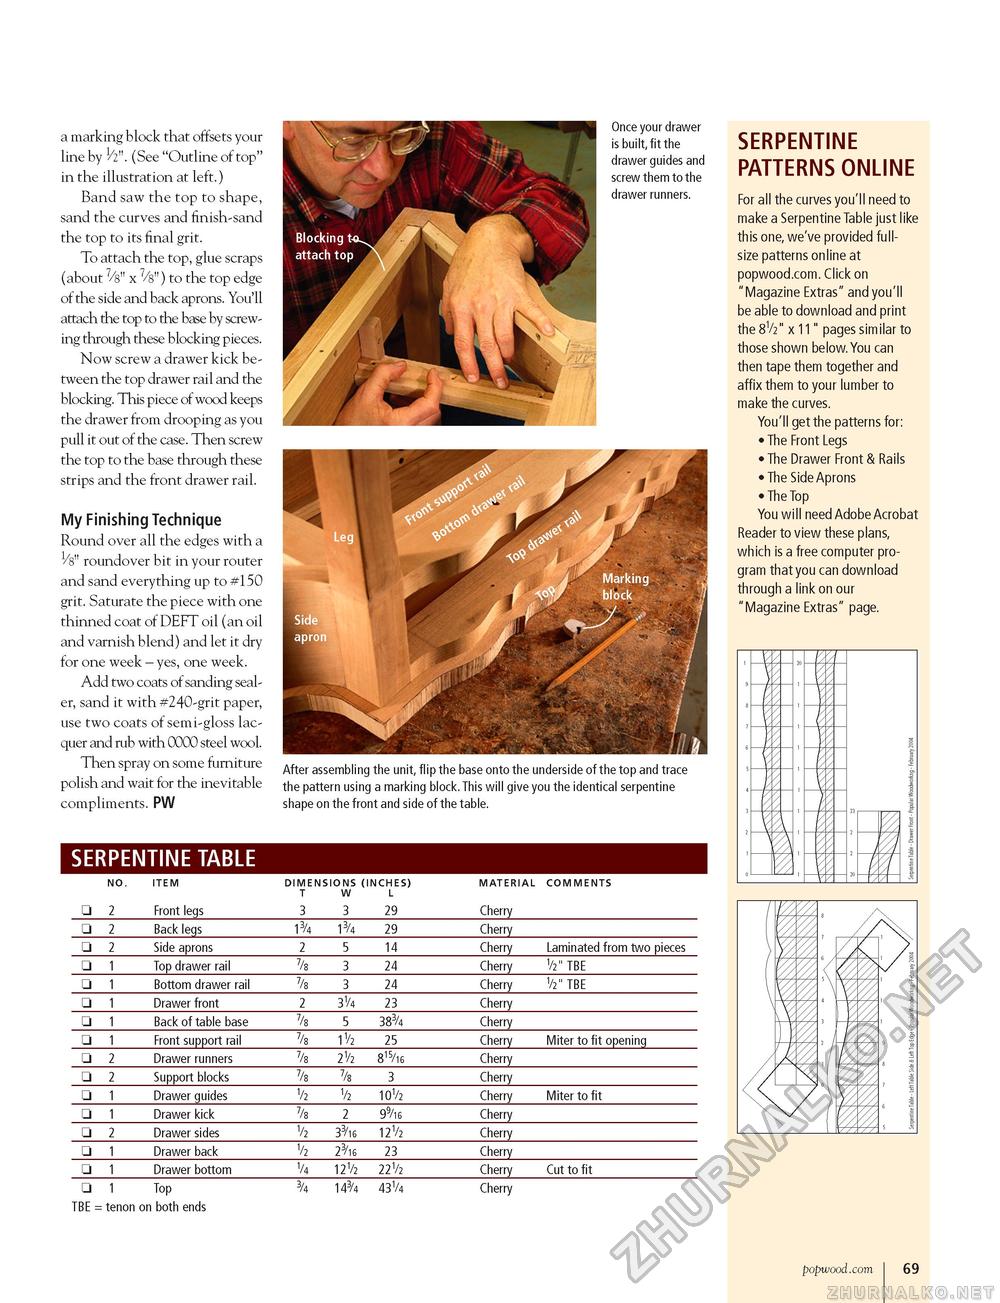
a marking block that offsets your line by V2". (See "Outline of top" in the illustration at left.) Band saw the top to shape, sand the curves and finish-sand the top to its final grit. To attach the top, glue scraps (about 7/8" x 7/8") to the top edge of the side and back aprons. You'll attach the top to the base by screwing through these blocking pieces. Now screw a drawer kick between the top drawer rail and the blocking. This piece of wood keeps the drawer from drooping as you pull it out of the case. Then screw the top to the base through these strips and the front drawer rail. My Finishing Technique Round over all the edges with a 1/8" roundover bit in your router and sand everything up to #150 grit. Saturate the piece with one thinned coat of DEFT oil (an oil and varnish blend) and let it dry for one week - yes, one week. Add two coats of sanding sealer, sand it with #240-grit paper, use two coats of semi-gloss lacquer and rub with 0000 steel wool. Then spray on some furniture polish and wait for the inevitable compliments. PW Once your drawer is built, fit the drawer guides and screw them to the drawer runners. After assembling the unit, flip the base onto the underside of the top and trace the pattern using a marking block. This will give you the identical serpentine shape on the front and side of the table. SERPENTINE TABLE
TBE = tenon on both ends TBE = tenon on both ends SERPENTINE PATTERNS ONLINE For all the curves you'll need to make a Serpentine Table just like this one, we've provided full-size patterns online at popwood.com. Click on "Magazine Extras" and you'll be able to download and print the 8V2" x 11" pages similar to those shown below. You can then tape them together and affix them to your lumber to make the curves. You'll get the patterns for: • The Front Legs • The Drawer Front & Rails • The Side Aprons • The Top You will need Adobe Acrobat Reader to view these plans, which is a free computer program that you can download through a link on our "Magazine Extras" page. popwood.com 69 |
||||||||||||||||||||||||||||||||||||||||||||||||||||||||||||||||||||||||||||||||||||||||||||||||||||||||||||||||||||||||||||||||||||||||


