Popular Woodworking 2004-02 № 139, страница 70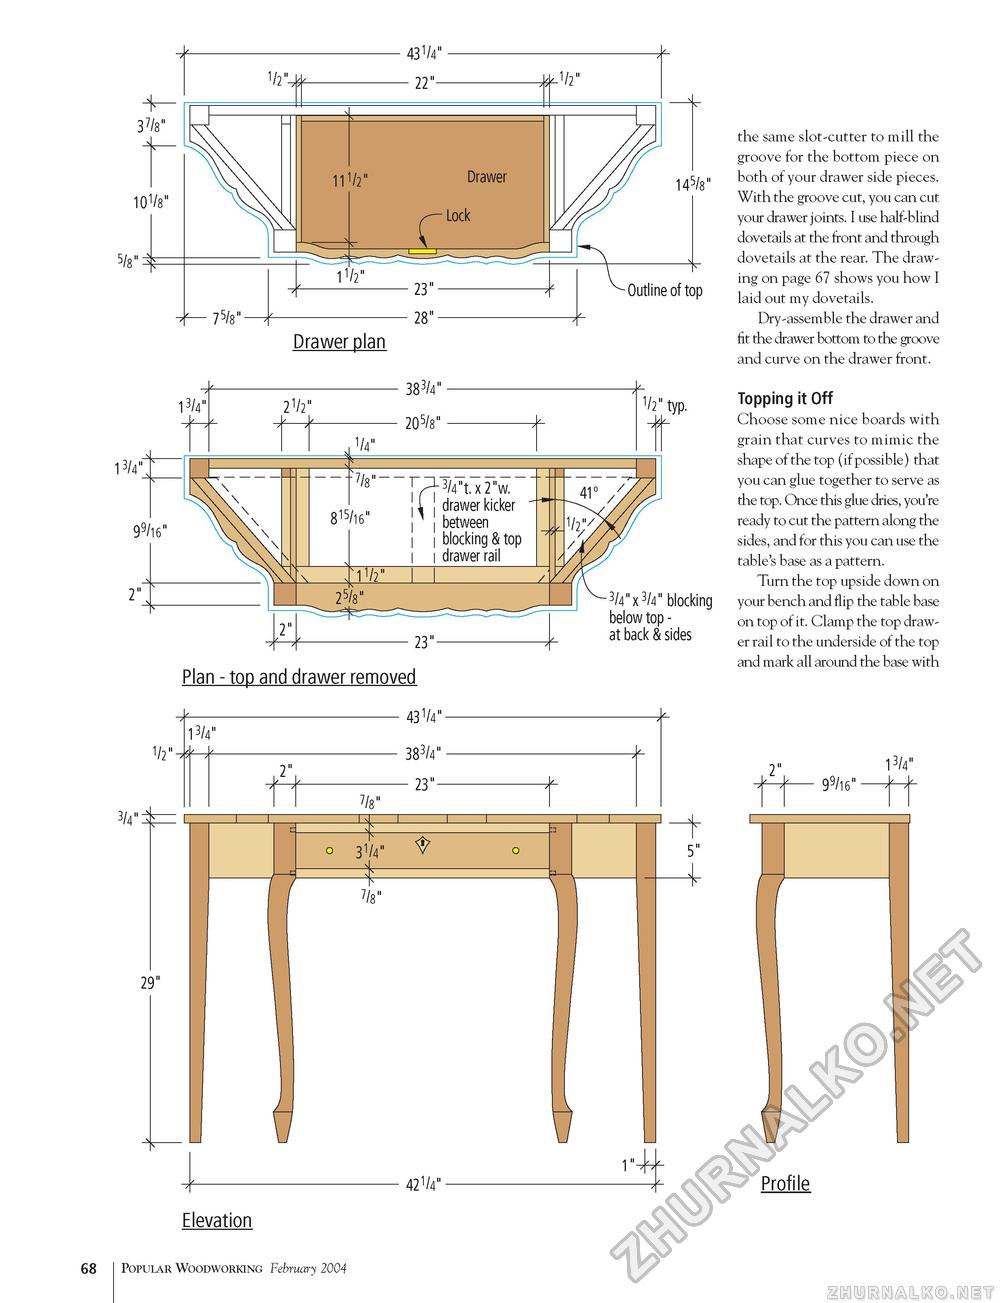
37/8" 5/8"- 145/8" 101/8" Outline of top Drawer plan 13/4" 1/2" typ. 3/4"x 3/4" blocking below top -at back & sides 1/2 2 ~> Plan - top and drawer removed -43V4"- - 383/4" -23"- 3/4"- 13/4" 2" 29" 31/4" U 5" 4 421/4" I the same slot-cutter to mill the groove for the bottom piece on both of your drawer side pieces. With the groove cut, you can cut your drawer joints. I use half-blind dovetails at the front and through dovetails at the rear. The drawing on page 67 shows you how I laid out my dovetails. Dry-assemble the drawer and fit the drawer bottom to the groove and curve on the drawer front. Topping it Off Choose some nice boards with grain that curves to mimic the shape of the top (if possible) that you can glue together to serve as the top. Once this glue dries, you're ready to cut the pattern along the sides, and for this you can use the table's base as a pattern. Turn the top upside down on your bench and flip the table base on top of it. Clamp the top drawer rail to the underside of the top and mark all around the base with 2" 13/4" 99/16" Profile Elevation 68 Popular Woodworking February 2004 |


