Popular Woodworking 2004-06 № 141, страница 44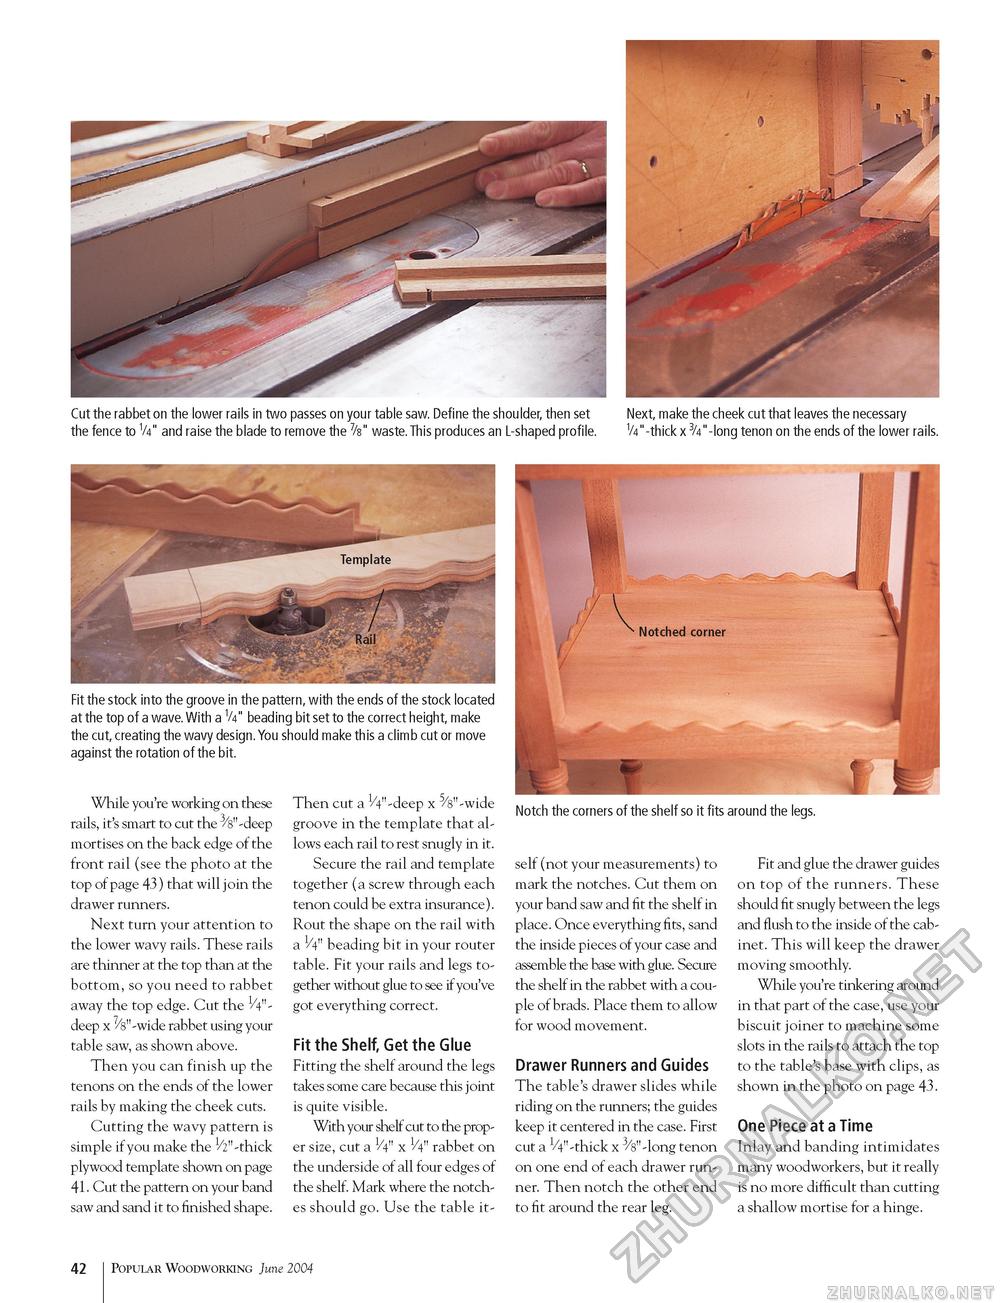
Cut the rabbet on the lower rails in two passes on your table saw. Define the shoulder, then set the fence to V4" and raise the blade to remove the 7/s" waste.This produces an L-shaped profile. Next, make the cheek cut that leaves the necessary 1/4"-thick x 3/4"-long tenon on the ends of the lower rails. Notch the corners of the shelf so it fits around the legs. While you're working on these rails, it's smart to cut the 3/s" -deep mortises on the back edge of the front rail (see the photo at the top of page 43) that will join the drawer runners. Next turn your attention to the lower wavy rails. These rails are thinner at the top than at the bottom, so you need to rabbet away the top edge. Cut the 1/4"-deep x ^"-wide rabbet using your table saw, as shown above. Then you can finish up the tenons on the ends of the lower rails by making the cheek cuts. Cutting the wavy pattern is simple if you make the 1/2"-thick plywood template shown on page 41. Cut the pattern on your band saw and sand it to finished shape. Then cut a 1/4"-deep x 5/s"-wide groove in the template that allows each rail to rest snugly in it. Secure the rail and template together (a screw through each tenon could be extra insurance). Rout the shape on the rail with a V4" beading bit in your router table. Fit your rails and legs together without glue to see if you've got everything correct. Fit the Shelf, Get the Glue Fitting the shelf around the legs takes some care because this joint is quite visible. With your shelf cut to the proper size, cut a 1/4" x 1/4" rabbet on the underside of all four edges of the shelf. Mark where the notches should go. Use the table it self (not your measurements) to mark the notches. Cut them on your band saw and fit the shelf in place. Once everything fits, sand the inside pieces of your case and assemble the base with glue. Secure the shelf in the rabbet with a couple of brads. Place them to allow for wood movement. Drawer Runners and Guides The table's drawer slides while riding on the runners; the guides keep it centered in the case. First cut a 1/4"-thick x 3/s"-long tenon on one end of each drawer runner. Then notch the other end to fit around the rear leg. Fit and glue the drawer guides on top of the runners. These should fit snugly between the legs and flush to the inside of the cabinet. This will keep the drawer moving smoothly. While you're tinkering around in that part of the case, use your biscuit joiner to machine some slots in the rails to attach the top to the table's base with clips, as shown in the photo on page 43. One Piece at a Time Inlay and banding intimidates many woodworkers, but it really is no more difficult than cutting a shallow mortise for a hinge. 42 Popular Woodworking June 2004 |


