Popular Woodworking 2004-06 № 141, страница 46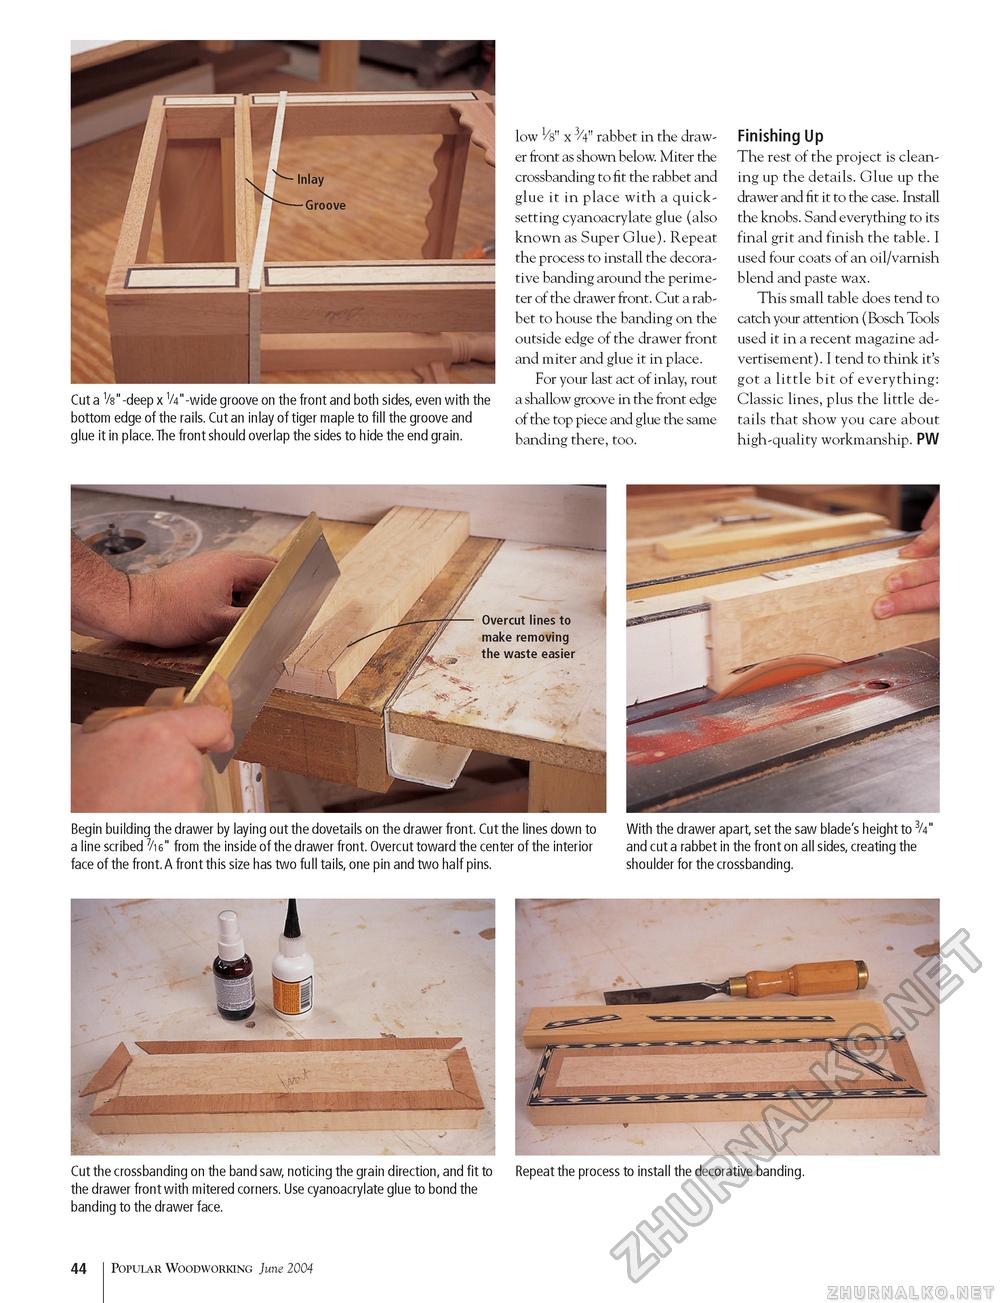
Cut a Vs"-deep x V4"-wide groove on the front and both sides, even with the bottom edge of the rails. Cut an inlay of tiger maple to fill the groove and glue it in place. The front should overlap the sides to hide the end grain. low 1/8" x 3/4" rabbet in the drawer front as shown below. Miter the crossbanding to fit the rabbet and glue it in place with a quick-setting cyanoacrylate glue (also known as Super Glue). Repeat the process to install the decorative banding around the perimeter of the drawer front. Cut a rabbet to house the banding on the outside edge of the drawer front and miter and glue it in place. For your last act of inlay, rout a shallow groove in the front edge of the top piece and glue the same banding there, too. Finishing Up The rest of the project is cleaning up the details. Glue up the drawer and fit it to the case. Install the knobs. Sand everything to its final grit and finish the table. I used four coats of an oil/varnish blend and paste wax. This small table does tend to catch your attention (Bosch Tools used it in a recent magazine advertisement). I tend to think it's got a little bit of everything: Classic lines, plus the little details that show you care about high-quality workmanship. PW Begin building the drawer by laying out the dovetails on the drawer front. Cut the lines down to With the drawer apart, set the saw blade's height to 3/4" a line scribed 7/16" from the inside of the drawer front. Overcut toward the center of the interior and cut a rabbet in the front on all sides, creating the face of the front.A front this size has two full tails, one pin and two half pins. shoulder for the crossbanding. Cut the crossbanding on the band saw, noticing the grain direction, and fit to Repeat the process to install the decorative banding. the drawer front with mitered corners. Use cyanoacrylate glue to bond the banding to the drawer face. 44 Popular Woodworking June 2004 |


