Popular Woodworking 2004-06 № 141, страница 85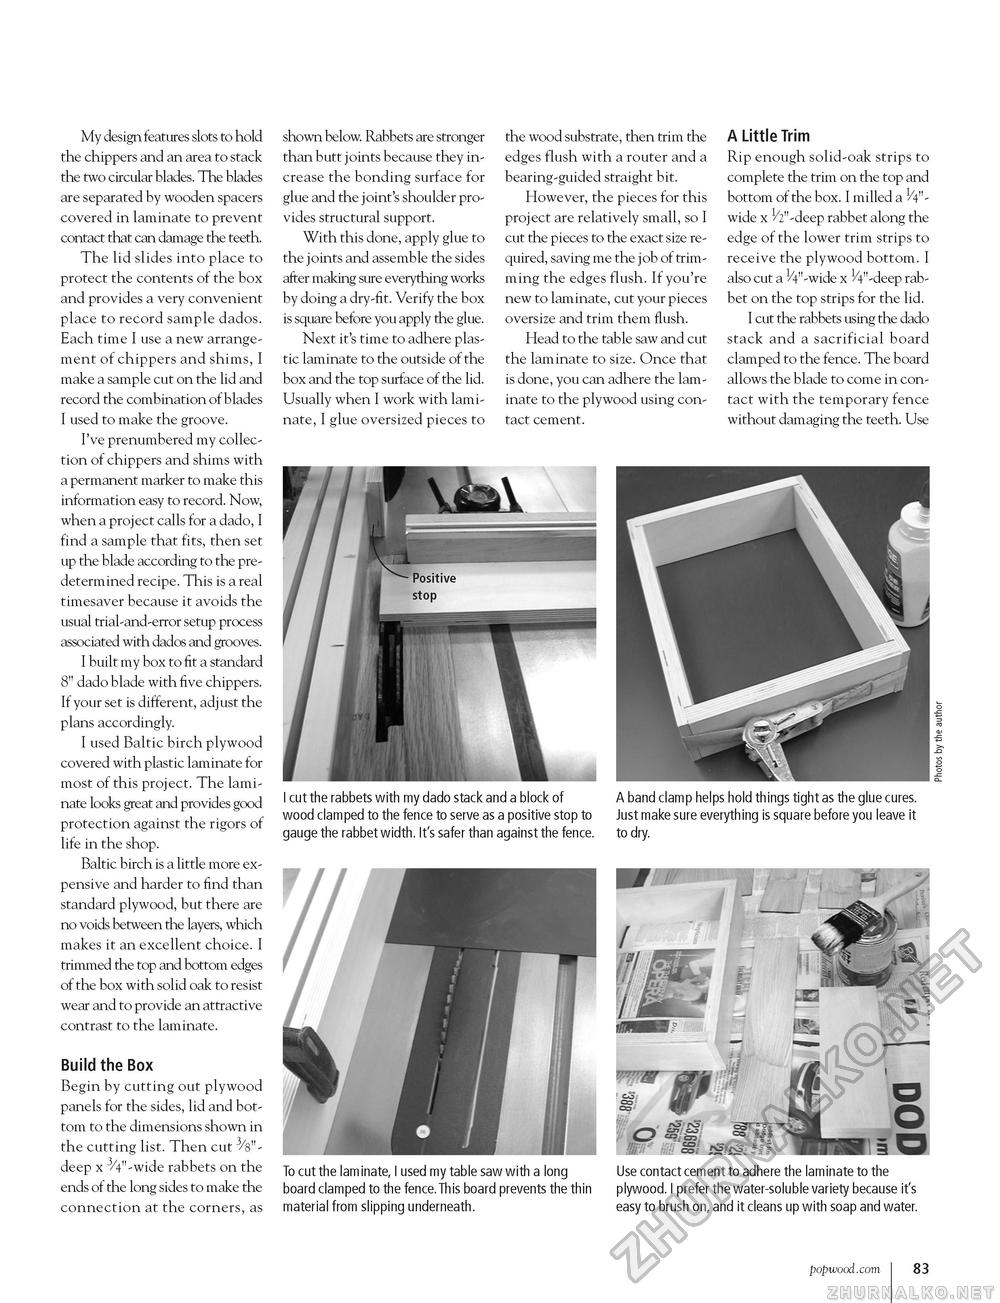
My design features slots to hold the chippers and an area to stack the two circular blades. The blades are separated by wooden spacers covered in laminate to prevent contact that can damage the teeth. The lid slides into place to protect the contents of the box and provides a very convenient place to record sample dados. Each time I use a new arrangement of chippers and shims, I make a sample cut on the lid and record the combination of blades I used to make the groove. I've prenumbered my collection of chippers and shims with a permanent marker to make this information easy to record. Now, when a project calls for a dado, I find a sample that fits, then set up the blade according to the predetermined recipe. This is a real timesaver because it avoids the usual trial-and-error setup process associated with dados and grooves. I built my box to fit a standard 8" dado blade with five chippers. If your set is different, adjust the plans accordingly. I used Baltic birch plywood covered with plastic laminate for most of this project. The laminate looks great and provides good protection against the rigors of life in the shop. Baltic birch is a little more expensive and harder to find than standard plywood, but there are no voids between the layers, which makes it an excellent choice. I trimmed the top and bottom edges of the box with solid oak to resist wear and to provide an attractive contrast to the laminate. Build the Box Begin by cutting out plywood panels for the sides, lid and bottom to the dimensions shown in the cutting list. Then cut 3/s"-deep x 3/4"-wide rabbets on the ends of the long sides to make the connection at the corners, as shown below. Rabbets are stronger than butt joints because they increase the bonding surface for glue and the joint's shoulder provides structural support. With this done, apply glue to the joints and assemble the sides after making sure everything works by doing a dry-fit. Verify the box is square before you apply the glue. Next it's time to adhere plastic laminate to the outside of the box and the top surface of the lid. Usually when I work with laminate, I glue oversized pieces to the wood substrate, then trim the edges flush with a router and a bearing-guided straight bit. However, the pieces for this project are relatively small, so I cut the pieces to the exact size required, saving me the job of trimming the edges flush. If you're new to laminate, cut your pieces oversize and trim them flush. Head to the table saw and cut the laminate to size. Once that is done, you can adhere the laminate to the plywood using contact cement. A Little Trim Rip enough solid-oak strips to complete the trim on the top and bottom of the box. I milled a 1/4"-wide x V2"-deep rabbet along the edge of the lower trim strips to receive the plywood bottom. I also cut a 1/4"-wide x 1/4"-deep rabbet on the top strips for the lid. I cut the rabbets using the dado stack and a sacrificial board clamped to the fence. The board allows the blade to come in contact with the temporary fence without damaging the teeth. Use I cut the rabbets with my dado stack and a block of A band clamp helps hold things tight as the glue cures. wood clamped to the fence to serve as a positive stop to Just make sure everything is square before you leave it gauge the rabbet width. It's safer than against the fence. to dry. To cut the laminate, I used my table saw with a long Use contact cement to adhere the laminate to the board clamped to the fence.This board prevents the thin plywood. I prefer the water-soluble variety because it's material from slipping underneath. easy to brush on, and it cleans up with soap and water. popwood.com 83 |


