Popular Woodworking 2004-06 № 141, страница 86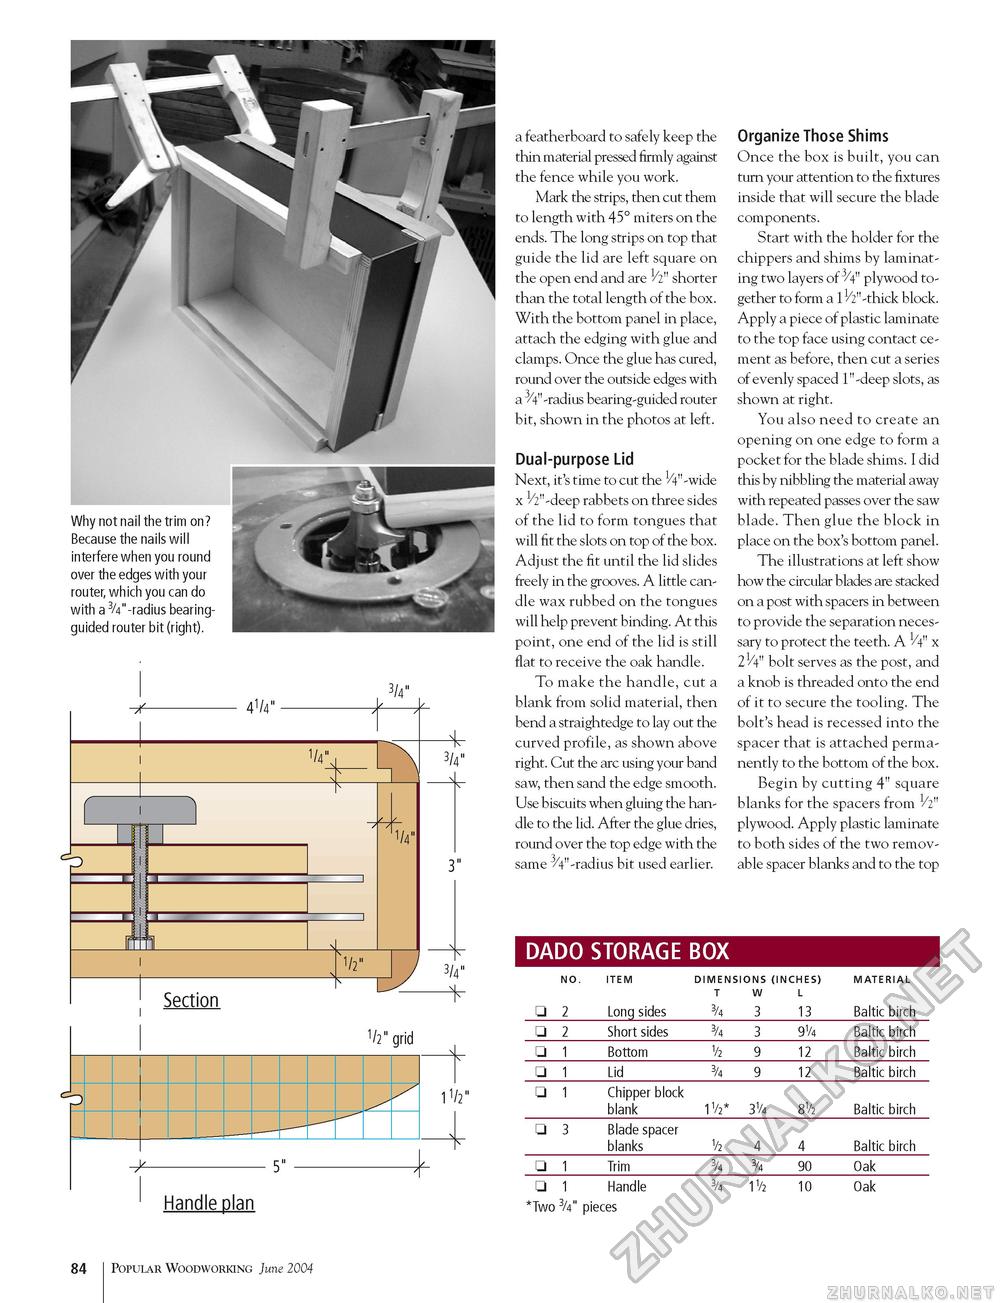
Why not nail the trim on? Because the nails will interfere when you round over the edges with your router,which you can do with a 3/4"-radius bearing-guided router bit (right). a featherboard to safely keep the thin material pressed firmly against the fence while you work. Mark the strips, then cut them to length with 45° miters on the ends. The long strips on top that guide the lid are left square on the open end and are V2" shorter than the total length of the box. With the bottom panel in place, attach the edging with glue and clamps. Once the glue has cured, round over the outside edges with a ^"-radius bearing-guided router bit, shown in the photos at left. Dual-purpose Lid Next, it's time to cut the ty'-wide x 1/2"-deep rabbets on three sides of the lid to form tongues that will fit the slots on top of the box. Adjust the fit until the lid slides freely in the grooves. A little candle wax rubbed on the tongues will help prevent binding. At this point, one end of the lid is still flat to receive the oak handle. To make the handle, cut a blank from solid material, then bend a straightedge to lay out the curved profile, as shown above right. Cut the arc using your band saw, then sand the edge smooth. Use biscuits when gluing the handle to the lid. After the glue dries, round over the top edge with the same ^"-radius bit used earlier. Organize Those Shims Once the box is built, you can turn your attention to the fixtures inside that will secure the blade components. Start with the holder for the chippers and shims by laminating two layers of 3/4" plywood together to form a 11/2"-thick block. Apply a piece of plastic laminate to the top face using contact cement as before, then cut a series of evenly spaced 1"-deep slots, as shown at right. You also need to create an opening on one edge to form a pocket for the blade shims. I did this by nibbling the material away with repeated passes over the saw blade. Then glue the block in place on the box's bottom panel. The illustrations at left show how the circular blades are stacked on a post with spacers in between to provide the separation necessary to protect the teeth. A V4" x 21/4" bolt serves as the post, and a knob is threaded onto the end of it to secure the tooling. The bolt's head is recessed into the spacer that is attached permanently to the bottom of the box. Begin by cutting 4" square blanks for the spacers from 1/2n plywood. Apply plastic laminate to both sides of the two removable spacer blanks and to the top DADO STORAGE BOX Handle plan
84 Popular Woodworking June 2004 |
||||||||||||||||||||||||||||||||||||||||||||||||||||||||||||


