Popular Woodworking 2004-08 № 142, страница 65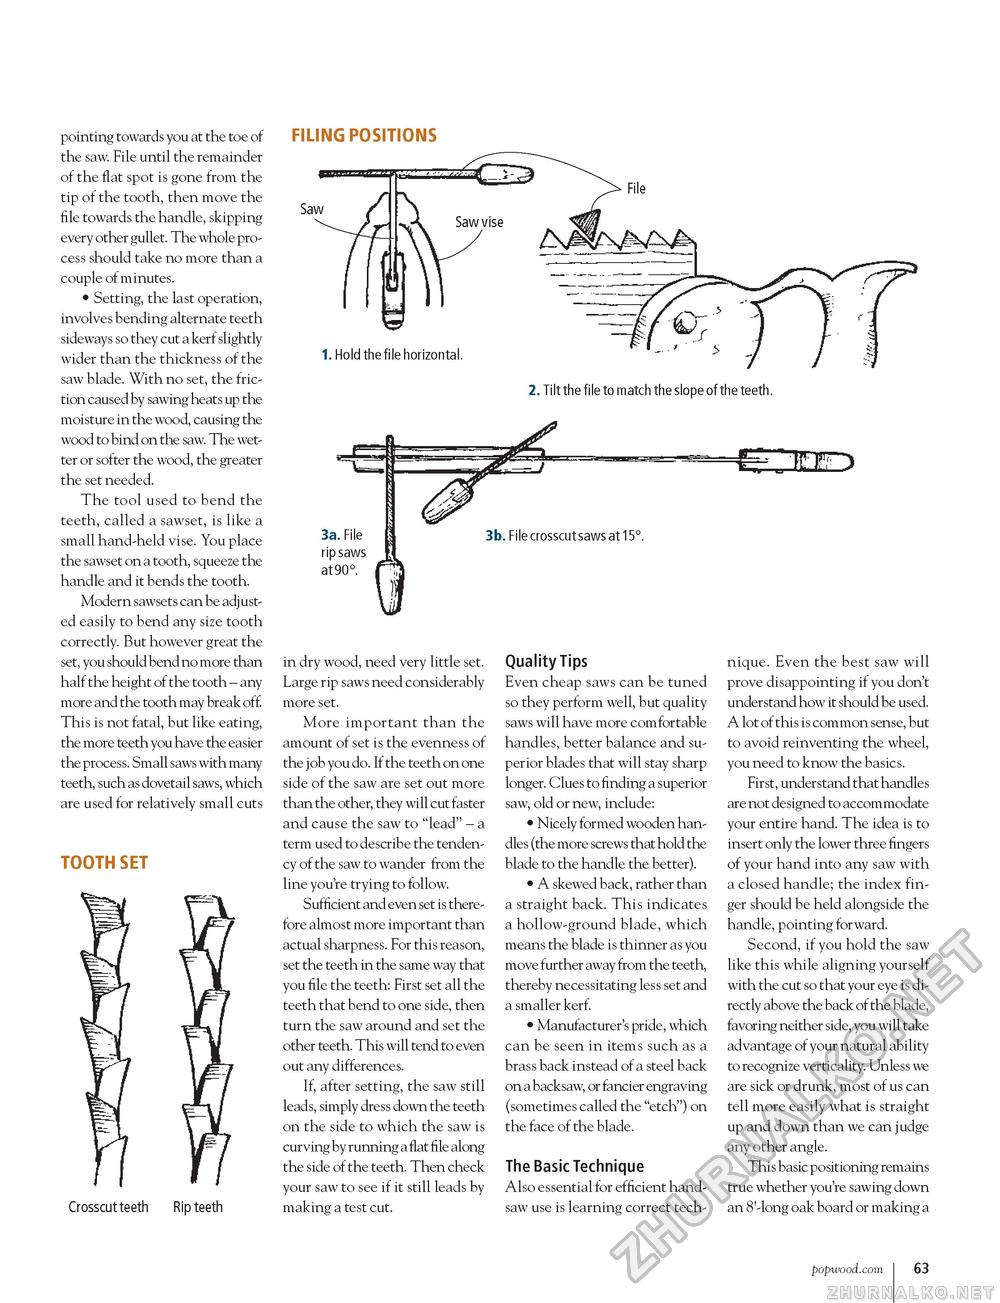
pointing towards you at the toe of the saw. File until the remainder of the flat spot is gone from the tip of the tooth, then move the file towards the handle, skipping every other gullet. The whole process should take no more than a couple of minutes. • Setting, the last operation, involves bending alternate teeth sideways so they cut a kerf slightly wider than the thickness of the saw blade. With no set, the friction caused by sawing heats up the moisture in the wood, causing the wood to bind on the saw. The wetter or softer the wood, the greater the set needed. The tool used to bend the teeth, called a sawset, is like a small hand-held vise. You place the sawset on a tooth, squeeze the handle and it bends the tooth. Modern sawsets can be adjusted easily to bend any size tooth correctly. But however great the set, you should bend no more than half the height of the tooth - any more and the tooth may break off. This is not fatal, but like eating, the more teeth you have the easier the process. Small saws with many teeth, such as dovetail saws, which are used for relatively small cuts TOOTH SET FILING POSITIONS Saw / 1. Hold the file horizontal 2. Tilt the file to match the slope of the teeth. 3a. File rip saws at 90° 3b. File crosscut saws at 15°. Crosscut teeth Rip teeth in dry wood, need very little set. Large rip saws need considerably more set. More important than the amount of set is the evenness of the job you do. If the teeth on one side of the saw are set out more than the other, they will cut faster and cause the saw to "lead" - a term used to describe the tendency of the saw to wander from the line you're trying to follow. Sufficient and even set is therefore almost more important than actual sharpness. For this reason, set the teeth in the same way that you file the teeth: First set all the teeth that bend to one side, then turn the saw around and set the other teeth. This will tend to even out any differences. If, after setting, the saw still leads, simply dress down the teeth on the side to which the saw is curving by running a flat file along the side of the teeth. Then check your saw to see if it still leads by making a test cut. UDO Quality Tips Even cheap saws can be tuned so they perform well, but quality saws will have more comfortable handles, better balance and superior blades that will stay sharp longer. Clues to finding a superior saw, old or new, include: • Nicely formed wooden handles (the more screws that hold the blade to the handle the better). • A skewed back, rather than a straight back. This indicates a hollow-ground blade, which means the blade is thinner as you move further away from the teeth, thereby necessitating less set and a smaller kerf. • Manufacturer's pride, which can be seen in items such as a brass back instead of a steel back on a backsaw, or fancier engraving (sometimes called the "etch") on the face of the blade. The Basic Technique Also essential for efficient handsaw use is learning correct tech- nique. Even the best saw will prove disappointing if you don't understand how it should be used. A lot of this is common sense, but to avoid reinventing the wheel, you need to know the basics. First, understand that handles are not designed to accommodate your entire hand. The idea is to insert only the lower three fingers of your hand into any saw with a closed handle; the index finger should be held alongside the handle, pointing forward. Second, if you hold the saw like this while aligning yourself with the cut so that your eye is directly above the back of the blade, favoring neither side, you will take advantage of your natural ability to recognize verticality. Unless we are sick or drunk, most of us can tell more easily what is straight up and down than we can judge any other angle. This basic positioning remains true whether you're sawing down an 8'-long oak board or making a popwood.com 63 |


