Popular Woodworking 2004-08 № 142, страница 66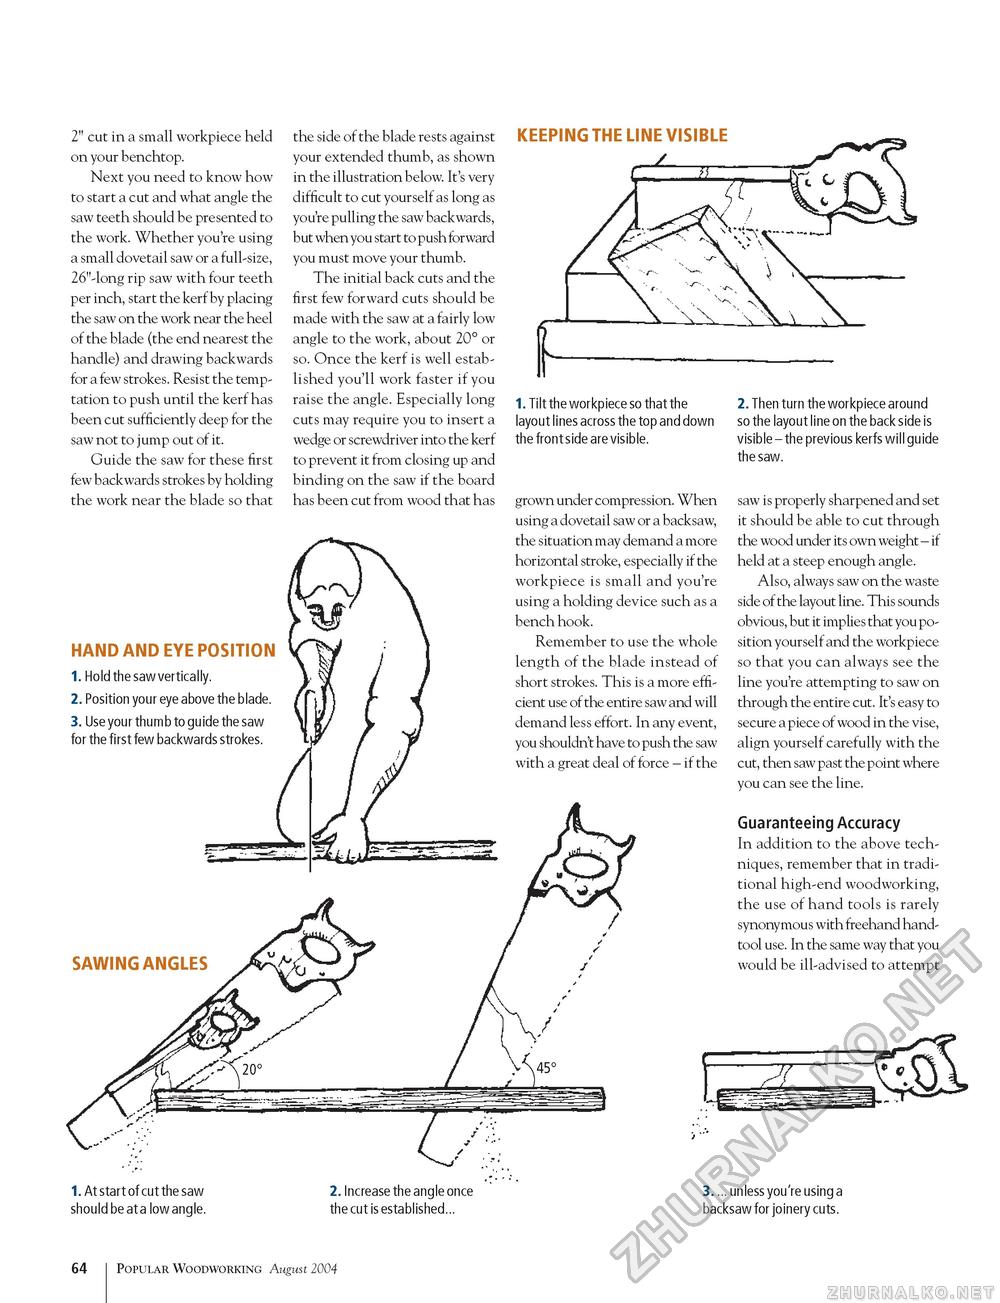
2" cut in a small workpiece held on your benchtop. Next you need to know how to start a cut and what angle the saw teeth should be presented to the work. Whether you're using a small dovetail saw or a full-size, 26"-long rip saw with four teeth per inch, start the kerf by placing the saw on the work near the heel of the blade (the end nearest the handle) and drawing backwards for a few strokes. Resist the temptation to push until the kerf has been cut sufficiently deep for the saw not to jump out of it. Guide the saw for these first few backwards strokes by holding the work near the blade so that the side of the blade rests against your extended thumb, as shown in the illustration below. It's very difficult to cut yourself as long as you're pulling the saw backwards, but when you start to push forward you must move your thumb. The initial back cuts and the first few forward cuts should be made with the saw at a fairly low angle to the work, about 20° or so. Once the kerf is well established you'll work faster if you raise the angle. Especially long cuts may require you to insert a wedge or screwdriver into the kerf to prevent it from closing up and binding on the saw if the board has been cut from wood that has KEEPING THE LINE VISIBLE HAND AND EYE POSITION 1. Hold the saw vertically 2. Position your eye above the blade 3. Use your thumb to guide the saw for the first few backwards strokes. 1. Tilt the workpiece so that the layout lines across the top and down the front side are visible. grown under compression. When using a dovetail saw or a backsaw, the situation may demand a more horizontal stroke, especially if the workpiece is small and you're using a holding device such as a bench hook. Remember to use the whole length of the blade instead of short strokes. This is a more efficient use of the entire saw and will demand less effort. In any event, you shouldn't have to push the saw with a great deal of force - if the SAWING ANGLES 2. Then turn the workpiece around so the layout line on the back side is visible - the previous kerfs will guide the saw. saw is properly sharpened and set it should be able to cut through the wood under its own weight - if held at a steep enough angle. Also, always saw on the waste side of the layout line. This sounds obvious, but it implies that you position yourself and the workpiece so that you can always see the line you're attempting to saw on through the entire cut. It's easy to secure a piece of wood in the vise, align yourself carefully with the cut, then saw past the point where you can see the line. Guaranteeing Accuracy In addition to the above techniques, remember that in traditional high-end woodworking, the use of hand tools is rarely synonymous with freehand hand-tool use. In the same way that you would be ill-advised to attempt 1. At start of cut the saw should be at a low angle. 2. Increase the angle once the cut is established... 3. ... unless you're using a backsaw for joinery cuts. 64 Popular Woodworking August 2004 |


