Popular Woodworking 2004-10 № 143, страница 36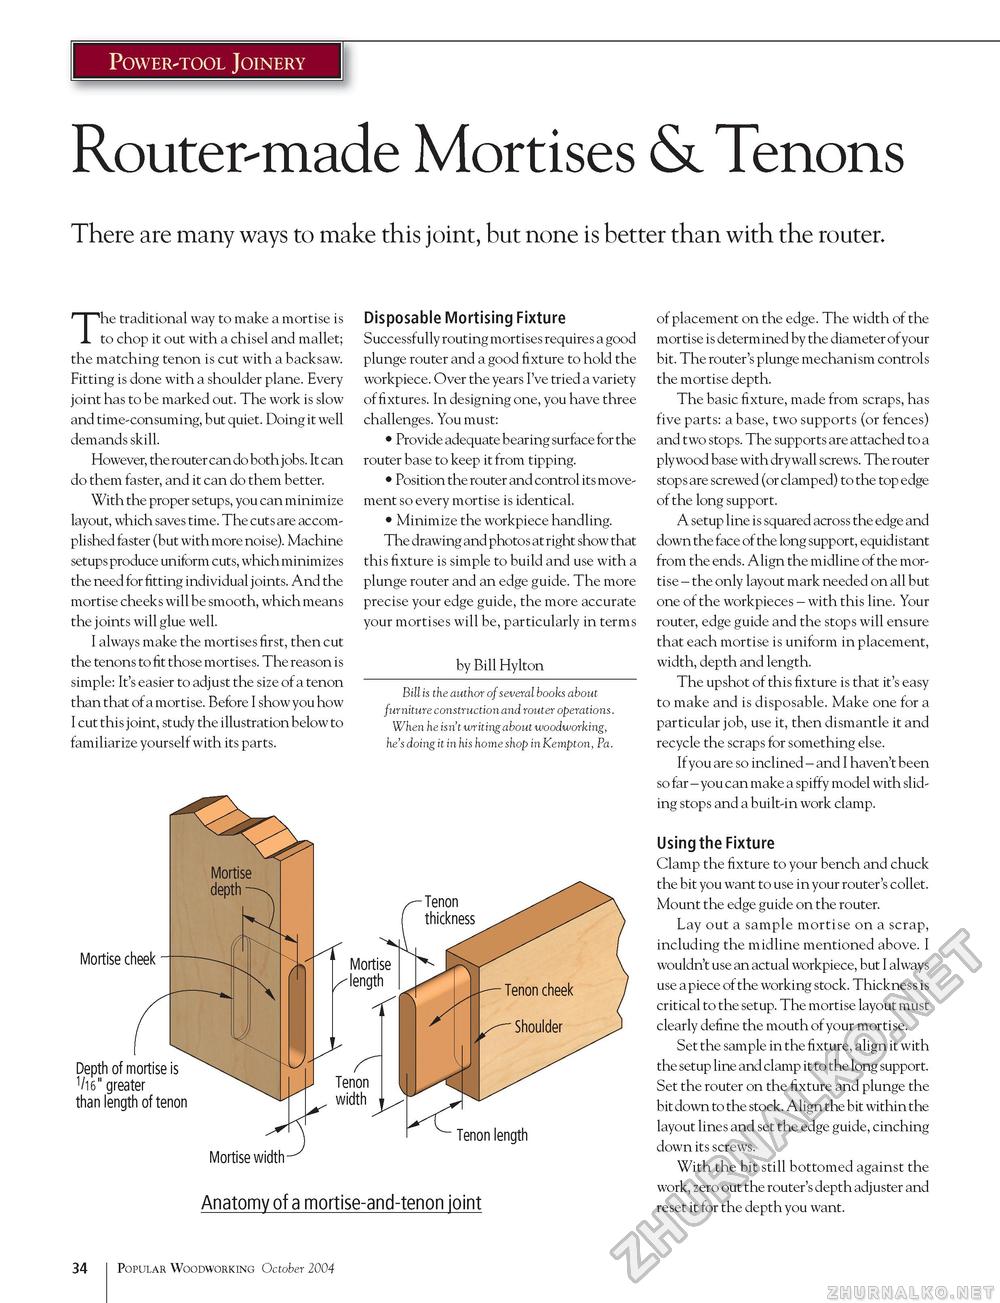
Power-tool Joinery Router-made Mortises & Tenons There are many ways to make this joint, but none is better than with the router. The traditional way to make a mortise is to chop it out with a chisel and mallet; the matching tenon is cut with a backsaw. Fitting is done with a shoulder plane. Every joint has to be marked out. The work is slow and time-consuming, but quiet. Doing it well demands skill. However, the router can do both jobs. It can do them faster, and it can do them better. With the proper setups, you can minimize layout, which saves time. The cuts are accomplished faster (but with more noise). Machine setups produce uniform cuts, which minimizes the need for fitting individual j oints. And the mortise cheeks will be smooth, which means the joints will glue well. I always make the mortises first, then cut the tenons to fit those mortises. The reason is simple: It's easier to adjust the size of a tenon than that of a mortise. Before I show you how I cut this joint, study the illustration below to familiarize yourself with its parts. Disposable Mortising Fixture Successfully routing mortises requires a good plunge router and a good fixture to hold the workpiece. Over the years I've tried a variety of fixtures. In designing one, you have three challenges. You must: • Provide adequate bearing surface for the router base to keep it from tipping. • Position the router and control its movement so every mortise is identical. • Minimize the workpiece handling. The drawing and photos at right show that this fixture is simple to build and use with a plunge router and an edge guide. The more precise your edge guide, the more accurate your mortises will be, particularly in terms by Bill Hylton Bill is the author of several books about furniture construction and router operations. When he isn't writing about woodworking, he's doing it in his home shop in Kempton, Pa. of placement on the edge. The width of the mortise is determined by the diameter of your bit. The router's plunge mechanism controls the mortise depth. The basic fixture, made from scraps, has five parts: a base, two supports (or fences) and two stops. The supports are attached to a plywood base with dry wall screws. The router stops are screwed (or clamped) to the top edge of the long support. A setup line is squared across the edge and down the face of the long support, equidistant from the ends. Align the midline of the mortise - the only layout mark needed on all but one of the workpieces - with this line. Your router, edge guide and the stops will ensure that each mortise is uniform in placement, width, depth and length. The upshot of this fixture is that it's easy to make and is disposable. Make one for a particular job, use it, then dismantle it and recycle the scraps for something else. If you are so inclined - and I haven't been so far - you can make a spiffy model with sliding stops and a built-in work clamp. Using the Fixture Clamp the fixture to your bench and chuck the bit you want to use in your router's collet. Mount the edge guide on the router. Lay out a sample mortise on a scrap, including the midline mentioned above. I wouldn't use an actual workpiece, but I always use a piece of the working stock. Thickness is critical to the setup. The mortise layout must clearly define the mouth of your mortise. Set the sample in the fixture, align it with the setup line and clamp it to the long support. Set the router on the fixture and plunge the bit down to the stock. Align the bit within the layout lines and set the edge guide, cinching down its screws. With the bit still bottomed against the work, zero out the router's depth adjuster and reset it for the depth you want. Anatomy of a mortise-and-tenon joint 34 Popular Woodworking October 2004 |


